视频网站的嵌入代码是什么如何设计推广方案
目录
一、Spring Boot概述
1、Spring Boot 特性
1.1 起步依赖
1.2 自动配置
1.3 其他特性
1.3.1 内嵌的Tomcat、Jetty (无需部署WAR文件)
1.3.2 外部化配置
1.3.3 不需要XML配置(properties/yml)
二、Spring Boot入门
1、一个入门程序需求
2、步骤
2.1 创建Maven工程
2.2 导入Spring-boot-start-web起步依赖
2.3 编写Controller
2.4 提供启动类
3、手动创建SpringBoot工程(不重要)
3.1 创建Maven工程
3.2 引入依赖
3.3 提供启动类
3.3.1 修改App文件名为启动类名
3.3.2 手动生成resources文件夹
3.3.3 手动生成application.properies 等
三、SpringBoot配置文件
1、properties配置文件
2、yaml配置文件(推荐)
3、yml配置信息书写与获取
2.1 第三方技术配置信息
2.2 自定义配置信息
2.2.1 引入发送邮件依赖
2.2.2 工具类MailUtil
2.2.3 controller
2.2.4 service
2.2.5 serviceImpl
2.2.6 yml配置文件
四、整合Mybatis-plus
1、pom
2、yml
3、emp.sql
4、统一返回类
5、controller
6、service
7、serviceImpl
五、Bean管理
1、Bean扫描
2、Bean注册
2.1 @Bean
2.1.1 @Bean方法一:启动类创建一个方法(不建议使用)
2.1.2 @Bean方法二:配置类(建议)
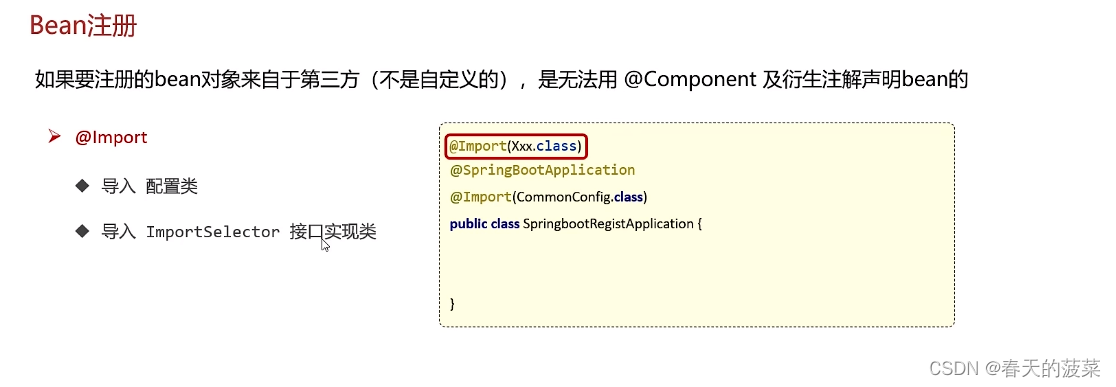
2.2 @Import
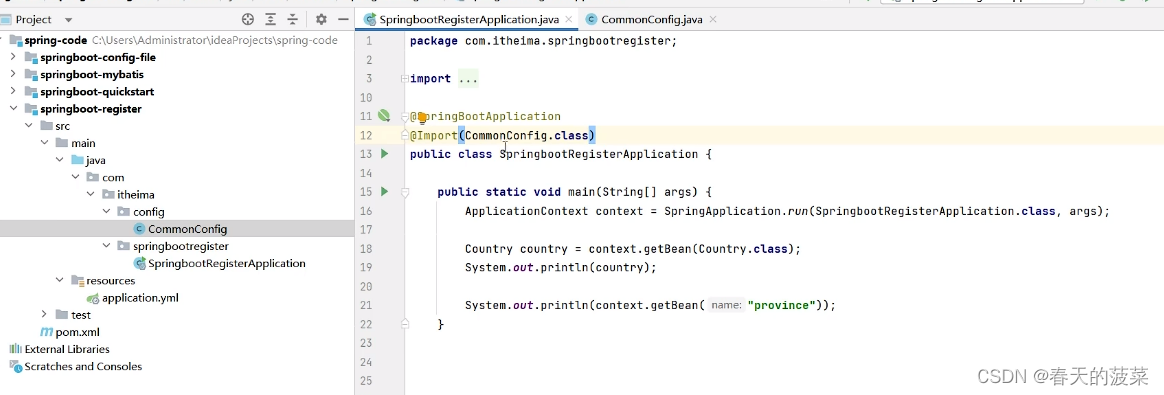
2.2.1 导入配置类
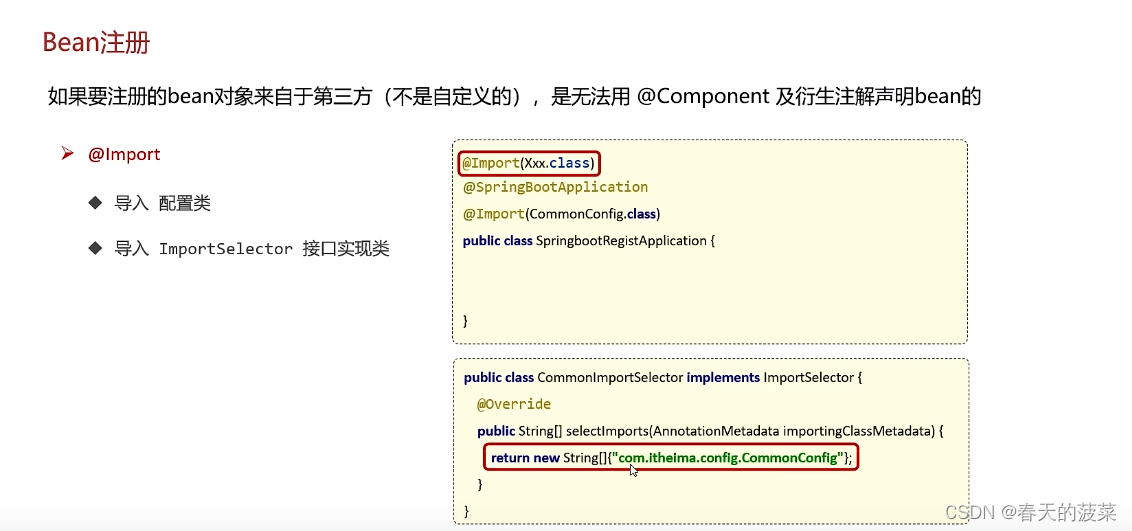
2.2.2 导入ImportSelector接口实现类
3、注册条件
六、自动配置
七、自定义starter
前言:通过SpringBoot3+Vue3学习,我们可以学会单体前后端当中的常用技术,独立完成后端接口和页面的开发,大大提升编码能力.本课程需要jdk17+、idea2021+、maven3.5+,Spring3+Vue3
一、Spring Boot概述
Spring Boot是Spring提供的一个子项目,用于快速构建Spring应用程序
1、Spring Boot 特性
1.1 起步依赖
本质上就是一个Maven坐标,整合了完成一个功能需要的所有坐标
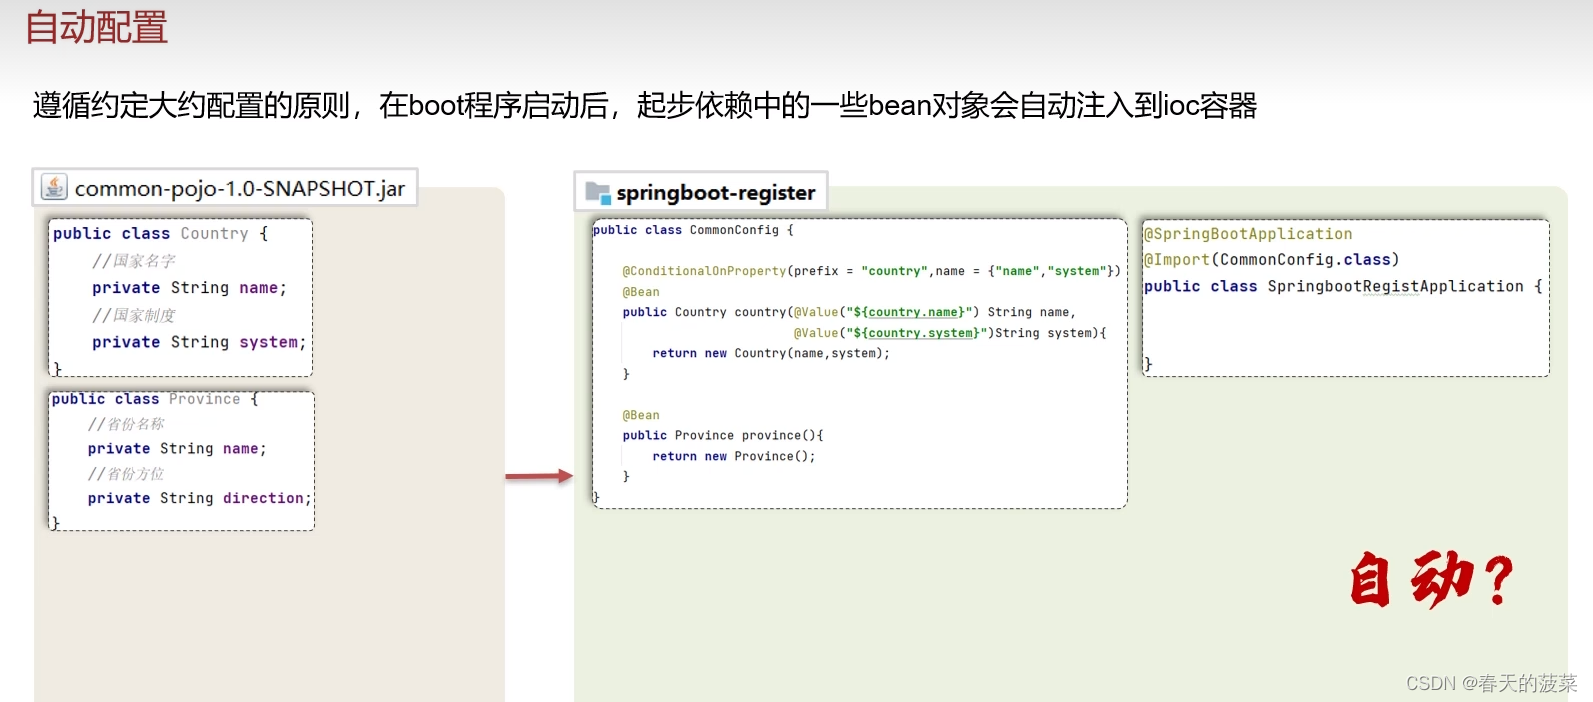
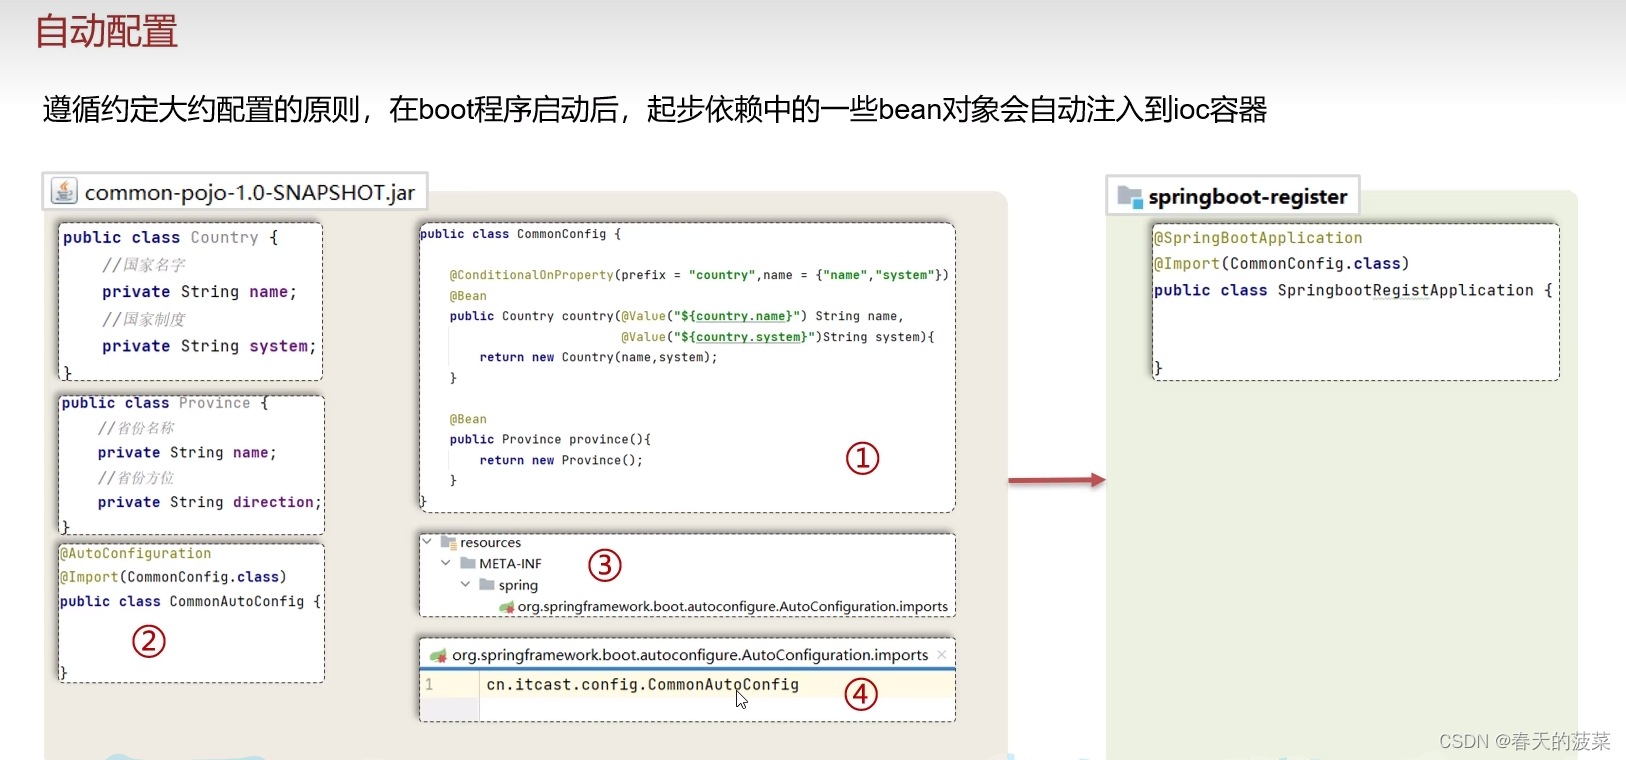
1.2 自动配置
遵循约定大约配置的原则,在boot程序启动后,一些bean对象会自动注入到ioc容器,不需要手动声明,简化开发。
1.3 其他特性
1.3.1 内嵌的Tomcat、Jetty (无需部署WAR文件)
1.3.2 外部化配置
1.3.3 不需要XML配置(properties/yml)
二、Spring Boot入门
1、一个入门程序需求
需求:使用SpringBoot开发一个web应用,浏览器发起请求/hello后,给浏览器返回字符串“hello world ~".
2、步骤
2.1 创建Maven工程

2.2 导入Spring-boot-start-web起步依赖

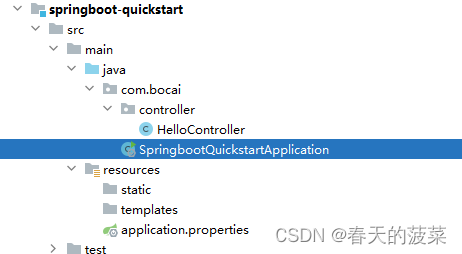
2.3 编写Controller
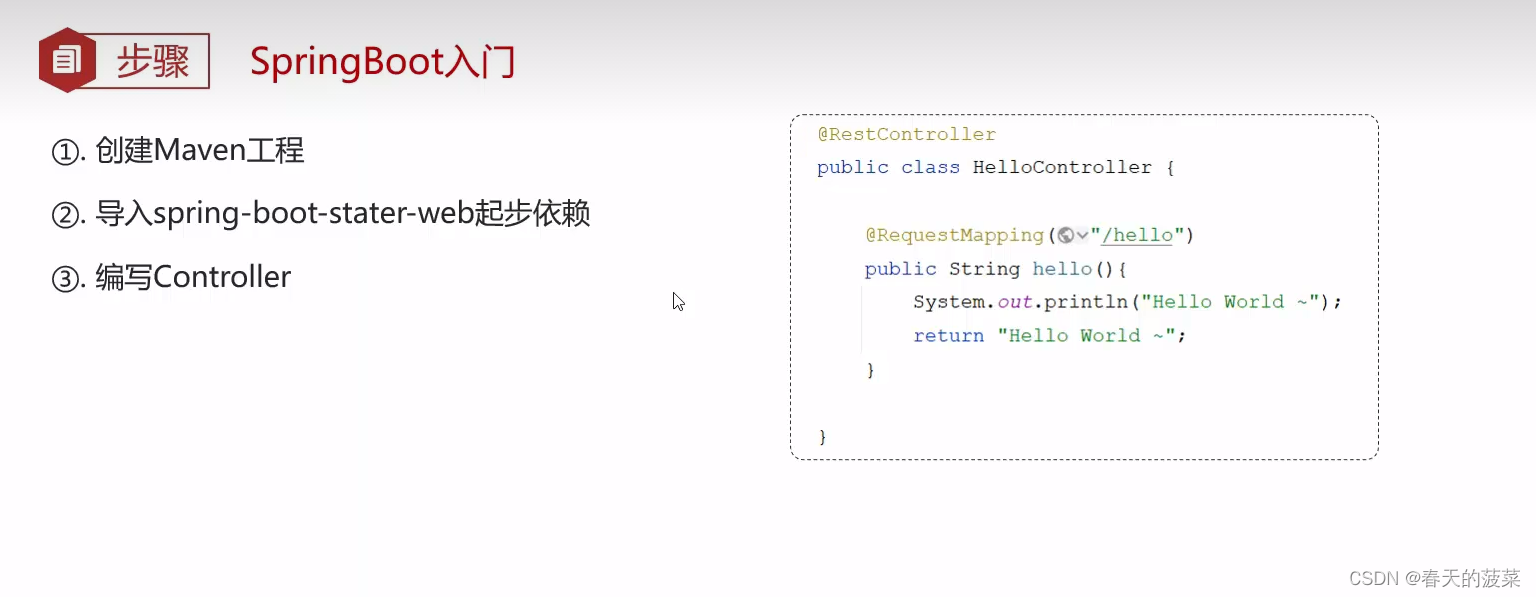
package com.bocai.controller;import org.springframework.web.bind.annotation.RequestMapping;
import org.springframework.web.bind.annotation.RestController;@RestController
public class HelloController {@RequestMapping("/hello")public String hello(){return "Hello World!";}
}
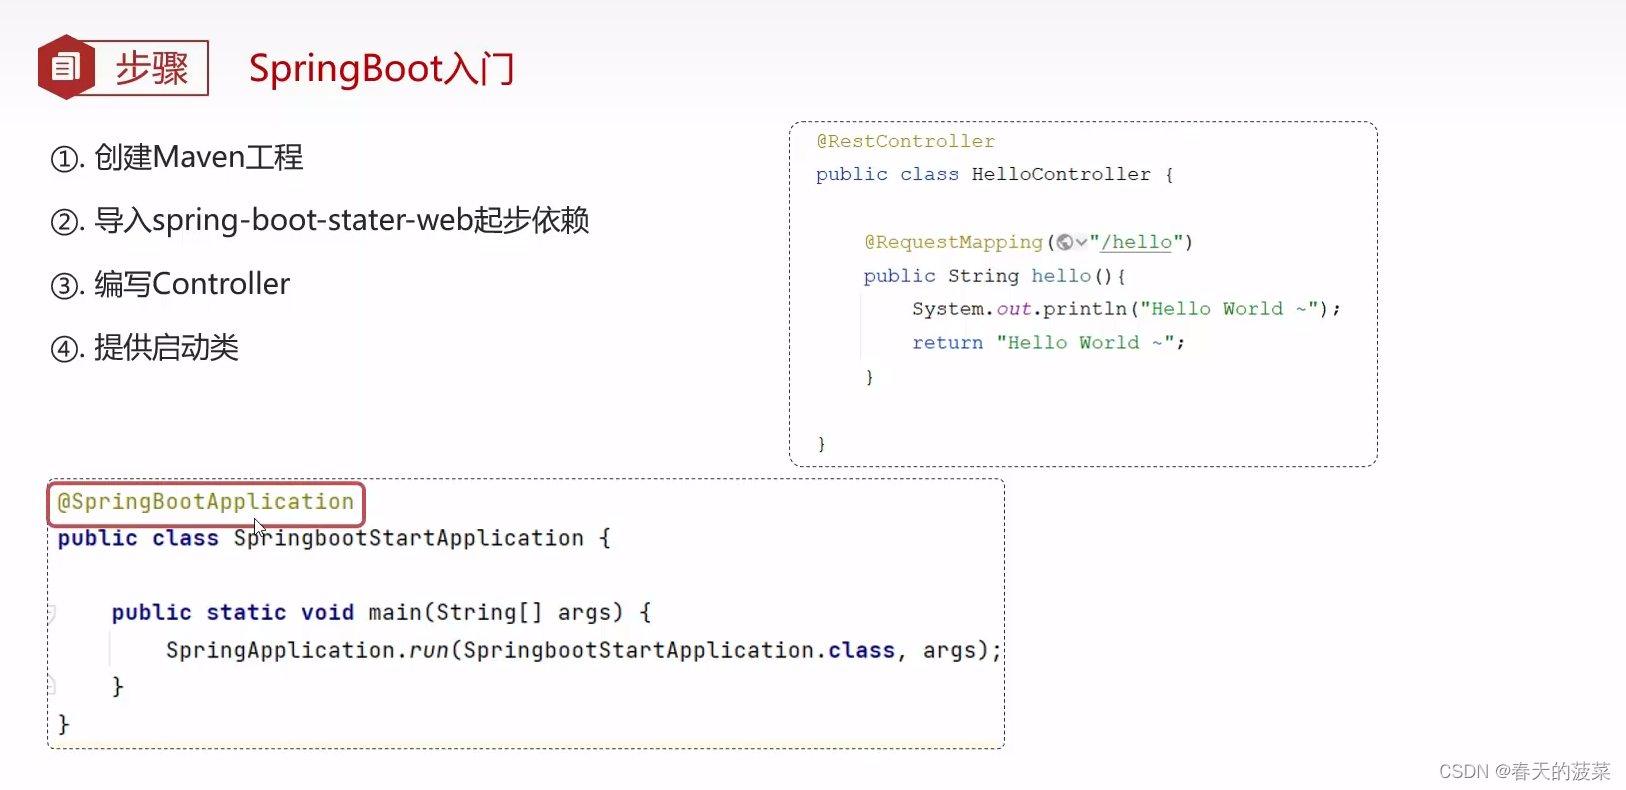
2.4 提供启动类
 启动服务访问:http://localhost:8080/hello
3、手动创建SpringBoot工程(不重要)

3.1 创建Maven工程

3.2 引入依赖
<parent><groupId>org.springframework.boot</groupId><artifactId>spring-boot-starter-parent</artifactId><version>3.1.5</version><relativePath/> <!-- lookup parent from repository --></parent> <dependency><groupId>org.springframework.boot</groupId><artifactId>spring-boot-starter-web</artifactId></dependency>3.3 提供启动类
3.3.1 修改App文件名为启动类名
一般为项目名+Application
package com.bocai;import org.springframework.boot.SpringApplication;
import org.springframework.boot.autoconfigure.SpringBootApplication;@SpringBootApplication
public class SpringbootQuickstartApplication {public static void main(String[] args) {SpringApplication.run(SpringbootQuickstartApplication.class, args);}}
3.3.2 手动生成resources文件夹

3.3.3 手动生成application.properies 等
三、SpringBoot配置文件
1、properties配置文件
server.port=9090
2、yaml配置文件(推荐)
server:port: 9091servlet:context-path: /start2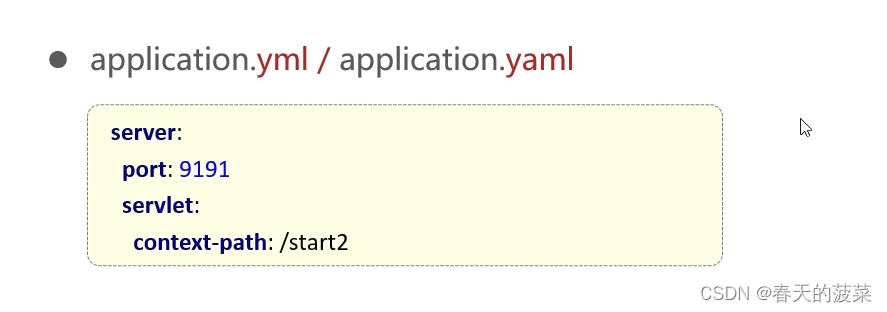
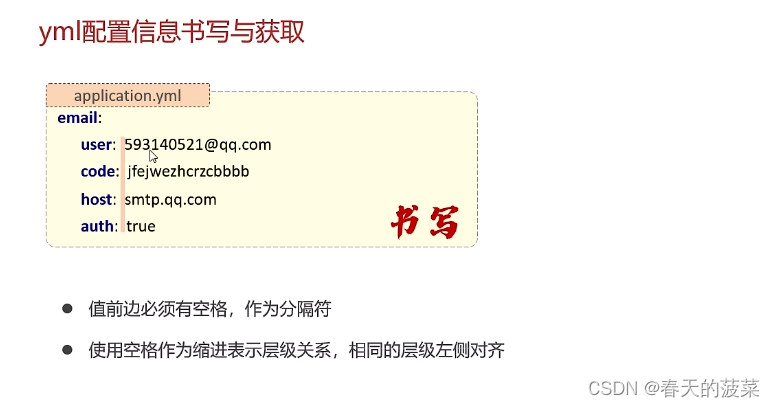
3、yml配置信息书写与获取
2.1 第三方技术配置信息
2.2 自定义配置信息
发送邮件为例
2.2.1 引入发送邮件依赖
<!-- 发送邮件 --><dependency><groupId>org.eclipse.angus</groupId><artifactId>jakarta.mail</artifactId></dependency>2.2.2 工具类MailUtil
package com.bocai.utils;import com.bocai.pojo.EmailProperties;
import jakarta.mail.*;
import jakarta.mail.internet.InternetAddress;
import jakarta.mail.internet.MimeMessage;import java.util.Properties;public class MailUtil {/*** 发送邮件* @param emailProperties 发件人信息(发件人邮箱,发件人授权码)及邮件服务器信息(邮件服务器域名,身份验证开关)* @param to 收件人邮箱* @param title 邮件标题* @param content 邮件正文* @return*/public static boolean sendMail(EmailProperties emailProperties, String to, String title, String content){MimeMessage message = null;try {Properties properties = new Properties();properties.put("mail.smtp.host", emailProperties.getHost());properties.put("mail.smtp.auth",emailProperties.isAuth());properties.put("mail.user", emailProperties.getUser());properties.put("mail.password", emailProperties.getCode());// 构建授权信息,用于进行SMTP进行身份验证Authenticator authenticator = new Authenticator() {@Overrideprotected PasswordAuthentication getPasswordAuthentication() {return new PasswordAuthentication(emailProperties.getUser(), emailProperties.getCode());}};// 使用环境属性和授权信息,创建邮件会话Session mailSession = Session.getInstance(properties, authenticator);// 创建邮件消息message = new MimeMessage(mailSession);}catch (Exception e){e.printStackTrace();}//如果邮件创建失败,直接返回if (message==null){return false;}try {// 设置发件人InternetAddress form = new InternetAddress(emailProperties.getUser());message.setFrom(form);// 设置收件人InternetAddress toAddress = new InternetAddress(to);message.setRecipient(Message.RecipientType.TO, toAddress);// 设置邮件标题message.setSubject(title);// 设置邮件的内容体message.setContent(content, "text/html;charset=UTF-8");// 发送邮件Transport.send(message);}catch (Exception e){e.printStackTrace();}return true;}
}
2.2.3 controller
package com.bocai.controller;import com.bocai.service.EmailServcie;
import org.springframework.beans.factory.annotation.Autowired;
import org.springframework.web.bind.annotation.RequestMapping;
import org.springframework.web.bind.annotation.RestController;@RestController
public class EmailController {@Autowiredprivate EmailServcie emailServcie;@RequestMapping("/send")public  Boolean send(){//收件人信箱String to = "sdadae@qq.com";//邮件标题String title = "测试邮件";//正文String content = "使用java进行邮件发送测试的正文";boolean flag = emailServcie.send(to,title,content);return flag;}
}
2.2.4 service
package com.bocai.service;public interface EmailServcie {boolean send(String to, String title, String content);
}
2.2.5 serviceImpl
package com.bocai.service.impl;import com.bocai.pojo.EmailProperties;
import com.bocai.service.EmailServcie;
import com.bocai.utils.MailUtil;
import org.springframework.beans.factory.annotation.Autowired;
import org.springframework.stereotype.Service;@Service
public class EmailServiceImpl implements EmailServcie {@Autowiredprivate EmailProperties emailProperties;/**** @param to 收件人邮箱* @param title 标题* @param content 正文* @return*/@Overridepublic boolean send(String to, String title, String content) {boolean flag = MailUtil.sendMail(emailProperties,to,title,content);return flag;}
}
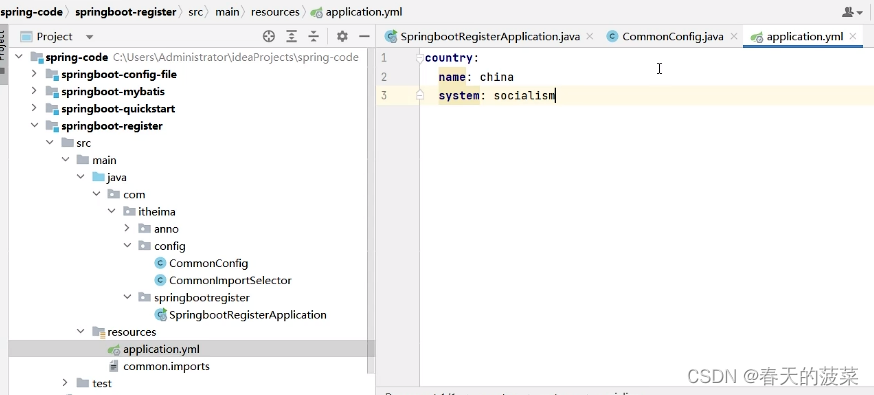
2.2.6 yml配置文件
server:port: 9091# 发送邮件配置信息
email:user: 11332@qq.comcode: fdsdsfsdfshost: smtp.qq.comauth: true
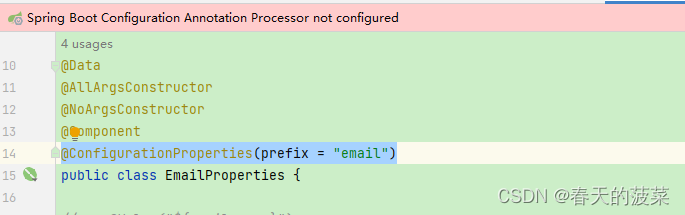
本文使用的是这个
@ConfigurationProperties(prefix = "email")可忽略上面的红色提示不管
四、整合Mybatis-plus
1、pom
mybatis-plus在springboot3.X版本之后要使用3.5.3以上版本
<?xml version="1.0" encoding="UTF-8"?>
<project xmlns="http://maven.apache.org/POM/4.0.0" xmlns:xsi="http://www.w3.org/2001/XMLSchema-instance"xsi:schemaLocation="http://maven.apache.org/POM/4.0.0 https://maven.apache.org/xsd/maven-4.0.0.xsd"><modelVersion>4.0.0</modelVersion><parent><groupId>org.springframework.boot</groupId><artifactId>spring-boot-starter-parent</artifactId><version>3.1.5</version><relativePath/> <!-- lookup parent from repository --></parent><groupId>com.bocai</groupId><artifactId>mybatis-plus-module</artifactId><version>0.0.1-SNAPSHOT</version><name>mybatis-plus-module</name><description>mybatis-plus-module</description><properties><java.version>17</java.version></properties><dependencies><dependency><groupId>org.springframework.boot</groupId><artifactId>spring-boot-starter-web</artifactId></dependency><dependency><groupId>com.mysql</groupId><artifactId>mysql-connector-j</artifactId><scope>runtime</scope></dependency><dependency><groupId>org.projectlombok</groupId><artifactId>lombok</artifactId><optional>true</optional></dependency><dependency><groupId>org.springframework.boot</groupId><artifactId>spring-boot-starter-test</artifactId><scope>test</scope></dependency><!--  3、 引入mybatisplus --><dependency><groupId>com.baomidou</groupId><artifactId>mybatis-plus-boot-starter</artifactId><version>3.5.3</version></dependency><dependency><groupId>com.alibaba</groupId><artifactId>druid-spring-boot-starter</artifactId><version>1.1.23</version></dependency></dependencies><build><plugins><plugin><groupId>org.springframework.boot</groupId><artifactId>spring-boot-maven-plugin</artifactId><configuration><image><builder>paketobuildpacks/builder-jammy-base:latest</builder></image><excludes><exclude><groupId>org.projectlombok</groupId><artifactId>lombok</artifactId></exclude></excludes></configuration></plugin></plugins></build></project>
2、yml
spring:datasource:type: com.alibaba.druid.pool.DruidDataSourcedriver-class-name: com.mysql.cj.jdbc.Driverurl: jdbc:mysql://localhost:3306/springboot_vue?serverTimezone=UTCusername: rootpassword: @@@@0mybatis-plus:configuration:map-underscore-to-camel-case: true # 在映射实体或者属性时,将数据库中表名和字段名中的下划线去掉,按照驼峰命名法映射log-impl: org.apache.ibatis.logging.stdout.StdOutImpl  # 控制台显示sqldefault-enum-type-handler: com.baomidou.mybatisplus.core.handlers.MybatisEnumTypeHandler  # 配置全局枚举处理器,好像还有说json的global-config:db-config:id-type: auto   # 数据库id生产规则全局 配置 # ASSIGN_ID雪花算法,数据库id建议使用Long类型logic-delete-field: deleted # 全局配置逻辑删除字段名logic-delete-value: 0 # 全局配置# 逻辑已删除值(默认为 1)这里因为我是反的所以改成0logic-not-delete-value: 1  # 逻辑未删除值(默认为 0)这里因为我是反的所以改成1# table-prefix: tbl_    # 数据库表前缀全局配置banner: false   # 关闭控制台mybatis-plus的logo
#  type-enums-package: com.bocai.enums   # 扫描通用枚举包 或者使用上面那个枚举全局配置
3、emp.sql
-- 员工管理(带约束)
CREATE TABLE emp (id INT UNSIGNED PRIMARY KEY AUTO_INCREMENT COMMENT 'ID',username VARCHAR(20) NOT NULL UNIQUE COMMENT '用户名',PASSWORD VARCHAR(32) DEFAULT '123456' COMMENT '密码',NAME VARCHAR(10) NOT NULL COMMENT '姓名',gender TINYINT UNSIGNED NOT NULL COMMENT '性别, 说明: 1 男, 2 女',image VARCHAR(300) COMMENT '图像',job TINYINT UNSIGNED COMMENT '职位, 说明: 1 班主任,2 讲师, 3 学工主管, 4 教研主管, 5 咨询师',entrydate DATE COMMENT '入职时间',dept_id INT UNSIGNED COMMENT '部门ID',create_time DATETIME NOT NULL COMMENT '创建时间',update_time DATETIME NOT NULL COMMENT '修改时间'
) COMMENT '员工表';INSERT INTO emp(id, username, PASSWORD, NAME, gender, image, job, entrydate,dept_id, create_time, update_time) VALUES(1,'jinyong','123456','金庸',1,'1.jpg',4,'2000-01-01',2,NOW(),NOW()),(2,'zhangwuji','123456','张无忌',1,'2.jpg',2,'2015-01-01',2,NOW(),NOW()),(3,'yangxiao','123456','杨逍',1,'3.jpg',2,'2008-05-01',2,NOW(),NOW()),(4,'weiyixiao','123456','韦一笑',1,'4.jpg',2,'2007-01-01',2,NOW(),NOW()),(5,'changyuchun','123456','常遇春',1,'5.jpg',2,'2012-12-05',2,NOW(),NOW()),(6,'xiaozhao','123456','小昭',2,'6.jpg',3,'2013-09-05',1,NOW(),NOW()),(7,'jixiaofu','123456','纪晓芙',2,'7.jpg',1,'2005-08-01',1,NOW(),NOW()),(8,'zhouzhiruo','123456','周芷若',2,'8.jpg',1,'2014-11-09',1,NOW(),NOW()),(9,'dingminjun','123456','丁敏君',2,'9.jpg',1,'2011-03-11',1,NOW(),NOW()),(10,'zhaomin','123456','赵敏',2,'10.jpg',1,'2013-09-05',1,NOW(),NOW()),(11,'luzhangke','123456','鹿杖客',1,'11.jpg',5,'2007-02-01',3,NOW(),NOW()),(12,'hebiweng','123456','鹤笔翁',1,'12.jpg',5,'2008-08-18',3,NOW(),NOW()),(13,'fangdongbai','123456','方东白',1,'13.jpg',5,'2012-11-01',3,NOW(),NOW()),(14,'zhangsanfeng','123456','张三丰',1,'14.jpg',2,'2002-08-01',2,NOW(),NOW()),(15,'yulianzhou','123456','俞莲舟',1,'15.jpg',2,'2011-05-01',2,NOW(),NOW()),(16,'songyuanqiao','123456','宋远桥',1,'16.jpg',2,'2007-01-01',2,NOW(),NOW()),(17,'chenyouliang','123456','陈友谅',1,'17.jpg',NULL,'2015-03-21',NULL,NOW(),NOW());
4、统一返回类
package com.bocai.common;import lombok.AllArgsConstructor;
import lombok.Data;
import lombok.NoArgsConstructor;@Data
@NoArgsConstructor
@AllArgsConstructor
public class Result {private Integer code;//响应码,1 代表成功; 0 代表失败private String msg;  //响应信息 描述字符串private Object data; //返回的数据//增删改 成功响应public static Result success(){return new Result(1,"success",null);}//查询 成功响应public static Result success(Object data){return new Result(1,"success",data);}//失败响应public static Result error(String msg){return new Result(0,msg,null);}
}
5、controller
package com.bocai.controller;import com.bocai.common.Result;
import com.bocai.pojo.Emp;
import com.bocai.service.EmpService;
import lombok.extern.slf4j.Slf4j;
import org.springframework.beans.factory.annotation.Autowired;
import org.springframework.web.bind.annotation.GetMapping;
import org.springframework.web.bind.annotation.PathVariable;
import org.springframework.web.bind.annotation.RequestMapping;
import org.springframework.web.bind.annotation.RestController;@RestController
@Slf4j
@RequestMapping("/emps")
public class EmpController {@Autowiredprivate EmpService empService;@GetMapping("/{id}")public Result queryById(@PathVariable Integer id){Emp emp = empService.getById(id);return Result.success(emp);}
}
6、service
package com.bocai.service;import com.bocai.pojo.Emp;
import com.baomidou.mybatisplus.extension.service.IService;/**
* @author cheng
* @description 针对表【emp(员工表)】的数据库操作Service
* @createDate 2023-11-13 16:53:52
*/
public interface EmpService extends IService<Emp> {}
7、serviceImpl
package com.bocai.service.impl;import com.baomidou.mybatisplus.extension.service.impl.ServiceImpl;
import com.bocai.pojo.Emp;
import com.bocai.service.EmpService;
import com.bocai.mapper.EmpMapper;
import org.springframework.stereotype.Service;/**
* @author cheng
* @description 针对表【emp(员工表)】的数据库操作Service实现
* @createDate 2023-11-13 16:53:52
*/
@Service
public class EmpServiceImpl extends ServiceImpl<EmpMapper, Emp>implements EmpService{}
8、mapper
package com.bocai.mapper;import com.bocai.pojo.Emp;
import com.baomidou.mybatisplus.core.mapper.BaseMapper;
import org.apache.ibatis.annotations.Mapper;/**
* @author cheng
* @description 针对表【emp(员工表)】的数据库操作Mapper
* @createDate 2023-11-13 16:53:52
* @Entity com.bocai.pojo.Emp
*/
@Mapper
public interface EmpMapper extends BaseMapper<Emp> {}
http://localhost:8080/emps/1

五、Bean管理
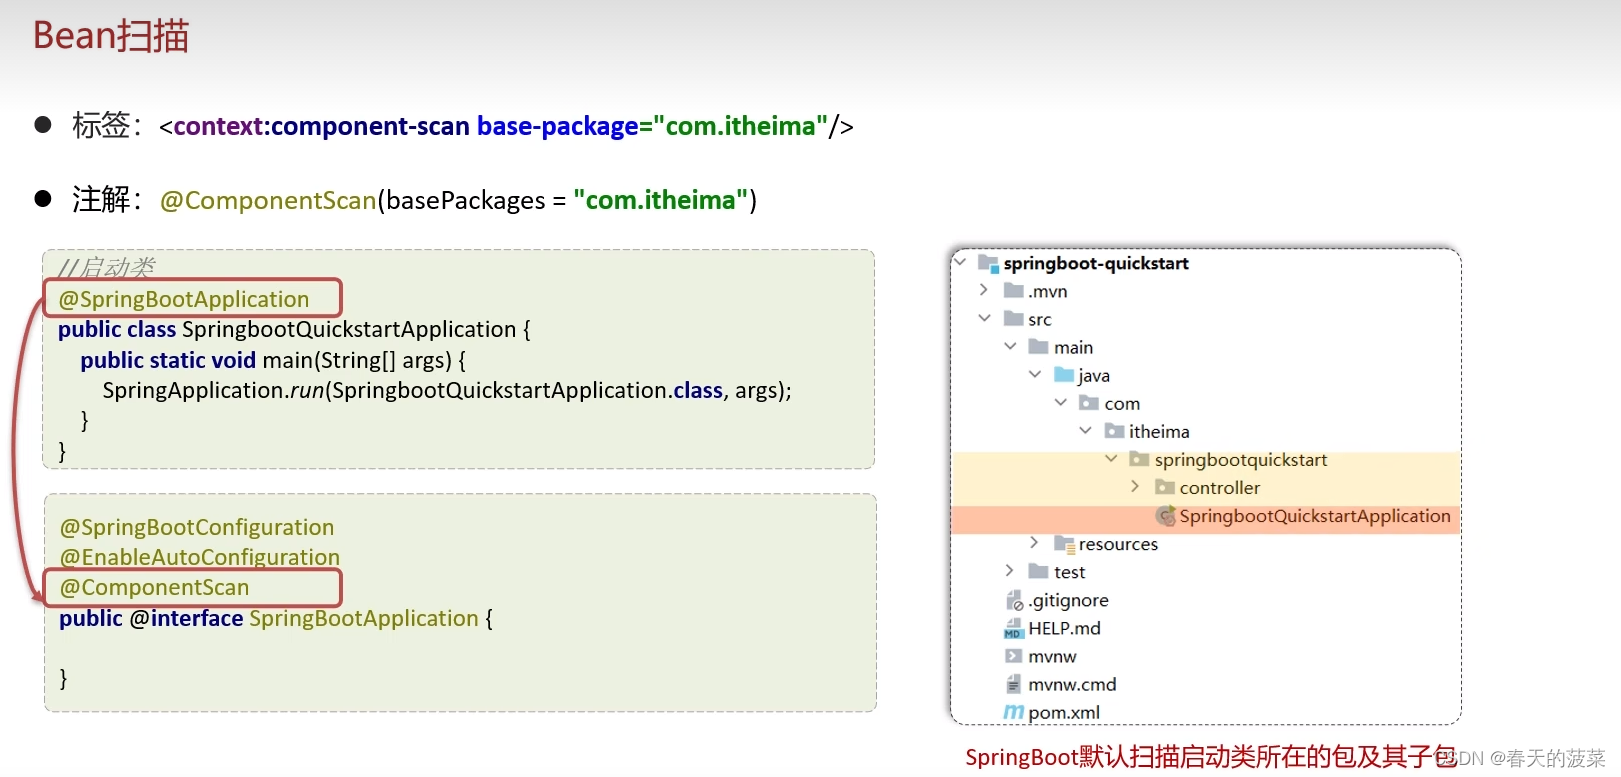
1、Bean扫描
SpringBoot默认扫描启动类所在包及其子包
2、Bean注册

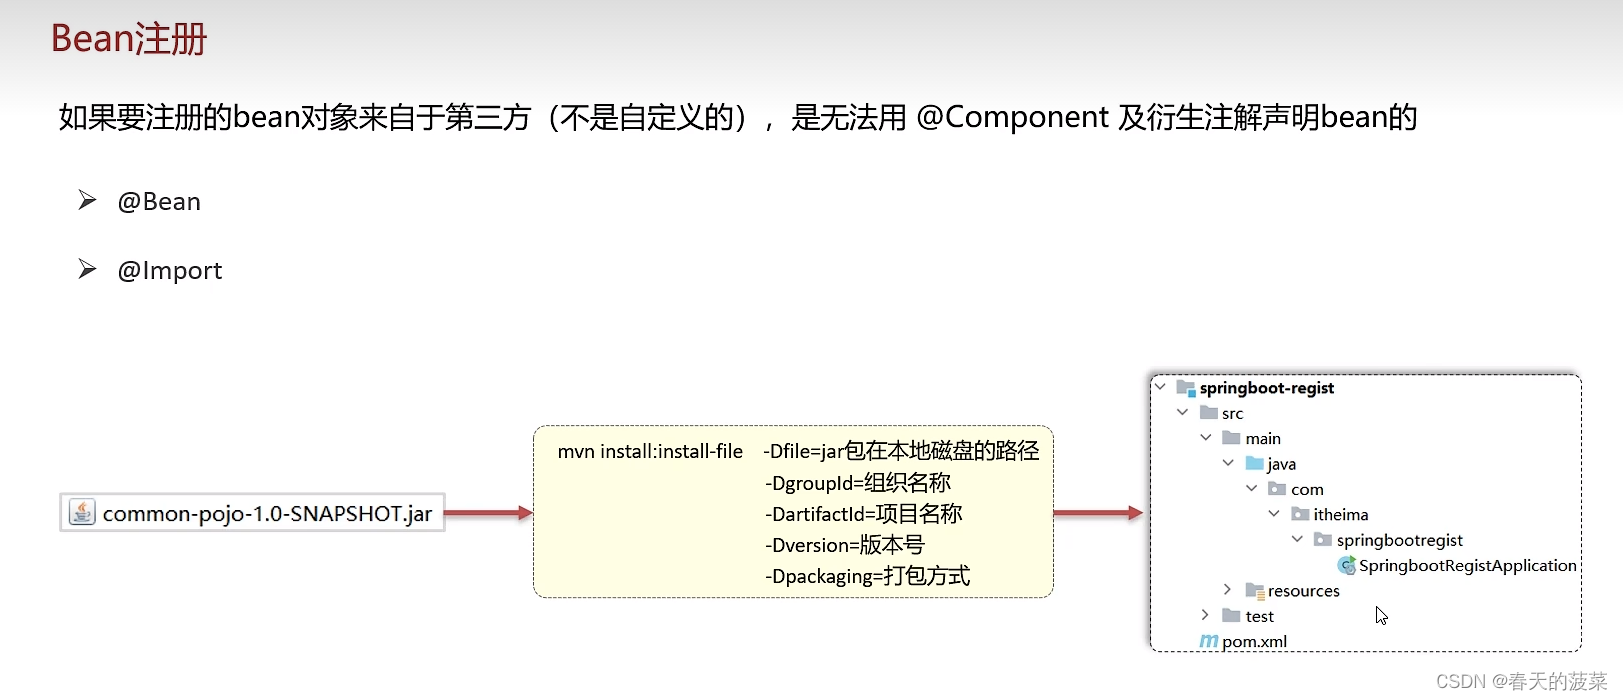

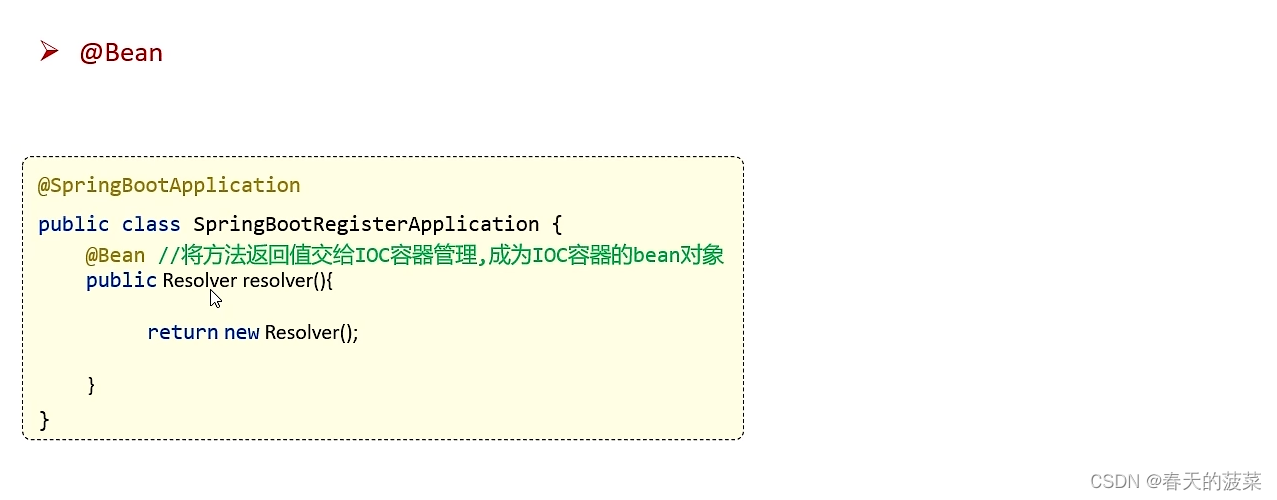
2.1 @Bean
2.1.1 @Bean方法一:启动类创建一个方法(不建议使用)

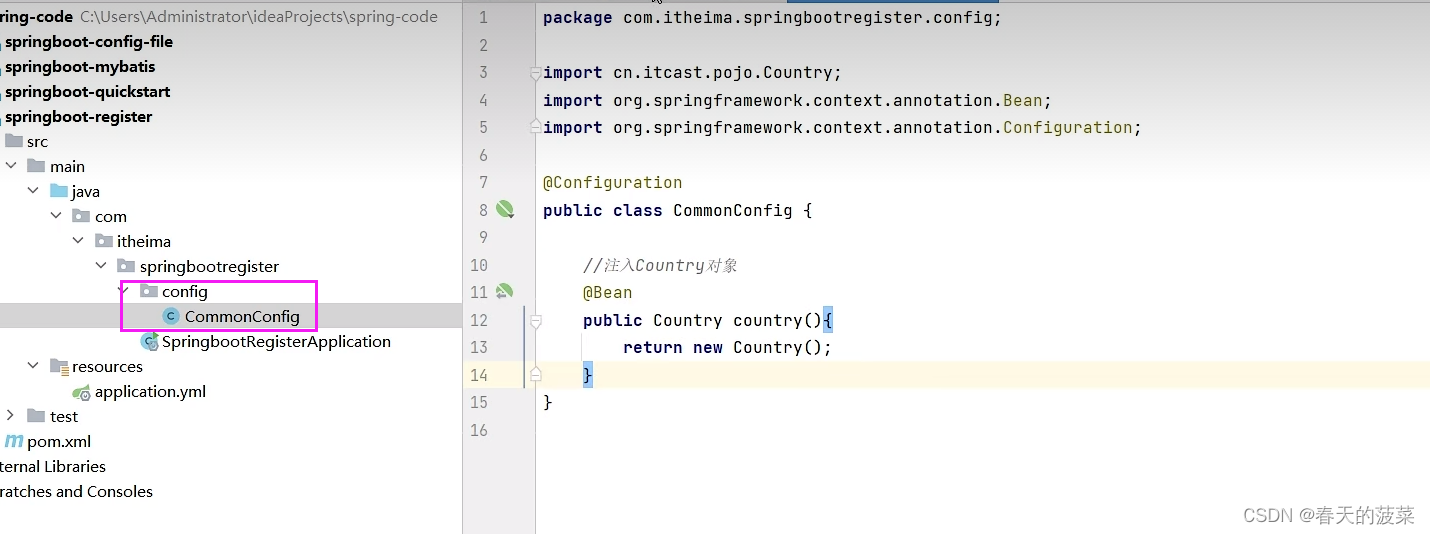
2.1.2 @Bean方法二:配置类(建议)

2.2 @Import
2.2.1 导入配置类
2.2.2 导入ImportSelector接口实现类


优化一下使用配置文件

package com.itheima.config;import org.springframework.context.annotation.ImportSelector;
import org.springframework.core.type.AnnotationMetadata;import java.io.BufferedReader;
import java.io.IOException;
import java.io.InputStream;
import java.io.InputStreamReader;
import java.util.ArrayList;
import java.util.List;public class CommonImportSelector implements ImportSelector {@Overridepublic String[] selectImports(AnnotationMetadata importingClassMetadata) {//读取配置文件的内容List<String> imports = new ArrayList<>();InputStream is = CommonImportSelector.class.getClassLoader().getResourceAsStream("common.imports");BufferedReader br = new BufferedReader(new InputStreamReader(is));String line = null;try {while((line = br.readLine())!=null){imports.add(line);}} catch (IOException e) {throw new RuntimeException(e);} finally {if (br!=null){try {br.close();} catch (IOException e) {throw new RuntimeException(e);}}}return imports.toArray(new String[0]);}
}
3、注册条件

package com.itheima.config;import cn.itcast.pojo.Country;
import cn.itcast.pojo.Province;
import org.springframework.beans.factory.annotation.Value;
import org.springframework.boot.autoconfigure.condition.ConditionalOnClass;
import org.springframework.boot.autoconfigure.condition.ConditionalOnMissingBean;
import org.springframework.boot.autoconfigure.condition.ConditionalOnProperty;
import org.springframework.context.annotation.Bean;
import org.springframework.context.annotation.Configuration;@Configuration
public class CommonConfig {//注入Country对象//如果配置文件中配置了指定的信息,则注入,否则不注入@ConditionalOnProperty(prefix = "country",name = {"name","system"})@Beanpublic Country country(@Value("${country.name}") String name,@Value("${country.system}") String system){Country country = new Country();country.setName(name);country.setSystem(system);return country ;}//对象默认的名字是: 方法名//@Bean("aa")//如果方法的内部需要使用到ioc容器中已经存在的bean对象,那么只需要在方法上声明即可,spring会自动的注入/*@Beanpublic Province province(Country country){System.out.println("province: "+country);return new Province();}*///如果ioc容器中不存在Country,则注入Province,否则不注入@Bean//@ConditionalOnMissingBean(Country.class)//如果当前环境中存在DispatcherServlet类,则注入Province,否则不注入//如果当前引入了web起步依赖,则环境中有DispatcherServlet,否则没有@ConditionalOnClass(name = "org.springframework.web.servlet.DispatcherServlet")public Province province(){return new Province();}}
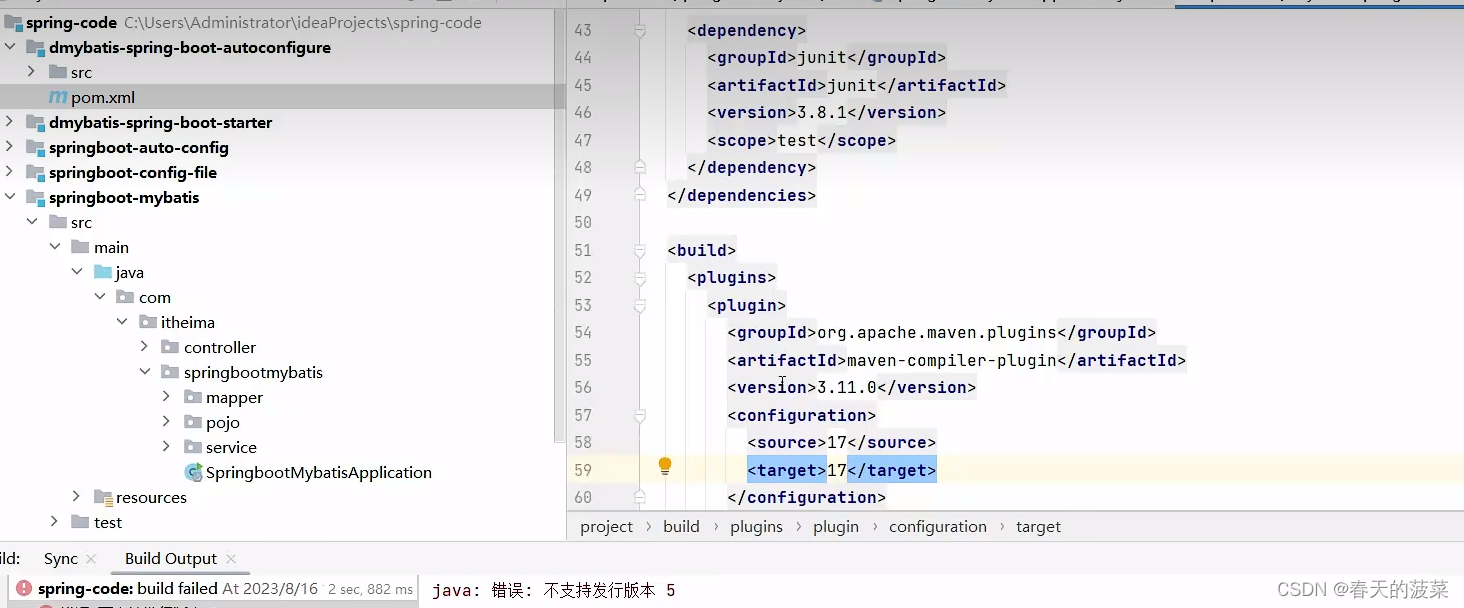
六、自动配置

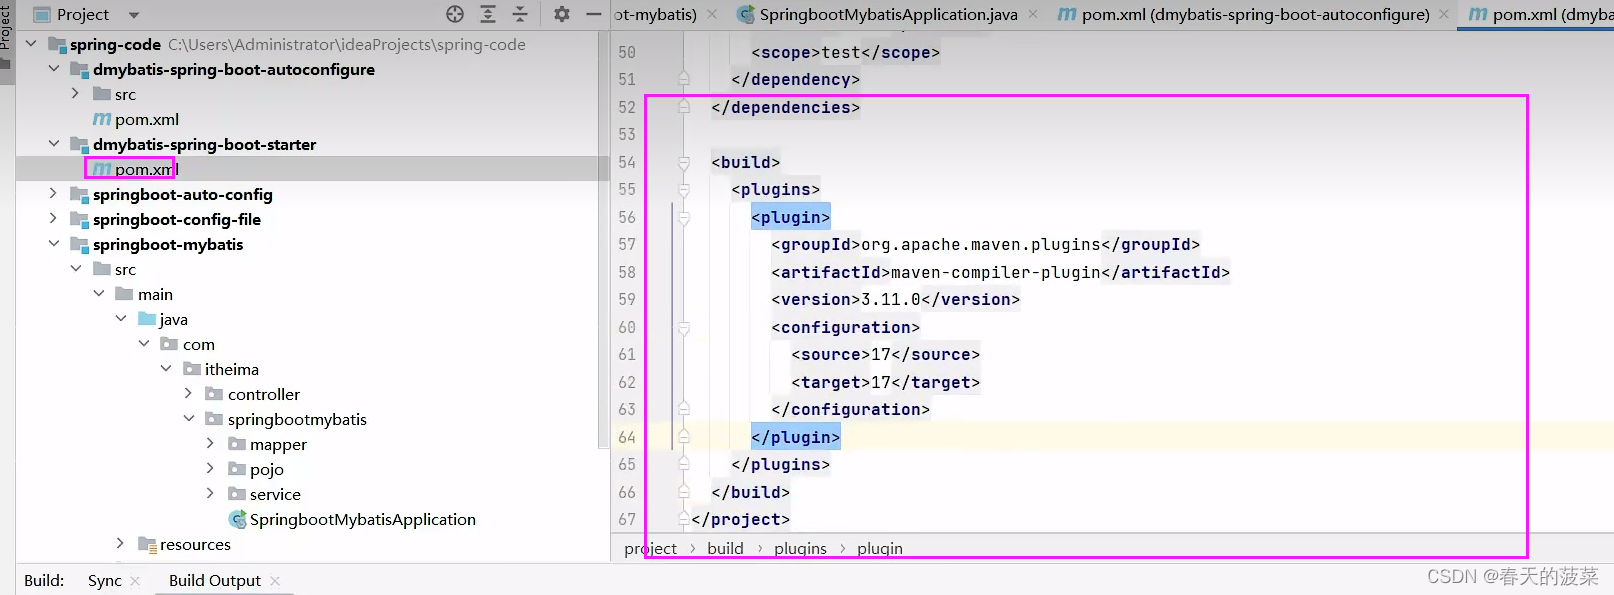
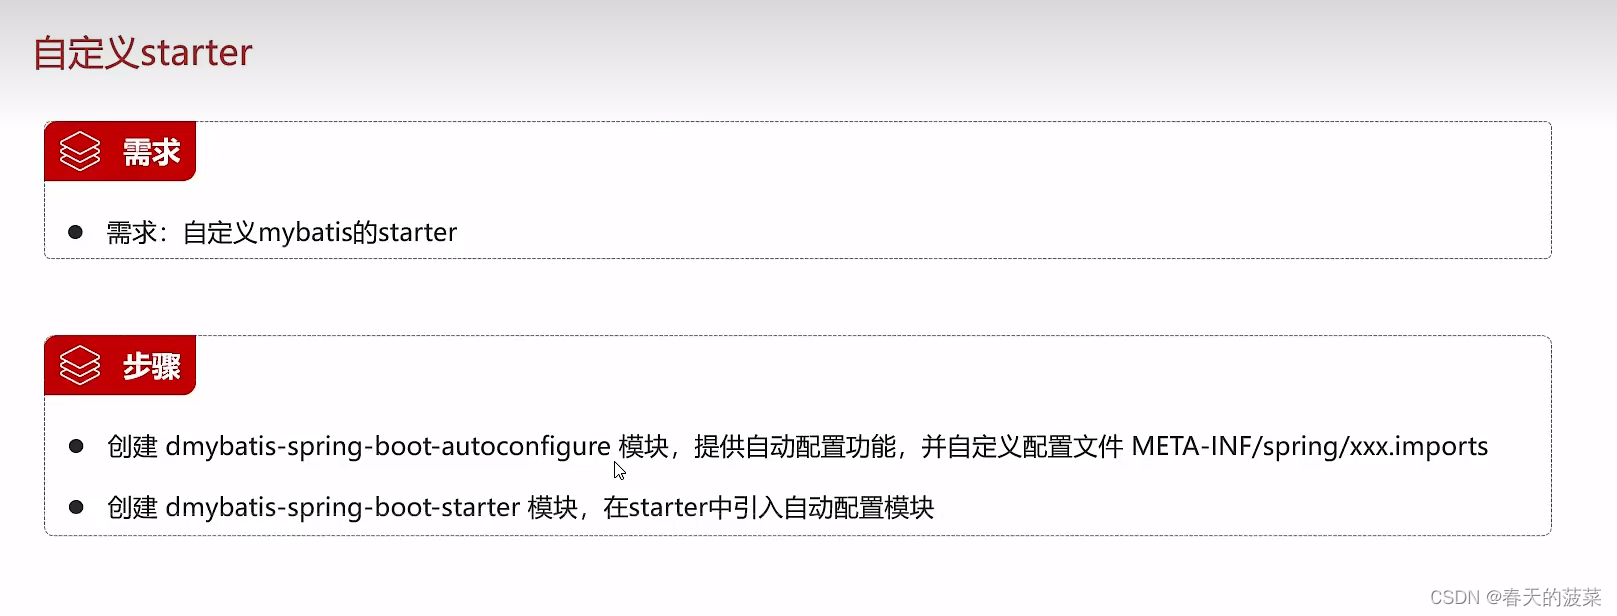
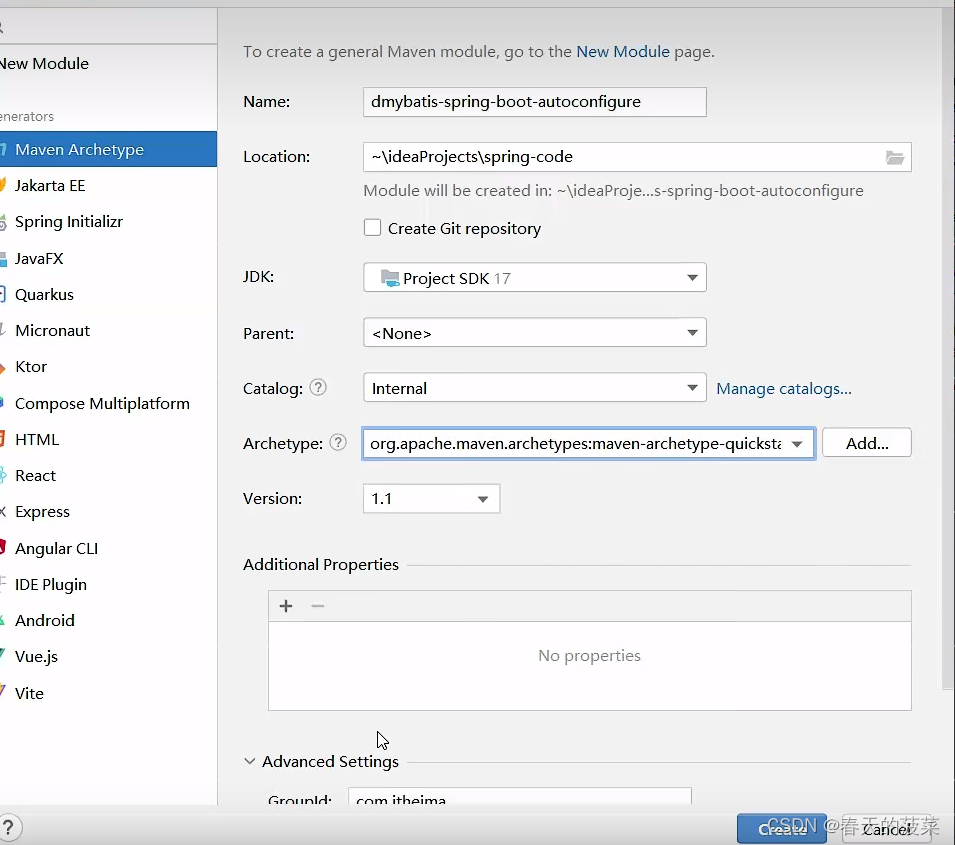
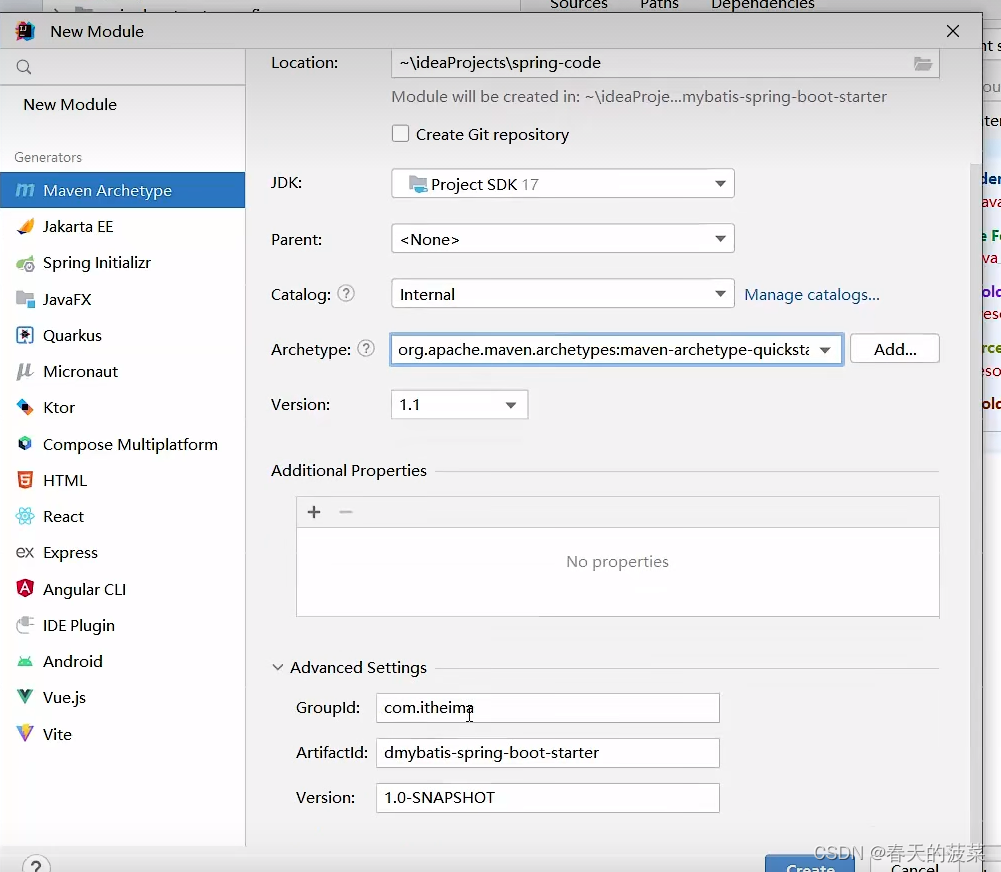
七、自定义starter
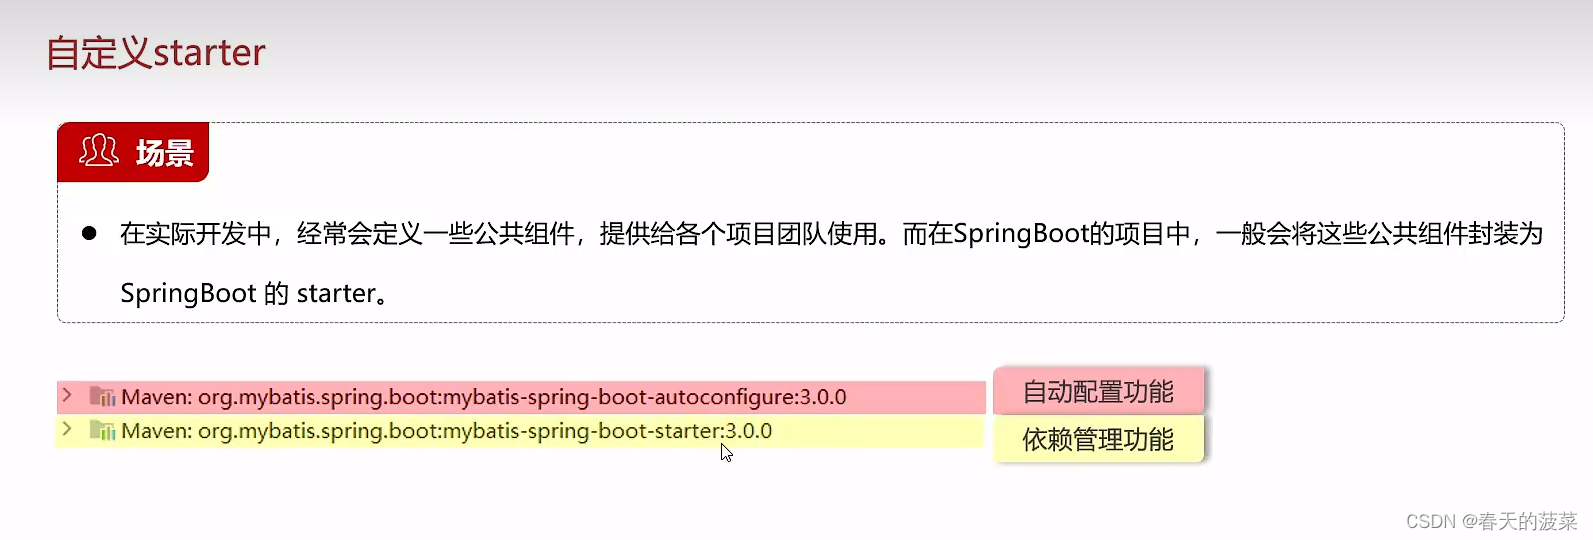
<dependency><groupId>org.springframework.boot</groupId><artifactId>spring-boot-starter</artifactId><version>3.1.2</version></dependency><dependency><groupId>org.springframework.boot</groupId><artifactId>spring-boot-starter-data-jdbc</artifactId><version>3.0.0</version></dependency><dependency><groupId>org.mybatis</groupId><artifactId>mybatis</artifactId><version>3.5.13</version></dependency><dependency><groupId>org.mybatis</groupId><artifactId>mybatis-spring</artifactId><version>3.0.0</version></dependency>
package com.itheima.config;import org.apache.ibatis.annotations.Mapper;
import org.mybatis.spring.SqlSessionFactoryBean;
import org.mybatis.spring.mapper.MapperScannerConfigurer;
import org.springframework.beans.factory.BeanFactory;
import org.springframework.boot.autoconfigure.AutoConfiguration;
import org.springframework.boot.autoconfigure.AutoConfigurationPackages;
import org.springframework.context.annotation.Bean;import javax.sql.DataSource;
import java.util.List;@AutoConfiguration//表示当前类是一个自动配置类
public class MyBatisAutoConfig {//SqlSessionFactoryBean@Beanpublic SqlSessionFactoryBean sqlSessionFactoryBean(DataSource dataSource){SqlSessionFactoryBean sqlSessionFactoryBean = new SqlSessionFactoryBean();sqlSessionFactoryBean.setDataSource(dataSource);return sqlSessionFactoryBean;}//MapperScannerConfigure@Beanpublic MapperScannerConfigurer mapperScannerConfigurer(BeanFactory beanFactory){MapperScannerConfigurer mapperScannerConfigurer = new MapperScannerConfigurer();//扫描的包:启动类所在的包及其子包List<String> packages = AutoConfigurationPackages.get(beanFactory);String p = packages.get(0);mapperScannerConfigurer.setBasePackage(p);//扫描的注解mapperScannerConfigurer.setAnnotationClass(Mapper.class);return mapperScannerConfigurer;}}
org.springframework.boot.autoconfigure.AutoConfiguration.imports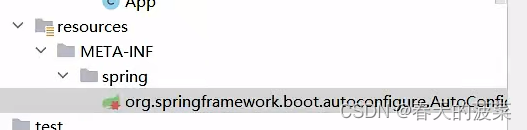
com.itheima.config.MyBatisAutoConfig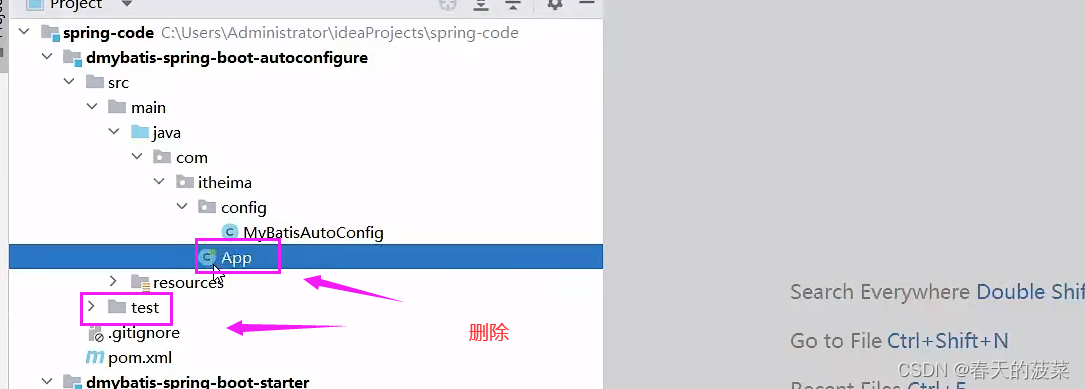
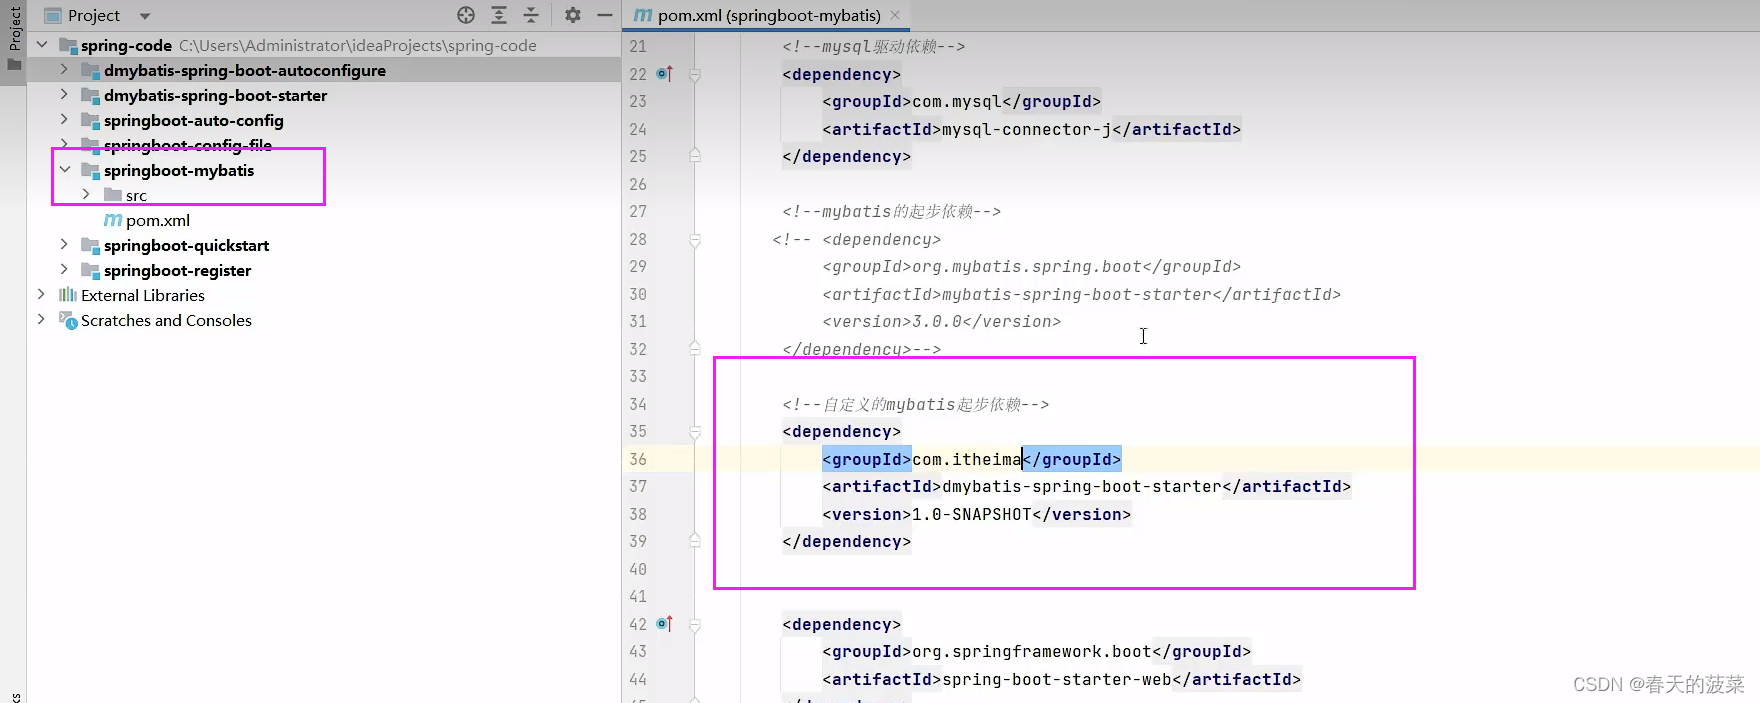
<dependency><groupId>com.itheima</groupId><artifactId>dmybatis-spring-boot-autoconfigure</artifactId><version>1.0-SNAPSHOT</version></dependency><dependency><groupId>org.springframework.boot</groupId><artifactId>spring-boot-starter</artifactId><version>3.1.2</version></dependency><dependency><groupId>org.springframework.boot</groupId><artifactId>spring-boot-starter-data-jdbc</artifactId><version>3.0.0</version></dependency><dependency><groupId>org.mybatis</groupId><artifactId>mybatis</artifactId><version>3.5.13</version></dependency><dependency><groupId>org.mybatis</groupId><artifactId>mybatis-spring</artifactId><version>3.0.0</version></dependency>