专业的建站公司都具备什么条件google play下载安装
Python学习路线 - Python高阶技巧 - PySpark案例实战
- 前言介绍
- Spark是什么
- Python On Spark
- PySpark
- Why PySpark
- 基础准备
- PySpark库的安装
- 构建PySpark执行环境入口对象
- PySpark的编程模型
- 数据输入
- RDD对象
- Python数据容器转RDD对象
- 读取文件转RDD对象
- 数据计算
- map方法
- flatMap方法
- reduceByKey方法
- 练习案例1
- filter方法
- distinct方法
- sortBy方法
- 练习案例2
- 案例
- 数据输出
- 输出为Python对象
- collect算子
- reduce算子
- take算子
- count算子
- 输出文件中
- saveAsTextFile算子
- 修改rdd分区为1
- 综合案例
- 搜索引擎日志分析
- 分布式集群运行
前言介绍
Spark是什么
定义:Apache Spark是用于大规模数据(large-scala data)处理的统一(unified)分析引擎。

简单来说,Spark是一款分布式的计算框架,用于调度成百上千的服务器集群,计算TB、PB乃致EB级别的海量数据

Python On Spark
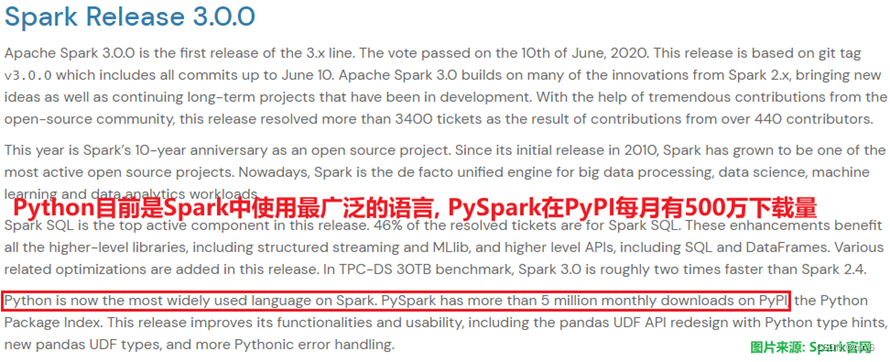
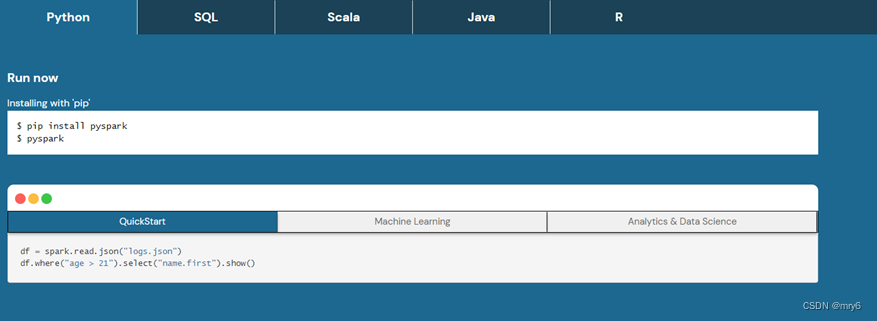
Spark作为全球顶级的分布式计算框架,支持众多的编程语言进行开发。而Python语言,则是Spark重点支持的方向。
PySpark
Spark对Python语言的支持,重点体现在,Python第三方库:PySpark之上。
PySpark是由Spark官方开发的Python语言第三方库。
Python开发者可以使用pip程序快速的安装PySpark并像其它三方库那样直接使用。
Why PySpark
Python应用场景和就业方向是十分丰富的,其中,最为亮点的方向为:
大数据开发 和 人工智能

总结:
1.什么是Spark、什么是PySpark
- Spark是Apache基金会旗下的顶级开源项目,用于对海量数据进行大规模分布式计算。
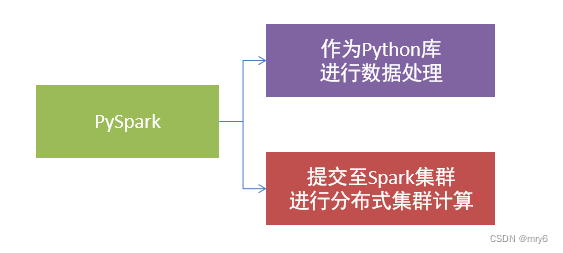
- PySpark是Spark的Python实现,是Spark为Python开发者提供的编程入口,用于以Python代码完成Spark任务的开发
- PySpark不仅可以作为Python第三方库使用,也可以将程序提交的Spark集群环境中,调度大规模集群进行执行。
2.为什么要学习PySpark?
大数据开发是Python众多就业方向中的明星赛道,薪资高岗位多,Spark(PySpark)又是大数据开发中的核心技术
基础准备
PySpark库的安装
同其它的Python第三方库一样,PySpark同样可以使用pip程序进行安装。
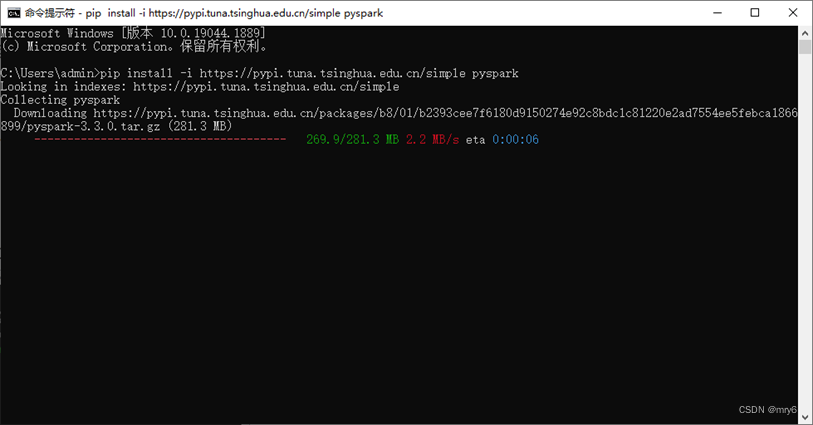
在"CMD"命令提示符程序内,输入:
pip install pyspark
或者使用国内代理镜像网站(清华大学源)
pip install -i https://pypi.tuna.tsinghua.edu.cn/simple pyspark
构建PySpark执行环境入口对象
想要使用PySpark库完成数据处理,首先需要构建一个执行环境入口对象。
PySpark的执行环境入口对象是:类SparkContext的类对象
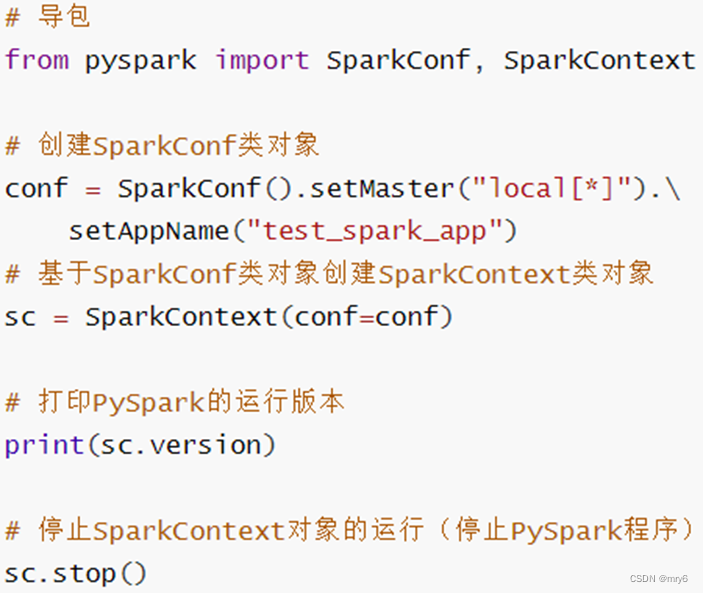

代码示例:
"""
演示获取PySpark的执行环境入口对象:SparkContext
并通过SparkContext对象获取当前PySpark的版本
"""# 导包
from pyspark import SparkConf, SparkContext# 创建SparkConf类对象
conf = SparkConf().setMaster("local[*]").setAppName("test_spark_app")
# 基于SparkConf类对象创建SparkContext对象
sc = SparkContext(conf = conf)
# 打印PySpark的运行版本
print(sc.version)
# 停止SparkContext对象的运行(停止PySpark程序)
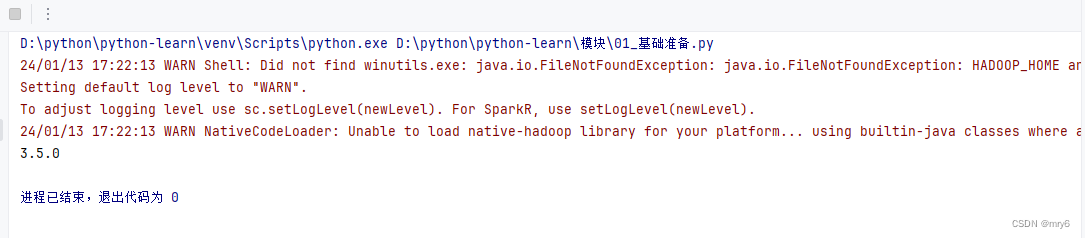
sc.stop()执行结果:
PySpark的编程模型
SparkContext类对象,是PySpark编程中一切功能的入口。
PySpark的编程,主要分为如下三大步骤:

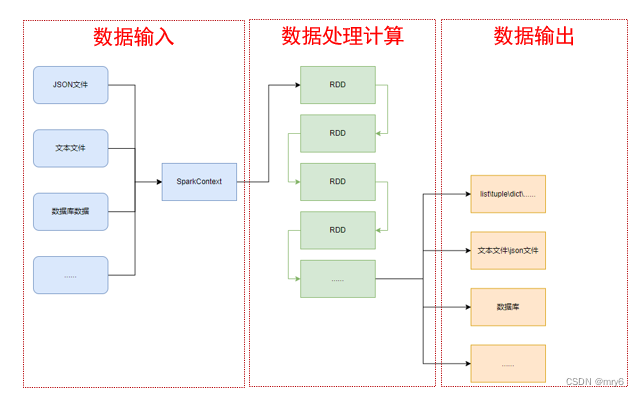
- 通过SparkContext对象,完成数据输入
- 输入数据后得到RDD对象,对RDD对象进行迭代计算
- 最终通过RDD对象的成员方法,完成数据输出工作
总结:
1.如何安装PySpark库
pip install pyspark
2.为什么要构建SparkContext对象作为执行入口
PySpark的功能都是从SparkContext对象作为开始
3.PySpark的编程模型是?
- 数据输入:通过SparkContext完成数据读取
- 数据计算:读取到的数据转换为RDD对象,调用RDD的成员方法完成计算
- 数据输出:调用RDD的数据输出相关成员方法,将结果输出到list、元组、字典、文本文件、数据库等
数据输入
RDD对象
如图可见,PySpark支持多种数据的输入,在输入完成后,都会得到一个:RDD类的对象
RDD全称为:弹性分布式数据集(Resilient Distributed Datasets)
PySpark针对数据的处理,都是以RDD对象作为载体,即:
- 数据存储在RDD内
- 各类数据的计算方法,也都是RDD的成员方法
- RDD的数据计算方法,返回值依旧是RDD对象
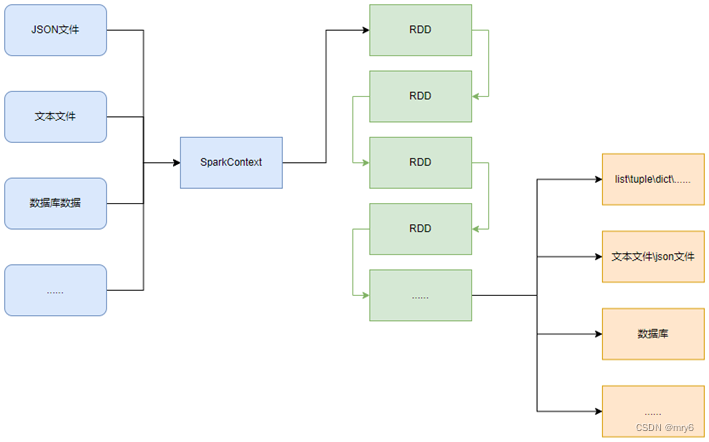
PySpark的编程模型(上图)可以归纳为: - 准备数据到RDD -> RDD迭代计算 -> RDD导出为list、文本文件等
- 即:源数据 -> RDD -> 结果数据
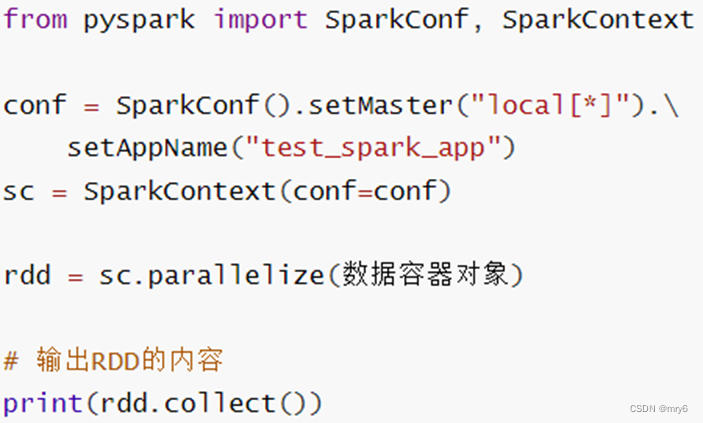
Python数据容器转RDD对象
PySpark支持通过SparkContext对象的parallelize成员方法,将:
- list
- tuple
- set
- dict
- str
转换为PySpark的RDD对象
注意:
- 字符串会被拆分出1个个的字符,存入RDD对象
- 字典仅有key会被存入RDD对象
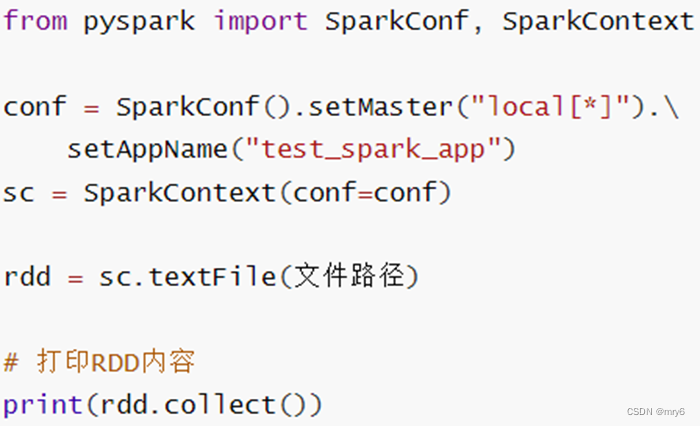
读取文件转RDD对象
PySpark也支持通过SparkContext入口对象,来读取文件,来构建出RDD对象。
代码示例:
"""
演示通过PySpark代码加载数据,即数据输入
"""
from pyspark import SparkConf, SparkContextconf = SparkConf().setMaster("local[*]").setAppName("test_spark")
sc = SparkContext(conf=conf)# 通过parallelize方法将Python对象加载到Spark内,成为RDD对象
rdd1 = sc.parallelize([1, 2, 3, 4, 5])
rdd2 = sc.parallelize((1, 2, 3, 4, 5))
rdd3 = sc.parallelize("abcdefg")
rdd4 = sc.parallelize({1, 2, 3, 4, 5})
rdd5 = sc.parallelize({"key1": "value1", "key2": "value2"})# 如果要查看RDD里面有什么内容,需要使用collect()方法
print(rdd1.collect())
print(rdd2.collect())
print(rdd3.collect())
print(rdd4.collect())
print(rdd5.collect())# 通过textFile方法,读取文件数据加载到Spark内,成为RDD对象
rdd = sc.textFile("D:/yuancheng/20231120/资料/第15章资料/资料/hello.txt")
print(rdd.collect())sc.stop()
输出结果:
D:\python\python-learn\venv\Scripts\python.exe D:\python\python-learn\模块\02_数据输入.py
24/01/14 09:52:11 WARN Shell: Did not find winutils.exe: java.io.FileNotFoundException: java.io.FileNotFoundException: HADOOP_HOME and hadoop.home.dir are unset. -see https://wiki.apache.org/hadoop/WindowsProblems
Setting default log level to "WARN".
To adjust logging level use sc.setLogLevel(newLevel). For SparkR, use setLogLevel(newLevel).
24/01/14 09:52:12 WARN NativeCodeLoader: Unable to load native-hadoop library for your platform... using builtin-java classes where applicable
[1, 2, 3, 4, 5]
[1, 2, 3, 4, 5]
['a', 'b', 'c', 'd', 'e', 'f', 'g']
[1, 2, 3, 4, 5]
['key1', 'key2']
['mry mry itcast mry', 'spark python spark python mry', 'mry itcast itcast mry python', 'python python spark pyspark pyspark', 'mry python pyspark itcast spark']进程已结束,退出代码为 0
总结:
1.RDD对象是什么?为什么要使用它?
RDD对象称之为分布式弹性数据集,是PySpark中数据计算的载体,它可以:
- 提供数据存储
- 提供数据计算的各类方法
- 数据计算的方法,返回值依旧是RDD(RDD迭代计算)
后续对数据进行各类计算,都是基于RDD对象进行
2.如何输入数据到Spark(即得到RDD对象)
- 通过SparkContext的parallelize成员方法,将Python数据容器转换为RDD对象
- 通过SparkContext的textFile成员方法,读取文本文件得到RDD对象
数据计算
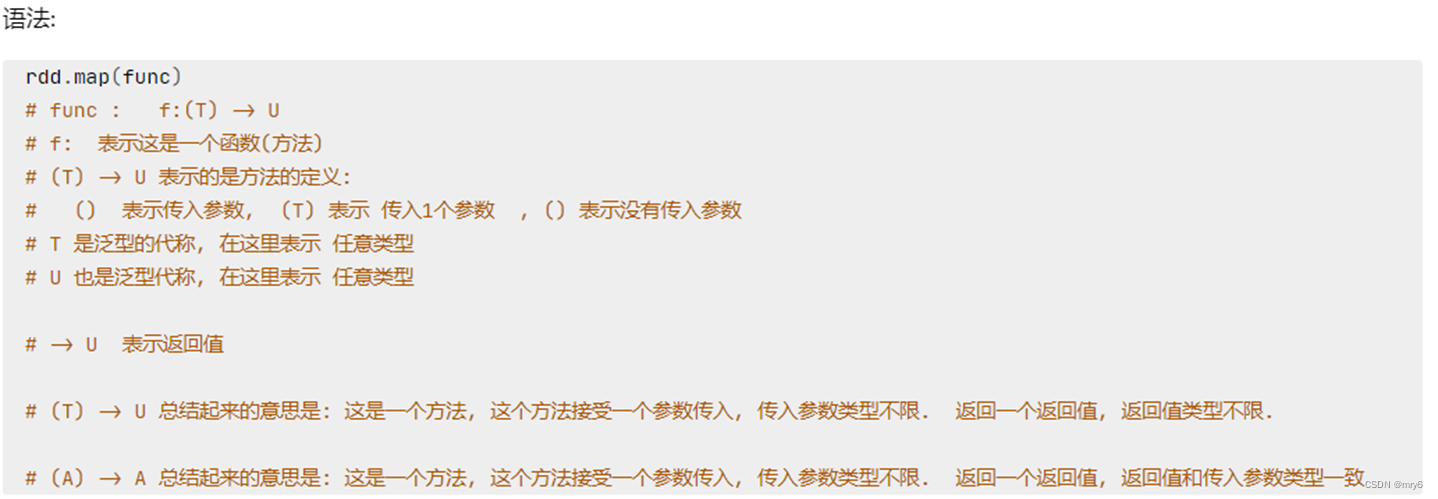
map方法
PySpark的数据计算,都是基于RDD对象来进行的,那么如何进行呢?
自然是依赖,RDD对象内置丰富的:成员方法(算子)
map算子
功能:map算子,是将RDD的数据一条条处理(处理的逻辑基于map算子中接收的处理函数),返回新的RDD
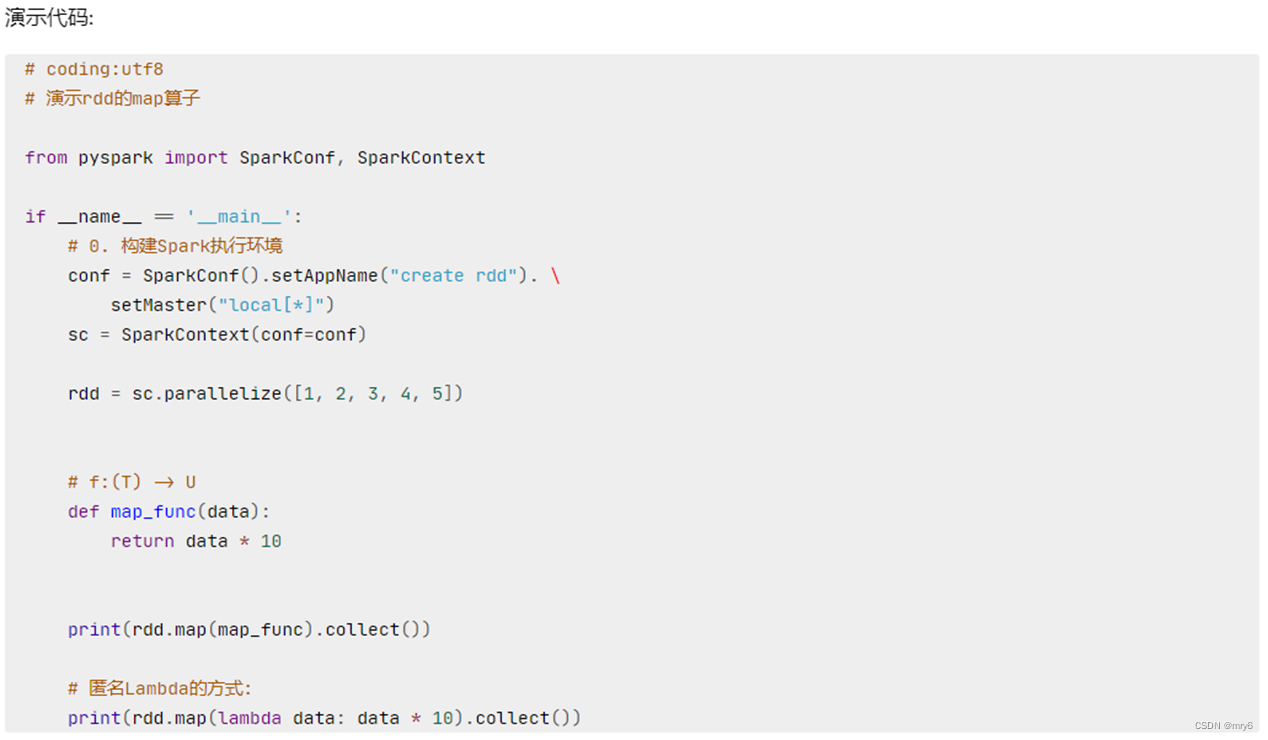
代码示例:
"""
演示RDD的map成员方法的使用
"""
import timefrom pyspark import SparkConf, SparkContext
import os
# os.environ['PYSPARK_PYTHON'] = 'D:/python/python-learn/venv/Scripts/python.exe'
os.environ['PYSPARK_PYTHON'] = 'D:/install/python/python.exe'conf = SparkConf().setMaster("local[*]").setAppName("test_spark")
sc = SparkContext(conf=conf)# 准备一个RDD
rdd = sc.parallelize([1, 2, 3, 4, 5])
print(rdd.collect())
# 通过map方法将全部数据都乘以10
def func(data):return data * 10# rdd2 = rdd.map(func)
# 链式调用
rdd2 = rdd.map(lambda x: x*10).map(lambda x : x + 5)
print(rdd2.collect())
# (T) -> U
# (T) -> Tsc.stop()
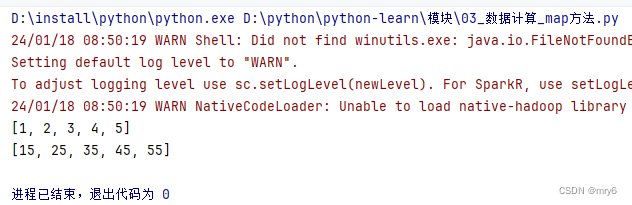
执行结果:
总结:
1.map算子(成员方法)
- 接受一个处理函数,可用lambda表达式快速编写
- 对RDD内的元素逐个处理,并返回一个新的RDD
2.链式调用
- 对于返回值是新RDD的算子,可以通过链式调用的方式多次调用算子。
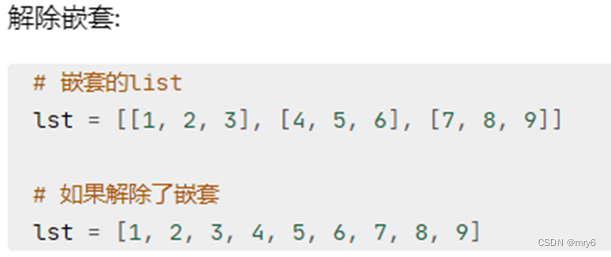
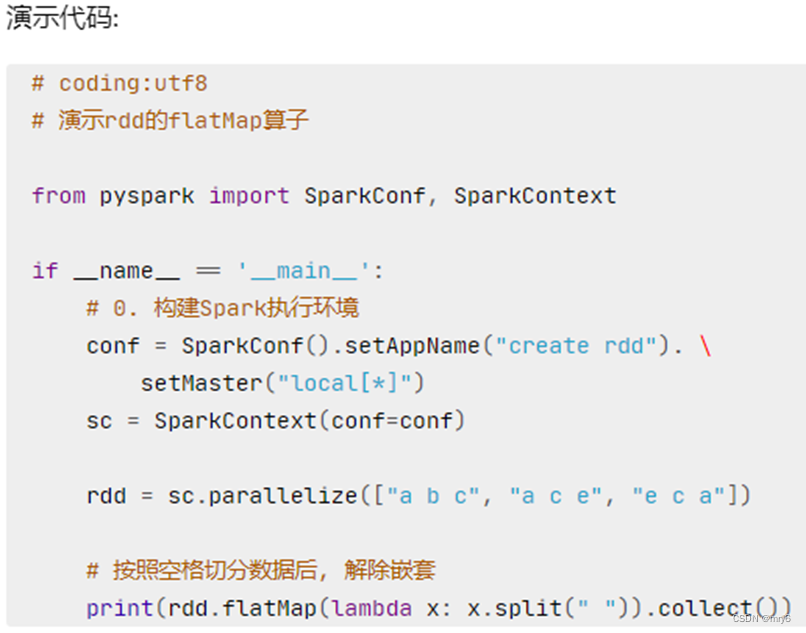
flatMap方法
功能:对RDD执行map操作,然后进行解除嵌套操作。
代码示例:
"""
演示RDD的flatMap成员方法的使用
"""
from pyspark import SparkConf, SparkContext
import os
os.environ['PYSPARK_PYTHON'] = 'D:/install/python/python.exe'conf = SparkConf().setMaster("local[*]").setAppName("test_spark")
sc = SparkContext(conf=conf)# 准备一个RDD
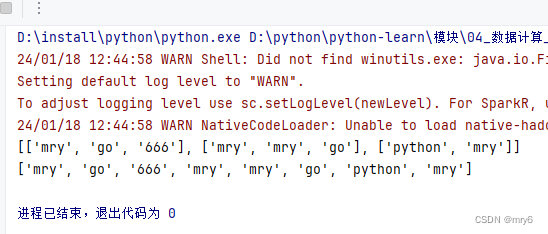
rdd = sc.parallelize(["mry go 666", "mry mry go", "python mry"])# 需求,将RDD数据里面的一个个单词提取出来
rdd2 = rdd.map(lambda x: x.split(" "))
print(rdd2.collect())rdd3 = rdd.flatMap(lambda x: x.split(" "))
print(rdd3.collect())输出结果:
总结:
1.flatMap算子
- 计算逻辑和map一样
- 可以比map多出,解除一层嵌套的功能
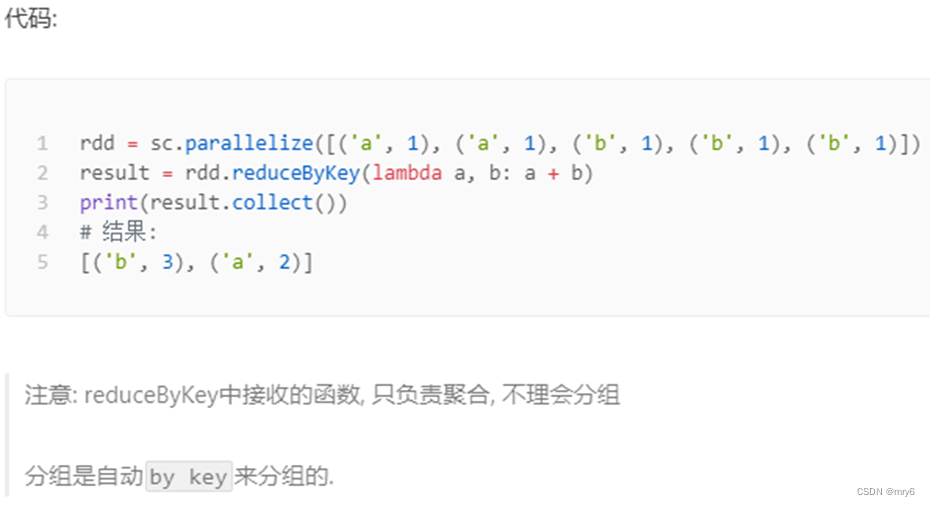
reduceByKey方法
功能:针对KV型RDD,自动按照key分组,然后根据你提供的聚合逻辑,完成组数据(value)的聚合操作。


代码示例:
"""
演示RDD的reduceByKey成员方法的使用
"""
from pyspark import SparkConf, SparkContext
import os
os.environ['PYSPARK_PYTHON'] = 'D:/install/python/python.exe'
conf = SparkConf().setMaster("local[*]").setAppName("test_spark")
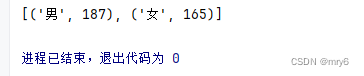
sc = SparkContext(conf=conf)# 准备一个RDD
rdd = sc.parallelize([('男', 99), ('男', 88), ('女', 99), ('女', 66)])# 求男生和女生两个组的成绩之和
rdd2 = rdd.reduceByKey(lambda a,b : a + b)
print(rdd2.collect())输出结果:
总结:
1.reduceByKey算子
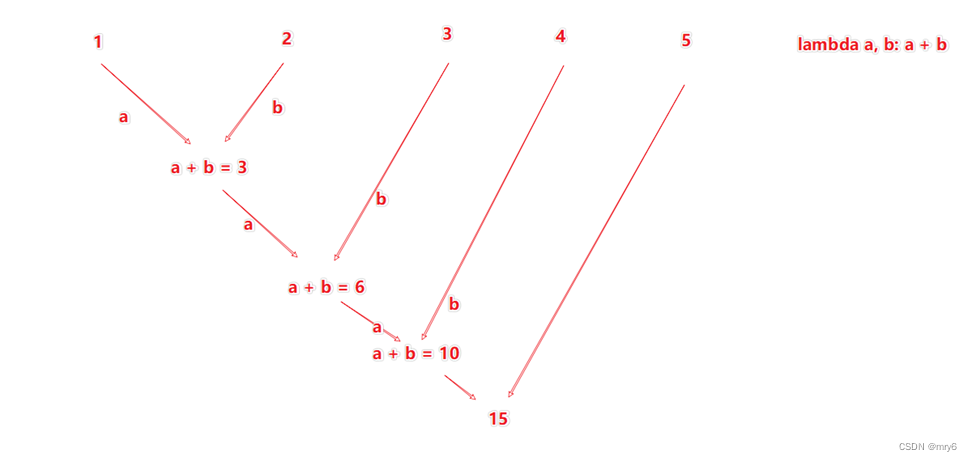
- 接受一个处理函数,对数据进行两两计算

练习案例1
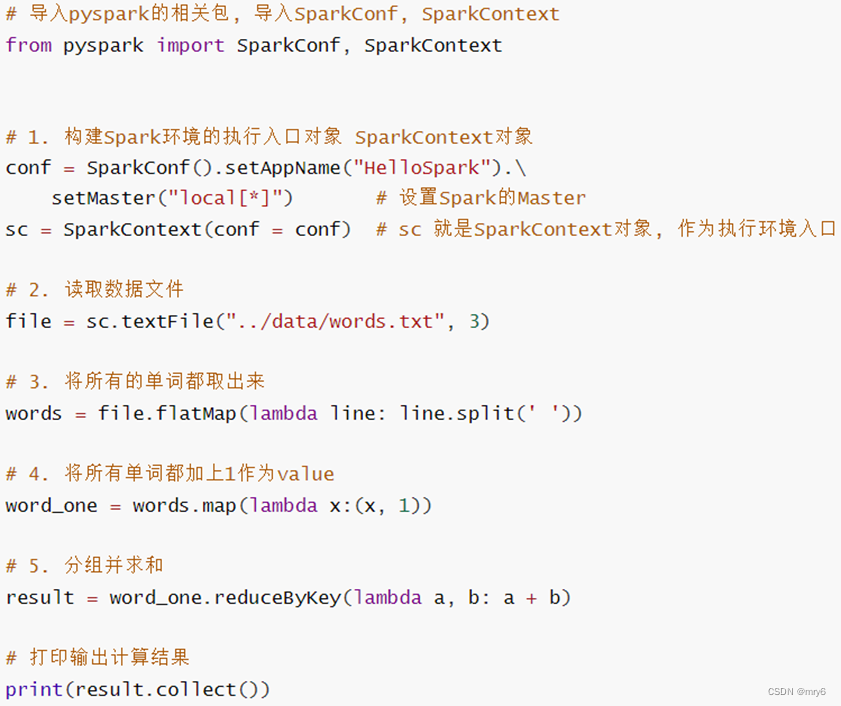
WordCount案例
使用学习到的内容,完成:
- 读取文件
- 统计文件内,单词的出现数量
代码示例:
"""
完成练习案例:单词计数统计
"""# 1.构建执行环境入口对象
from pyspark import SparkConf, SparkContext
import os
os.environ['PYSPARK_PYTHON'] = 'D:/install/python/python.exe'conf = SparkConf().setMaster("local[*]").setAppName("test_spark")
sc = SparkContext(conf=conf)# 2.读取数据文件
rdd = sc.textFile("D:/yuancheng/20231120/资料/第15章资料/资料/hello.txt")
print(rdd.collect())# 3.取出全部单词
word_rdd = rdd.flatMap(lambda x: x.split(" "))
print(word_rdd.collect())# 4.将所有单词都转换成二元元组,单词为key,value设置为1
word_with_one_rdd = word_rdd.map(lambda word: (word, 1))
print(word_with_one_rdd.collect())# 5.分组并求和
result_rdd = word_with_one_rdd.reduceByKey(lambda a, b : a + b)# 6.打印输出结果
print(result_rdd.collect())
输出结果:

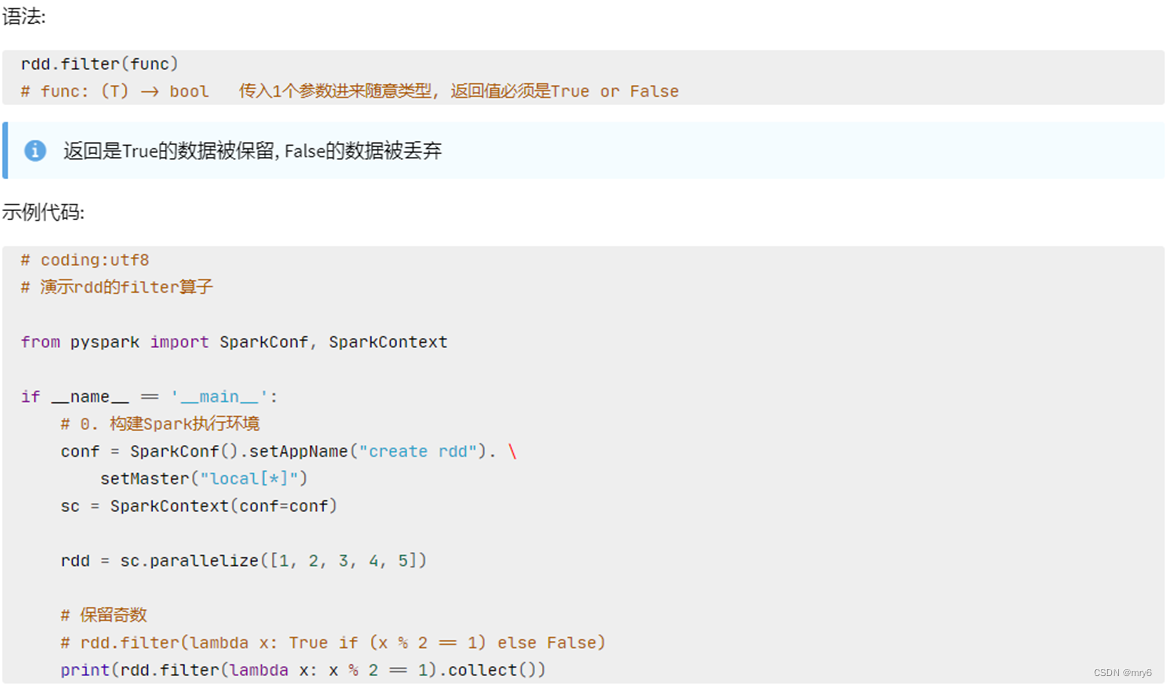
filter方法
功能:过滤想要的数据进行保留
代码示例:
"""
演示RDD的filter成员方法的使用
"""
from pyspark import SparkConf, SparkContext
import os
os.environ['PYSPARK_PYTHON'] = 'D:/install/python/python.exe'conf = SparkConf().setMaster("local[*]").setAppName("test_spark")
sc = SparkContext(conf=conf)# 准备一个RDD
rdd = sc.parallelize([1, 2, 3, 4, 5])# 对RDD的数据进行过滤
rdd2 = rdd.filter(lambda num: num % 2 == 0)
print(rdd2.collect())
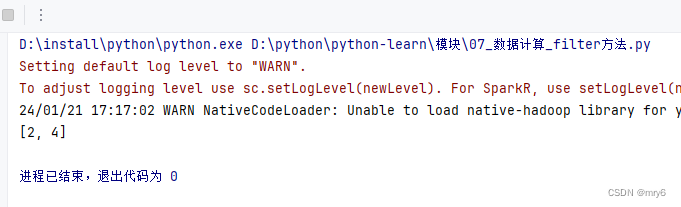
输出结果:
总结:
1.filter算子
- 接受一个处理函数,可用lambda快速编写
- 函数对RDD数据逐个处理,得到True的保留至返回值的RDD中
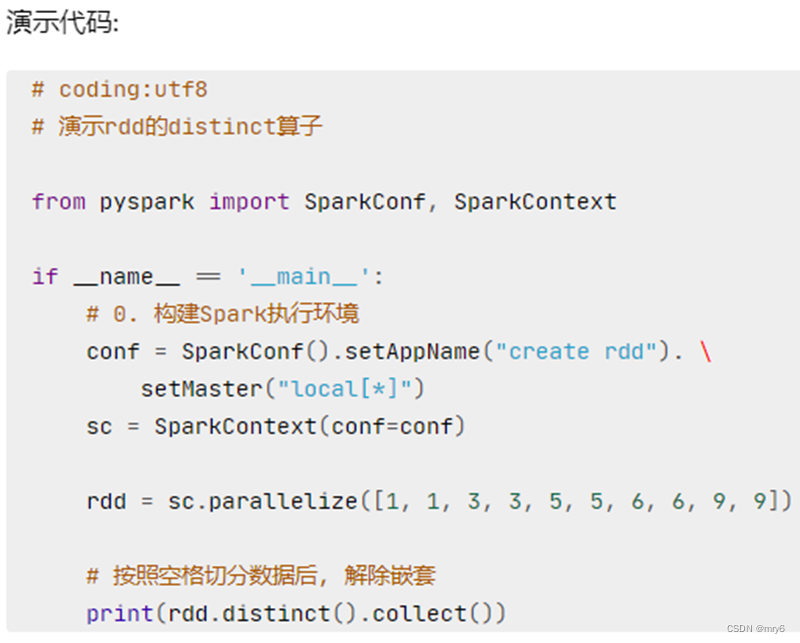
distinct方法
功能:对RDD数据进行去重,返回新RDD

代码示例:
"""
演示RDD的distinct成员方法的使用
"""
from pyspark import SparkConf, SparkContext
import os
os.environ['PYSPARK_PYTHON'] = 'D:/install/python/python.exe'conf = SparkConf().setMaster("local[*]").setAppName("test_spark")
sc = SparkContext(conf=conf)# 准备一个RDD
rdd = sc.parallelize([1, 1, 2, 2, 3, 3, 4, 5, 7, 8, 8, 9, 10])# 对RDD的数据进行去重
rdd2 = rdd.distinct()
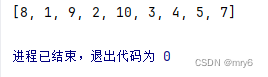
print(rdd2.collect())
输出结果:
总结:
1.distinct算子
- 完成对RDD内数据的去重操作
sortBy方法
功能:对RDD数据进行排序,基于你指定的排序依据。

代码示例:
"""
演示RDD的sortBy方法的使用
"""
from pyspark import SparkConf, SparkContext
import os
os.environ['PYSPARK_PYTHON'] = 'D:/install/python/python.exe'conf = SparkConf().setMaster("local[*]").setAppName("test_spark")
sc = SparkContext(conf=conf)# 1.读取数据文件
rdd = sc.textFile("D:/yuancheng/20231120/资料/第15章资料/资料/hello.txt")
# 2.取出全部单词
word_rdd = rdd.flatMap(lambda x: x.split(" "))
# 3.将所有单词都转换成二元元组,单词为key,value设置为1
word_with_one_rdd = word_rdd.map(lambda word: (word, 1))
# 4.分组并求和
result_rdd = word_with_one_rdd.reduceByKey(lambda a, b: a + b)
print(result_rdd.collect())
# 5.对结果进行排序
final_rdd = result_rdd.sortBy(lambda x: x[1], ascending=False, numPartitions=1)
print(final_rdd.collect())
输出结果:

总结:
1.sortBy算子
- 接收一个处理函数,可用lambda快速编写
- 函数表示用来决定排序的依据
- 可以控制升序或降序
- 全局排序需要设置分区数为1
练习案例2
案例
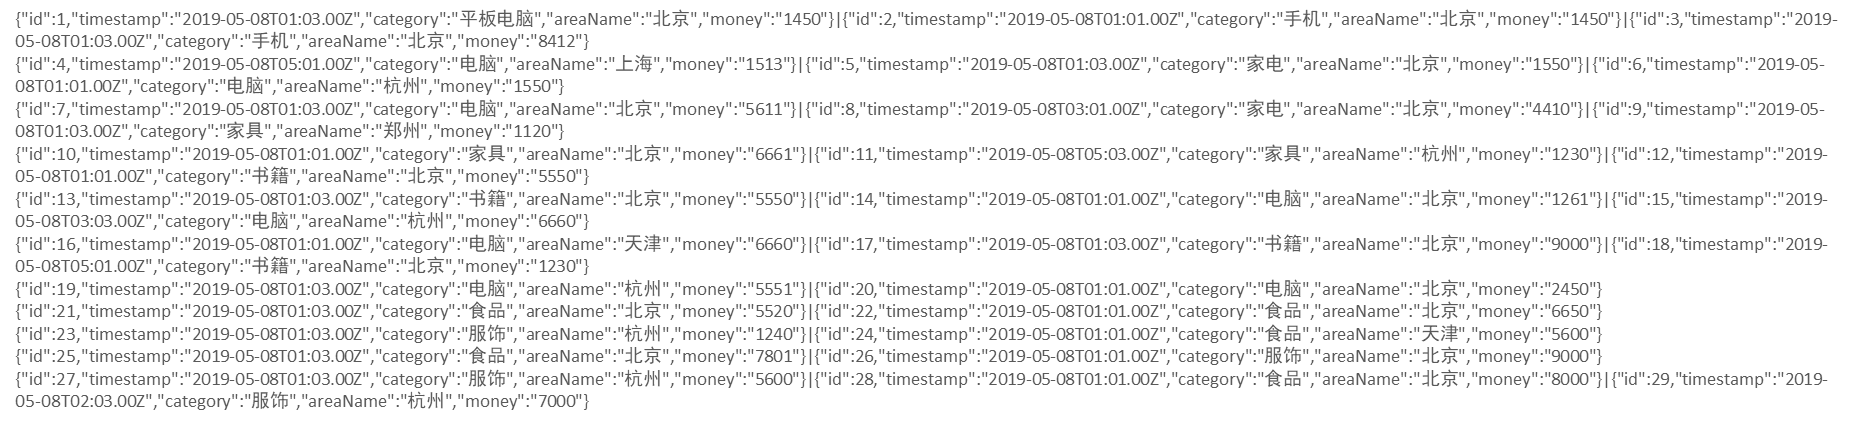
需求,复制以上内容到文件中,使用Spark读取文件进行计算:
- 各个城市销售额排名,从大到小
- 全部城市,有哪些商品类别在售卖
- 北京市有哪些商品类别在售卖
代码示例:
"""
练习案例:JSON商品统计
需求:
1. 各个城市销售额排名,从大到小
2. 全部城市,有哪些商品类别在售卖
3. 北京市有哪些商品类别在售卖
"""
from pyspark import SparkConf, SparkContext
import json
import os
os.environ['PYSPARK_PYTHON'] = 'D:/install/python/python.exe'conf = SparkConf().setMaster("local[*]").setAppName("test_spark")
sc = SparkContext(conf=conf)# TODD 需求1:城市销售额排名
# 1.1 读取数据文件到RDD
file_rdd = sc.textFile("D:/yuancheng/20231120/资料/第15章资料/资料/orders.txt")# 1.2 取出一个个JSON字符串
json_str_rdd = file_rdd.flatMap(lambda x: x.split("|"))
print(json_str_rdd.collect())# 1.3 将一个个JSON字符串转换为字典
dict_rdd =json_str_rdd.map(lambda x: json.loads(x))
print(dict_rdd.collect())# 1.4 取出城市和销售额数据
# (城市,销售额)
city_with_money_rdd = dict_rdd.map(lambda x: (x['areaName'], int(x['money'])))# 1.5 按城市分组按销售额聚合
city_result_rdd = city_with_money_rdd.reduceByKey(lambda a,b : a + b)# 1.6 按销售额聚合结果进行排序
result1_rdd = city_result_rdd.sortBy(lambda x: x[1], ascending=False, numPartitions=1)
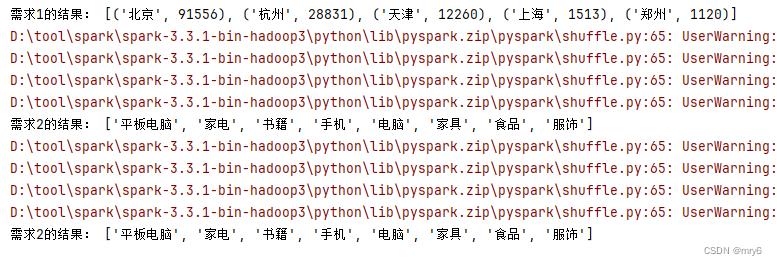
print("需求1的结果:", result1_rdd.collect())# TODD 需求2: 全部城市有哪些商品类别在售卖
# 2.1 取出全部的商品类别
# 2.2 对全部商品类别进行去重
category_rdd = dict_rdd.map(lambda x: x['category']).distinct()
print("需求2的结果:", category_rdd.collect())# TODD 需求3:北京市有哪些商品类别在售卖
# 3.1 过滤北京市的数据
beijing_data_rdd = dict_rdd.filter(lambda x: x['areaName'] == '北京')# 3.2 取出全部商品类别
# 3.3 进行商品类别去重
result3_rdd = beijing_data_rdd.map(lambda x: x['areaName']).distinct()
print("需求2的结果:", result3_rdd.collect())输出结果:
数据输出
数据输入:
- sc.parallelize
- sc.textFile
数据计算:
- rdd.map
- rdd.flatMap
- rdd.reduceByKey
- …

输出为Python对象
collect算子
功能:将RDD各个分区内的数据,统一收集到Driver中,形成一个List对象
用法:
rdd.collect()
返回值是一个list
代码示例:
"""
演示将RDD输出为Python对象
"""
from pyspark import SparkConf, SparkContext
import json
import os
os.environ['PYSPARK_PYTHON'] = 'D:/install/python/python.exe'conf = SparkConf().setMaster("local[*]").setAppName("test_spark")
sc = SparkContext(conf=conf)# 准备RDD
rdd = sc.parallelize([1, 2, 3, 4, 5])# collect算子,输出RDD为List对象
rdd_list: list = rdd.collect()
print(rdd_list)
print(type(rdd_list))
输出结果:

reduce算子
功能:对RDD数据集按照你传入的逻辑进行聚合


返回值等同于计算函数的返回值
代码示例:
"""
演示将RDD输出为Python对象
"""
from pyspark import SparkConf, SparkContext
import json
import os
os.environ['PYSPARK_PYTHON'] = 'D:/install/python/python.exe'conf = SparkConf().setMaster("local[*]").setAppName("test_spark")
sc = SparkContext(conf=conf)# 准备RDD
rdd = sc.parallelize([1, 2, 3, 4, 5])# reduce算子,对RDD进行两两聚合
num = rdd.reduce(lambda a, b: a + b)
print(num)
输出结果:

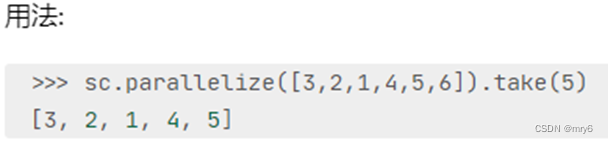
take算子
功能:取RDD的前N个元素,组合成list返回给你

代码示例:
"""
演示将RDD输出为Python对象
"""
from pyspark import SparkConf, SparkContext
import json
import os
os.environ['PYSPARK_PYTHON'] = 'D:/install/python/python.exe'conf = SparkConf().setMaster("local[*]").setAppName("test_spark")
sc = SparkContext(conf=conf)# 准备RDD
rdd = sc.parallelize([1, 2, 3, 4, 5])# take算子,输出RDD前N个元素,组成List返回
take_list = rdd.take(3)
print(take_list)
输出结果:
count算子
功能:计算RDD有多少条数据,返回值是一个数字
代码示例:
"""
演示将RDD输出为Python对象
"""
from pyspark import SparkConf, SparkContext
import json
import os
os.environ['PYSPARK_PYTHON'] = 'D:/install/python/python.exe'conf = SparkConf().setMaster("local[*]").setAppName("test_spark")
sc = SparkContext(conf=conf)# 准备RDD
rdd = sc.parallelize([1, 2, 3, 4, 5])# count,统计rdd内有多少条数据,返回值为数字
num_count = rdd.count()
print(f"rdd内有{num_count}个元素")
输出结果:
总结:
1.Spark的编程流程就是:
- 将数据加载为RDD(数据输入)
- 对RDD进行计算(数据计算)
- 将RDD转换为Python对象(数据输出)
2.数据输出的方法 - collect:将RDD内容转换为list
- reduce:对RDD内容进行自定义聚合
- take:取出RDD的前N个元素组成list
- count:统计RDD元素个数
数据输出可用的方法是很多的,本小节简单的介绍了4个。
输出文件中
saveAsTextFile算子
功能:将RDD的数据写入文本文件中
支持 本地写出,hdfs等文件系统
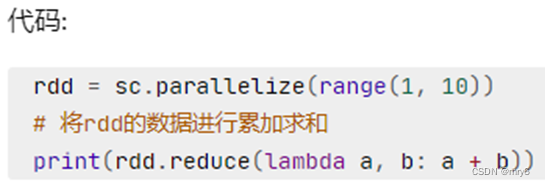
代码:

注意事项
调用保存文件的算子,需要配置Hadoop依赖
- 下载Hadoop安装包
- http://archive.apache.org/dist/hadoop/common/hadoop-3.0.0/hadoop-3.0.0.tar.gz
- 解压到电脑任意位置
- 在Python代码中使用os模块配置:os.environ[‘HADOOP_HOME’] = ‘HADOOP解压文件夹路径’
- 下载winutils.exe,并放入Hadoop解压文件夹的bin目录内
- https://raw.githubusercontent.com/steveloughran/winutils/master/hadoop-3.0.0/bin/winutils.exe
- 下载hadoop.dll,并放入:C:/Windows/System32 文件夹内
- https://raw.githubusercontent.com/steveloughran/winutils/master/hadoop-3.0.0/bin/hadoop.dll
代码示例:
"""
演示将RDD输出到文件中
"""
from pyspark import SparkConf, SparkContext
import json
import os
os.environ['PYSPARK_PYTHON'] = 'D:/install/python/python.exe'
os.environ['HADOOP_HOME'] = 'D:/tool/hadoop/hadoop-3.0.0'conf = SparkConf().setMaster("local[*]").setAppName("test_spark")
sc = SparkContext(conf=conf)# 准备RDD1
rdd1 = sc.parallelize([1, 2, 3, 4, 5])# 准备RDD2
rdd2 = sc.parallelize([("Hello", 3), ("Spark", 5), ("Hi", 7)])# 准备RDD3
rdd3 = sc.parallelize([[1, 3, 5], [6, 7, 9], [11, 13, 11]])# 输出到文件中
rdd1.saveAsTextFile("D:/yuancheng/20231120/资料/第15章资料/资料/output1")
rdd2.saveAsTextFile("D:/yuancheng/20231120/资料/第15章资料/资料/output2")
rdd3.saveAsTextFile("D:/yuancheng/20231120/资料/第15章资料/资料/output3")
输出结果:

修改rdd分区为1
方式1,SparkConf对象设置属性全局并行度为1:

方式2,创建RDD的时候设置(parallelize方法传入numSlices参数为1)


代码示例:
"""
演示将RDD输出到文件中
"""
from pyspark import SparkConf, SparkContext
import json
import os
os.environ['PYSPARK_PYTHON'] = 'D:/install/python/python.exe'
os.environ['HADOOP_HOME'] = 'D:/tool/hadoop/hadoop-3.0.0'conf = SparkConf().setMaster("local[*]").setAppName("test_spark")
# conf.set("spark.default.parallelism", "1")
sc = SparkContext(conf=conf)# 准备RDD1
rdd1 = sc.parallelize([1, 2, 3, 4, 5], numSlices=1)# 准备RDD2
rdd2 = sc.parallelize([("Hello", 3), ("Spark", 5), ("Hi", 7)], 1)# 准备RDD3
rdd3 = sc.parallelize([[1, 3, 5], [6, 7, 9], [11, 13, 11]], 1)# 输出到文件中
rdd1.saveAsTextFile("D:/yuancheng/20231120/资料/第15章资料/资料/output1")
rdd2.saveAsTextFile("D:/yuancheng/20231120/资料/第15章资料/资料/output2")
rdd3.saveAsTextFile("D:/yuancheng/20231120/资料/第15章资料/资料/output3")
输出结果:

总结:
1.RDD输出到文件的方法
- rdd.saveAsTextFile(路径)
- 输出的结果是一个文件夹
- 有几个分区就输出多少个结果文件
2.如何修改RDD分区
- SparkConf对象设置conf.set(“spark.default.parallelism”, “1”)
- 创建RDD的时候,sc.parallelize方法传入numSlices参数为1
综合案例
搜索引擎日志分析
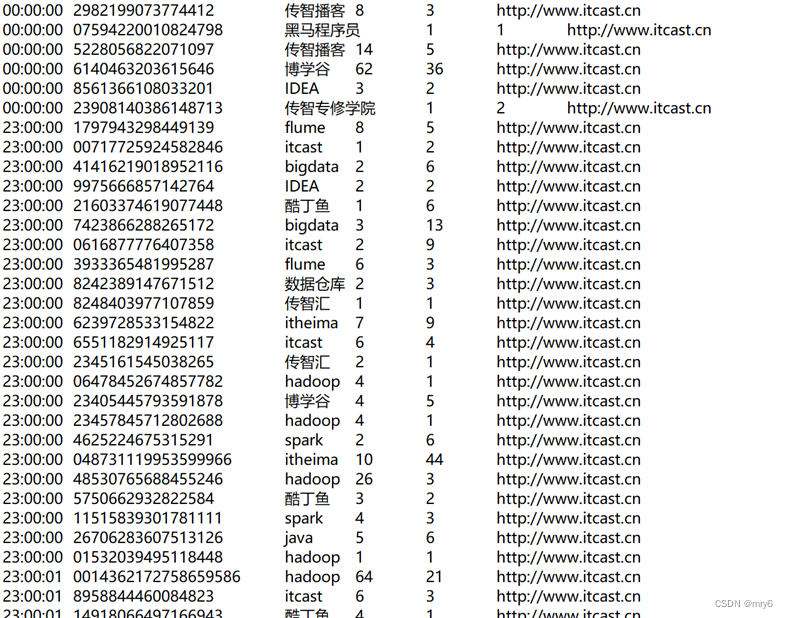
读取文件转换成RDD,并完成:
- 打印输出:热门搜索时间段(小时精度)Top3
- 打印输出:热门搜索词Top3
- 打印输出:统计黑马程序员关键字在哪个时段被搜索最多
- 将数据转换为JSON格式,写出为文件
代码示例:
"""
演示PySpark综合案例
"""
from pyspark import SparkConf, SparkContext
import os
os.environ['PYSPARK_PYTHON'] = 'D:/install/python/python.exe'conf = SparkConf().setMaster("local[*]").setAppName("test_spark")
conf.set("spark.default.parallelism", "1")
sc = SparkContext(conf=conf)# 读取文件转换成RDD
file_rdd = sc.textFile("D:/yuancheng/20231120/资料/第15章资料/资料/search_log.txt")# TODD 需求1:热门搜索时间段Top3(小时精度)
# 1.1 取出全部的时间并转换为小时
# 1.2 转换为(小时, 1)的二元元组
# 1.3 Key分组聚合Value
# 1.4 排序(降序)
# 1.5 取前3
result1 = file_rdd.map(lambda x: x.split("\t")).\map(lambda x: x[0][:2]).\map(lambda x: (x, 1)).\reduceByKey(lambda a, b: a + b).\sortBy(lambda x: x[1], ascending=False, numPartitions=1).\take(3)
print("需求1的结果:", result1)# TODD 需求2:热门搜索词Top3
# 2.1 取出全部的搜索词
# 2.2 (词, 1) 二元元组
# 2.3 分组聚合
# 2.4 排序
# 2.5 Top3
result2 = file_rdd.map(lambda x: (x.split("\t")[2], 1)).\reduceByKey(lambda a, b: a + b).\sortBy(lambda x: x[1], ascending=False, numPartitions=1).\take(3)
print("需求2的结果:", result2)# TODD 需求3:统计黑马程序员关键字在什么时段被搜索的最多
# 3.1 过滤内容,只保留黑马程序员关键词
# 3.2 转换为(小时, 1)的二元元组
# 3.3 Key分组聚合Value
# 3.4 排序(降序)
# 3.5 取前1
result3 = file_rdd.map(lambda x: x.split("\t")).\filter(lambda x: x[2] == '黑马程序员').\map(lambda x: (x[0][:2], 1)).\reduceByKey(lambda a, b: a + b).\sortBy(lambda x: x[1], ascending=False, numPartitions=1).\take(1)
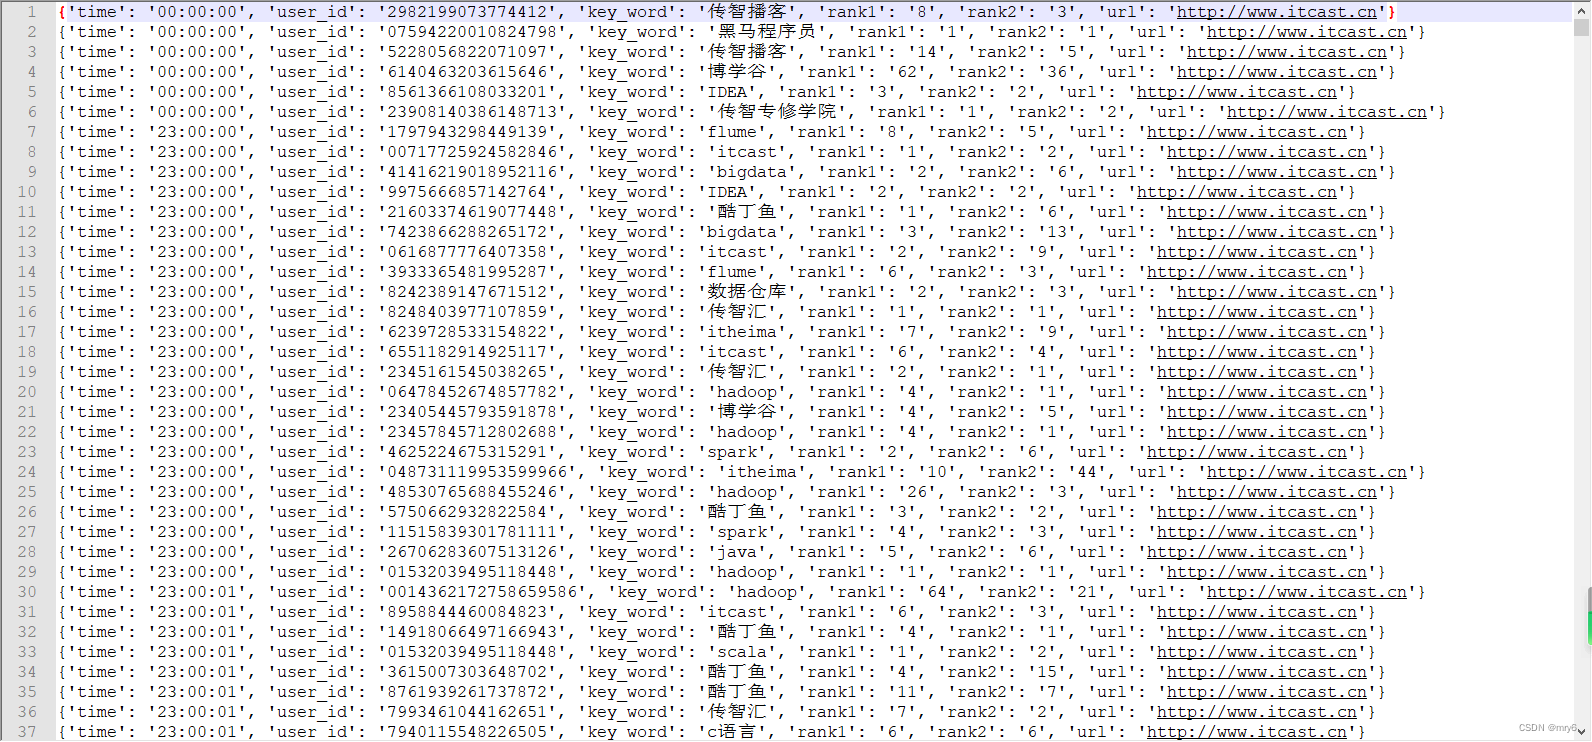
print("需求3的结果:", result3)# TODD 需求4:将数据转换为JSON格式,写出到文件中
# 4.1 转换为文件
file_rdd.map(lambda x: x.split("\t")).\map(lambda x: {"time": x[0], "user_id": x[1], "key_word": x[2], "rank1": x[3], "rank2": x[4], "url": x[5]}).\saveAsTextFile("D:/yuancheng/20231120/资料/第15章资料/资料/output_json")
输出结果:
D:\install\python\python.exe D:\python\python-learn\模块\13_综合案例.py
需求1的结果: [('20', 3479), ('23', 3087), ('21', 2989)]
需求2的结果: [('scala', 2310), ('hadoop', 2268), ('博学谷', 2002)]
需求3的结果: [('22', 245)]进程已结束,退出代码为 0
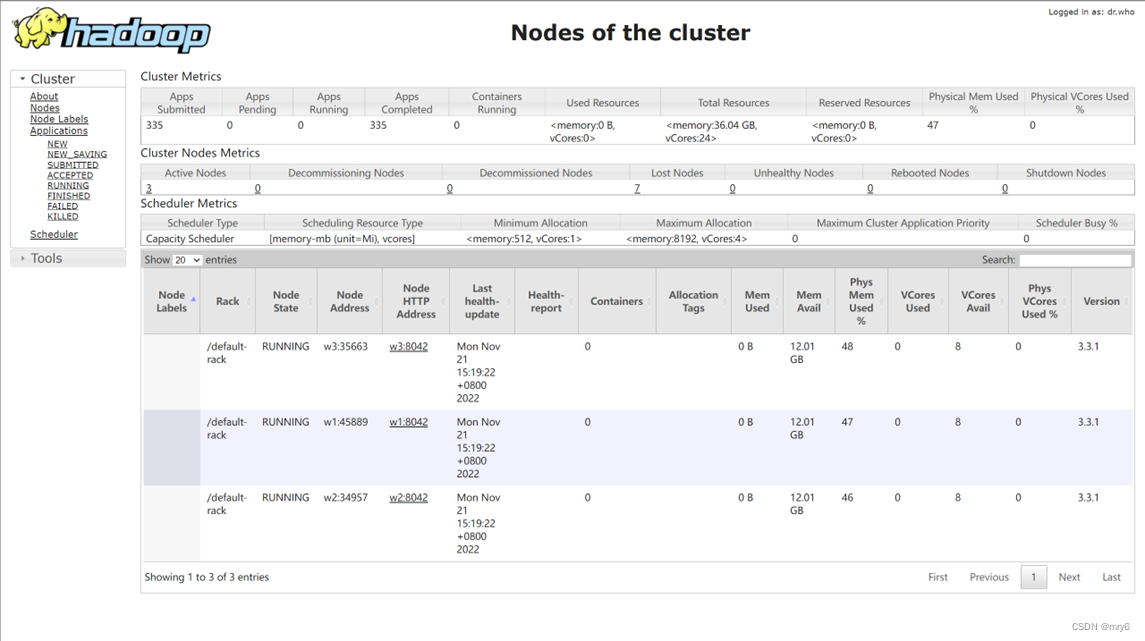
分布式集群运行
提交命令:
bin/spark-submit --master yarn --num-executors 3 --queue root.teach --executor-cores 4 --executor-memory 4g /home/hadoop/demo.py
输出结果: