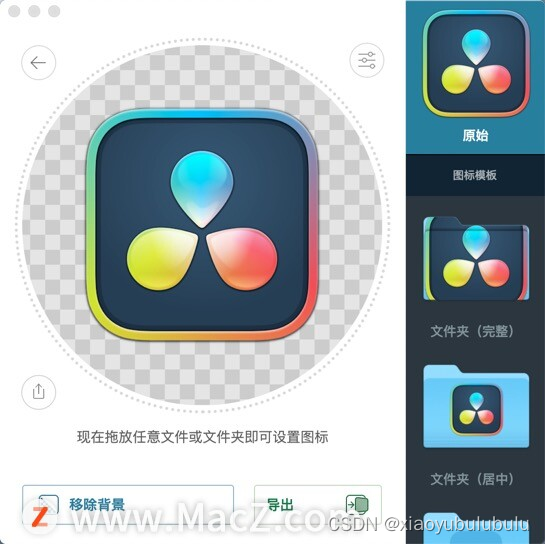
网站建设功能要求,个人怎么注册一个品牌,深圳注册公司多少钱,北京理想创意艺术设计有限公司概述
为了将坐标从一个坐标系变换到另一个坐标系#xff0c;我们需要用到几个变换矩阵#xff0c;最重要的几个分别是模型(Model)、观察(View)、投影(Projection)三个矩阵。我们的顶点坐标起始于局部空间(Local Space)#xff0c;在这里它称为局部坐标(Local Coordinate)我们需要用到几个变换矩阵最重要的几个分别是模型(Model)、观察(View)、投影(Projection)三个矩阵。我们的顶点坐标起始于局部空间(Local Space)在这里它称为局部坐标(Local Coordinate)它在之后会变为世界坐标(World Coordinate)观察坐标(View Coordinate)裁剪坐标(Clip Coordinate)并最后以屏幕坐标(Screen Coordinate)的形式结束。下面的这张图展示了整个流程以及各个变换过程做了什么
局部坐标是对象相对于局部原点的坐标也是物体起始的坐标。下一步是将局部坐标变换为世界空间坐标世界空间坐标是处于一个更大的空间范围的。这些坐标相对于世界的全局原点它们会和其它物体一起相对于世界的原点进行摆放。接下来我们将世界坐标变换为观察空间坐标使得每个坐标都是从摄像机或者说观察者的角度进行观察的。坐标到达观察空间之后我们需要将其投影到裁剪坐标。裁剪坐标会被处理至-1.0到1.0的范围内并判断哪些顶点将会出现在屏幕上。最后我们将裁剪坐标变换为屏幕坐标我们将使用一个叫做视口变换(Viewport Transform)的过程。视口变换将位于-1.0到1.0范围的坐标变换到由glViewport函数所定义的坐标范围内。最后变换出来的坐标将会送到光栅器将其转化为片段。
你可能已经大致了解了每个坐标空间的作用。我们之所以将顶点变换到各个不同的空间的原因是有些操作在特定的坐标系统中才有意义且更方便。例如当需要对物体进行修改的时候在局部空间中来操作会更说得通如果要对一个物体做出一个相对于其它物体位置的操作时在世界坐标系中来做这个才更说得通等等。如果我们愿意我们也可以定义一个直接从局部空间变换到裁剪空间的变换矩阵但那样会失去很多灵活性。
正射投影和透视投影
要创建一个正射投影矩阵我们可以使用GLM的内置函数glm::ortho
glm::ortho(0.0f, 800.0f, 0.0f, 600.0f, 0.1f, 100.0f); 在 GLM中可以这样创建一个透视投影矩阵
glm::mat4 proj glm::perspective(glm::radians(45.0f), (float)width/(float)height, 0.1f, 100.0f);
代码:
#include glad/glad.h // GLAD: 用于管理 OpenGL 函数指针
#include GLFW/glfw3.h // GLFW: 用于创建窗口及处理用户输入
#include stb_image.h // STB_IMAGE: 用于加载图像#include glm/glm.hpp // GLM: 用于数学运算如向量和矩阵
#include glm/gtc/matrix_transform.hpp
#include glm/gtc/type_ptr.hpp#include learnopengl/shader_m.h // 自定义 Shader 类用于管理着色器程序#include iostream // 用于标准输入输出// 回调函数声明
void framebuffer_size_callback(GLFWwindow* window, int width, int height);
void processInput(GLFWwindow *window);// 设置窗口宽度和高度
const unsigned int SCR_WIDTH 800;
const unsigned int SCR_HEIGHT 600;int main()
{// 初始化 GLFWglfwInit();// 设置 OpenGL 版本为 3.3glfwWindowHint(GLFW_CONTEXT_VERSION_MAJOR, 3);glfwWindowHint(GLFW_CONTEXT_VERSION_MINOR, 3);// 使用核心模式glfwWindowHint(GLFW_OPENGL_PROFILE, GLFW_OPENGL_CORE_PROFILE);#ifdef __APPLE__// MacOS 需要设置这个以便获得 OpenGL 3.2 及以上版本glfwWindowHint(GLFW_OPENGL_FORWARD_COMPAT, GL_TRUE);
#endif// 创建一个 GLFW 窗口GLFWwindow* window glfwCreateWindow(SCR_WIDTH, SCR_HEIGHT, LearnOpenGL, NULL, NULL);if (window NULL){std::cout Failed to create GLFW window std::endl;glfwTerminate();return -1;}glfwMakeContextCurrent(window);// 注册窗口大小变化回调函数glfwSetFramebufferSizeCallback(window, framebuffer_size_callback);// 初始化 GLAD加载所有 OpenGL 函数指针if (!gladLoadGLLoader((GLADloadproc)glfwGetProcAddress)){std::cout Failed to initialize GLAD std::endl;return -1;}// 编译和构建着色器程序Shader ourShader(6.1.coordinate_systems.vs, 6.1.coordinate_systems.fs);// 顶点数据和配置顶点属性float vertices[] {// 位置 // 纹理坐标0.5f, 0.5f, 0.0f, 1.0f, 1.0f, // 右上0.5f, -0.5f, 0.0f, 1.0f, 0.0f, // 右下-0.5f, -0.5f, 0.0f, 0.0f, 0.0f, // 左下-0.5f, 0.5f, 0.0f, 0.0f, 1.0f // 左上 };unsigned int indices[] {0, 1, 3, // 第一个三角形1, 2, 3 // 第二个三角形};unsigned int VBO, VAO, EBO;glGenVertexArrays(1, VAO);glGenBuffers(1, VBO);glGenBuffers(1, EBO);glBindVertexArray(VAO);glBindBuffer(GL_ARRAY_BUFFER, VBO);glBufferData(GL_ARRAY_BUFFER, sizeof(vertices), vertices, GL_STATIC_DRAW);glBindBuffer(GL_ELEMENT_ARRAY_BUFFER, EBO);glBufferData(GL_ELEMENT_ARRAY_BUFFER, sizeof(indices), indices, GL_STATIC_DRAW);// 位置属性glVertexAttribPointer(0, 3, GL_FLOAT, GL_FALSE, 5 * sizeof(float), (void*)0);glEnableVertexAttribArray(0);// 纹理坐标属性glVertexAttribPointer(1, 2, GL_FLOAT, GL_FALSE, 5 * sizeof(float), (void*)(3 * sizeof(float)));glEnableVertexAttribArray(1);// 加载和创建纹理 unsigned int texture1, texture2;// 纹理 1glGenTextures(1, texture1);glBindTexture(GL_TEXTURE_2D, texture1);// 设置纹理环绕方式glTexParameteri(GL_TEXTURE_2D, GL_TEXTURE_WRAP_S, GL_REPEAT);glTexParameteri(GL_TEXTURE_2D, GL_TEXTURE_WRAP_T, GL_REPEAT);// 设置纹理过滤方式glTexParameteri(GL_TEXTURE_2D, GL_TEXTURE_MIN_FILTER, GL_LINEAR);glTexParameteri(GL_TEXTURE_2D, GL_TEXTURE_MAG_FILTER, GL_LINEAR);// 加载图像创建纹理并生成 mipmapsint width, height, nrChannels;stbi_set_flip_vertically_on_load(true); // 告诉 stb_image.h 翻转加载的纹理在 y 轴上。unsigned char *data stbi_load(FileSystem::getPath(resources/textures/container.jpg).c_str(), width, height, nrChannels, 0);if (data){glTexImage2D(GL_TEXTURE_2D, 0, GL_RGB, width, height, 0, GL_RGB, GL_UNSIGNED_BYTE, data);glGenerateMipmap(GL_TEXTURE_2D);}else{std::cout Failed to load texture std::endl;}stbi_image_free(data);// 纹理 2glGenTextures(1, texture2);glBindTexture(GL_TEXTURE_2D, texture2);// 设置纹理环绕方式glTexParameteri(GL_TEXTURE_2D, GL_TEXTURE_WRAP_S, GL_REPEAT); glTexParameteri(GL_TEXTURE_2D, GL_TEXTURE_WRAP_T, GL_REPEAT);// 设置纹理过滤方式glTexParameteri(GL_TEXTURE_2D, GL_TEXTURE_MIN_FILTER, GL_LINEAR);glTexParameteri(GL_TEXTURE_2D, GL_TEXTURE_MAG_FILTER, GL_LINEAR);// 加载图像创建纹理并生成 mipmapsdata stbi_load(FileSystem::getPath(resources/textures/awesomeface.png).c_str(), width, height, nrChannels, 0);if (data){// awesomeface.png 有透明通道因此使用 GL_RGBAglTexImage2D(GL_TEXTURE_2D, 0, GL_RGB, width, height, 0, GL_RGBA, GL_UNSIGNED_BYTE, data);glGenerateMipmap(GL_TEXTURE_2D);}else{std::cout Failed to load texture std::endl;}stbi_image_free(data);// 告诉 OpenGL 每个采样器属于哪个纹理单元只需要做一次ourShader.use();ourShader.setInt(texture1, 0);ourShader.setInt(texture2, 1);// 渲染循环while (!glfwWindowShouldClose(window)){// 处理输入processInput(window);// 渲染指令glClearColor(0.2f, 0.3f, 0.3f, 1.0f);glClear(GL_COLOR_BUFFER_BIT);// 绑定纹理glActiveTexture(GL_TEXTURE0);glBindTexture(GL_TEXTURE_2D, texture1);glActiveTexture(GL_TEXTURE1);glBindTexture(GL_TEXTURE_2D, texture2);// 激活着色器ourShader.use();// 创建变换矩阵glm::mat4 model glm::mat4(1.0f); // 确保矩阵初始化为单位矩阵glm::mat4 view glm::mat4(1.0f);glm::mat4 projection glm::mat4(1.0f);model glm::rotate(model, glm::radians(-55.0f), glm::vec3(1.0f, 0.0f, 0.0f));view glm::translate(view, glm::vec3(0.0f, 0.0f, -3.0f));projection glm::perspective(glm::radians(45.0f), (float)SCR_WIDTH / (float)SCR_HEIGHT, 0.1f, 100.0f);// 获取矩阵 uniform 位置unsigned int modelLoc glGetUniformLocation(ourShader.ID, model);unsigned int viewLoc glGetUniformLocation(ourShader.ID, view);// 传递它们到着色器glUniformMatrix4fv(modelLoc, 1, GL_FALSE, glm::value_ptr(model));glUniformMatrix4fv(viewLoc, 1, GL_FALSE, view[0][0]);// 注意目前我们每帧都设置投影矩阵但是由于投影矩阵很少变化通常最好只设置一次。ourShader.setMat4(projection, projection);// 渲染容器glBindVertexArray(VAO);glDrawElements(GL_TRIANGLES, 6, GL_UNSIGNED_INT, 0);// 交换缓冲区并查询 IO 事件如按键、鼠标移动等glfwSwapBuffers(window);glfwPollEvents();}// 释放所有资源glDeleteVertexArrays(1, VAO);glDeleteBuffers(1, VBO);glDeleteBuffers(1, EBO);// 终止 GLFW释放所有分配的资源glfwTerminate();return 0;
}// 处理所有输入查询 GLFW 是否在这一帧中按下/释放了相关按键并做出相应处理
void processInput(GLFWwindow *window)
{if (glfwGetKey(window, GLFW_KEY_ESCAPE) GLFW_PRESS)glfwSetWindowShouldClose(window, true);
}// GLFW 回调函数窗口大小改变时执行
void framebuffer_size_callback(GLFWwindow* window, int width, int height)
{// 确保视口与新的窗口尺寸匹配注意 width 和 height 会显著大于在视网膜显示器上的指定值。glViewport(0, 0, width, height);
}
6.1.coordinate_systems.vs
#version 330 core
layout (location 0) in vec3 aPos;
layout (location 1) in vec2 aTexCoord;out vec2 TexCoord;uniform mat4 model;
uniform mat4 view;
uniform mat4 projection;void main()
{gl_Position projection * view * model * vec4(aPos, 1.0);TexCoord vec2(aTexCoord.x, aTexCoord.y);
}6.1.coordinate_systems.fs
#version 330 core
out vec4 FragColor;in vec2 TexCoord;// texture samplers
uniform sampler2D texture1;
uniform sampler2D texture2;void main()
{// linearly interpolate between both textures (80% container, 20% awesomeface)FragColor mix(texture(texture1, TexCoord), texture(texture2, TexCoord), 0.2);
}