seo网站优化策划案b2b b2c c2c o2o区别
批量查询极兔速递单号的物流信息,并将指定派件员的单号筛选出来。
所需工具:
一个【快递批量查询高手】软件
极兔速递单号若干
操作步骤:
步骤1:运行【快递批量查询高手】软件,第一次使用的朋友记得先注册,然后登录

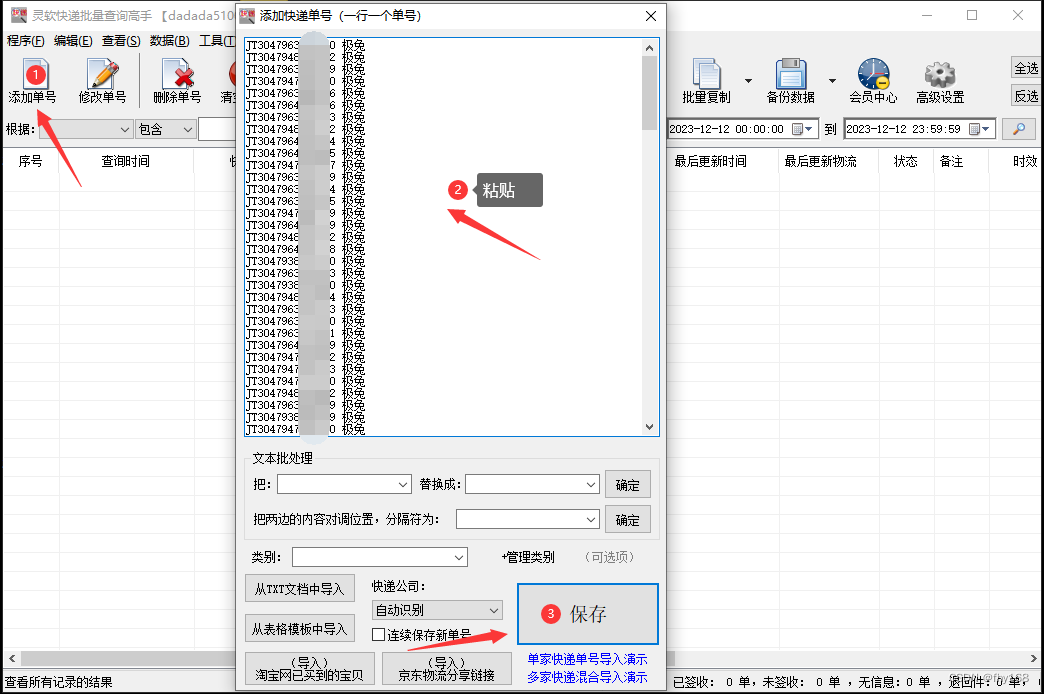
步骤2:点击主界面左上角的“添加单号”,在打开的窗口里把极兔速递单号信息复制粘贴进去,接着点击“保存”
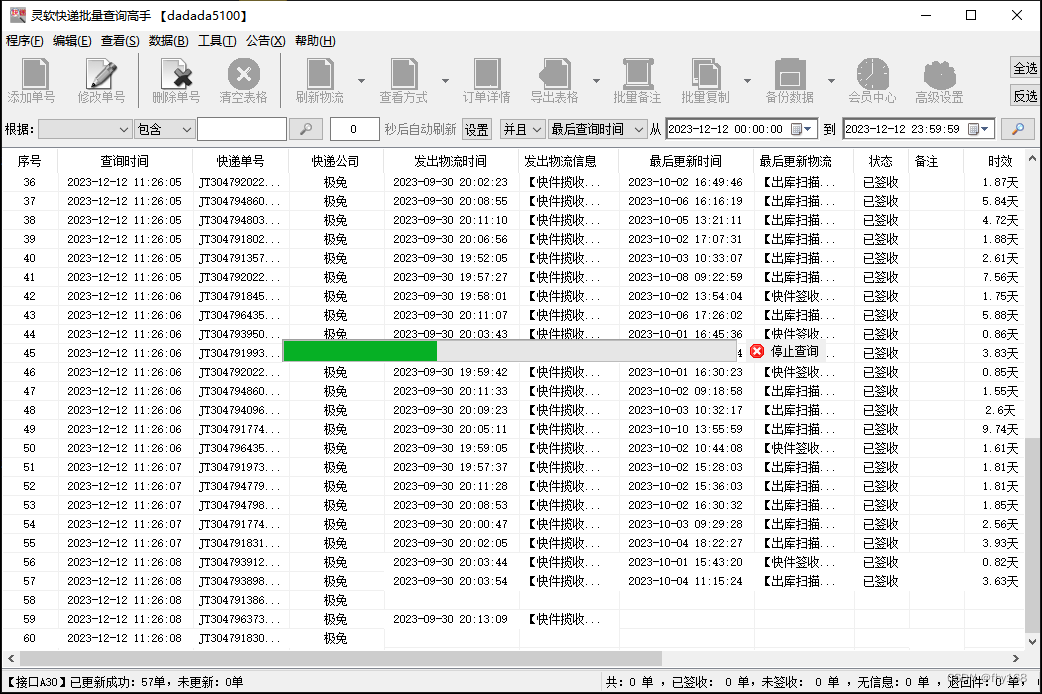
步骤3:保存后,进度条一直在滚动,是软件在批量查询各个单号的物流信息
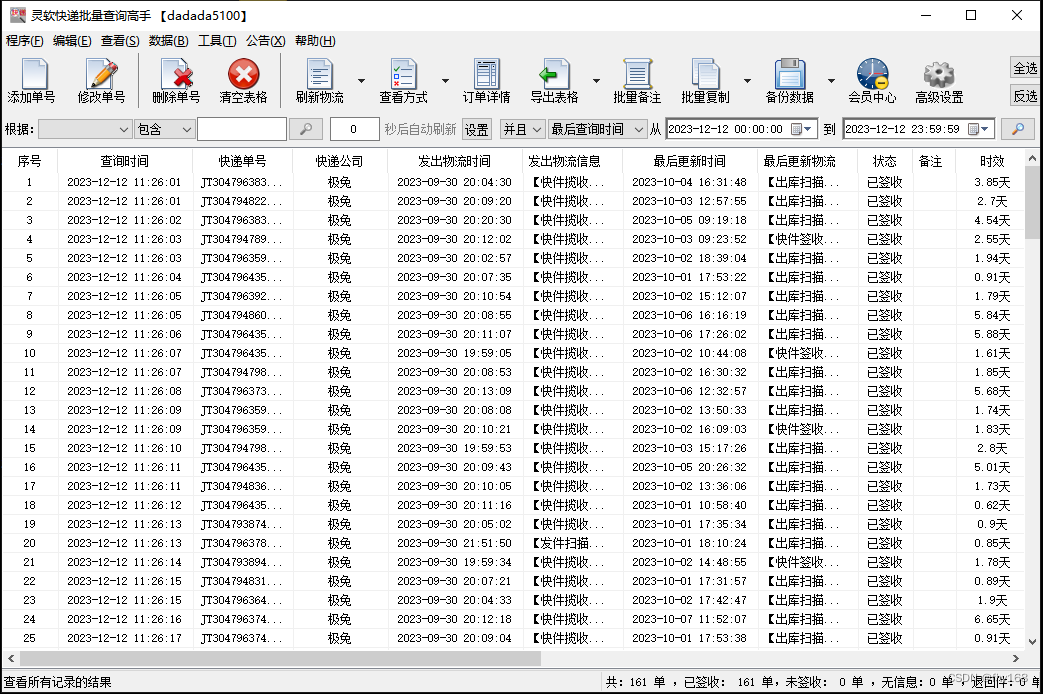
步骤4:很快就全部查询好了,查询好的物流信息与极兔速递官网上的同步
步骤5:本次假定将派件员为“王江伟”的极兔速递单号都筛选出来,在主界面左上角的 根据栏 选择“派件员”,然后在右侧的 包含栏 输入“王江伟”,再点击类似放大镜的 搜索键
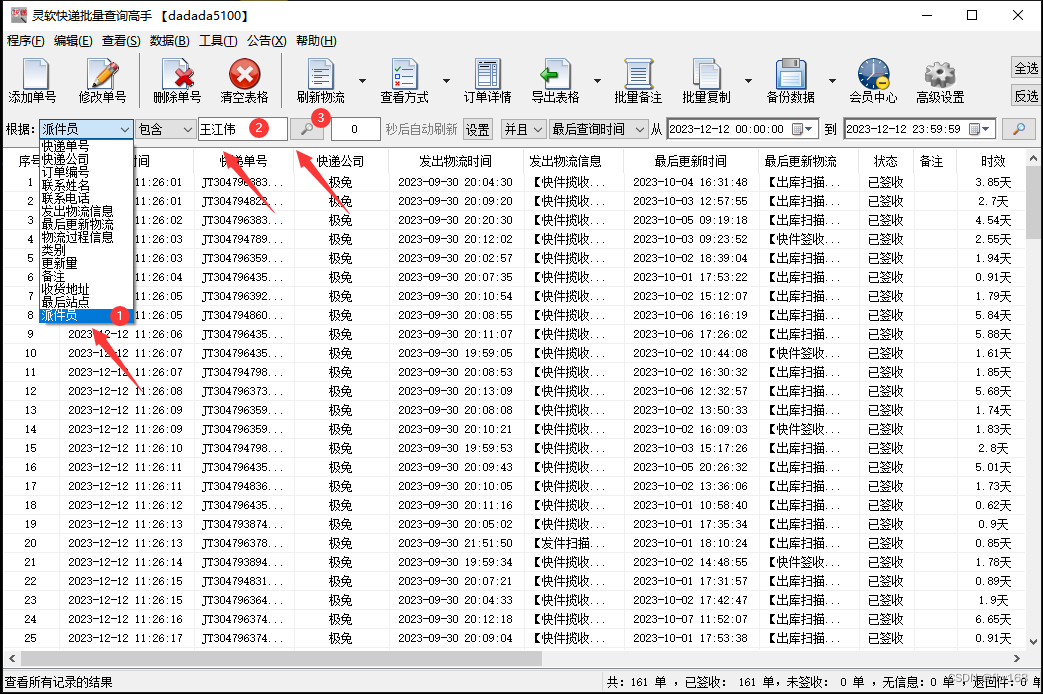
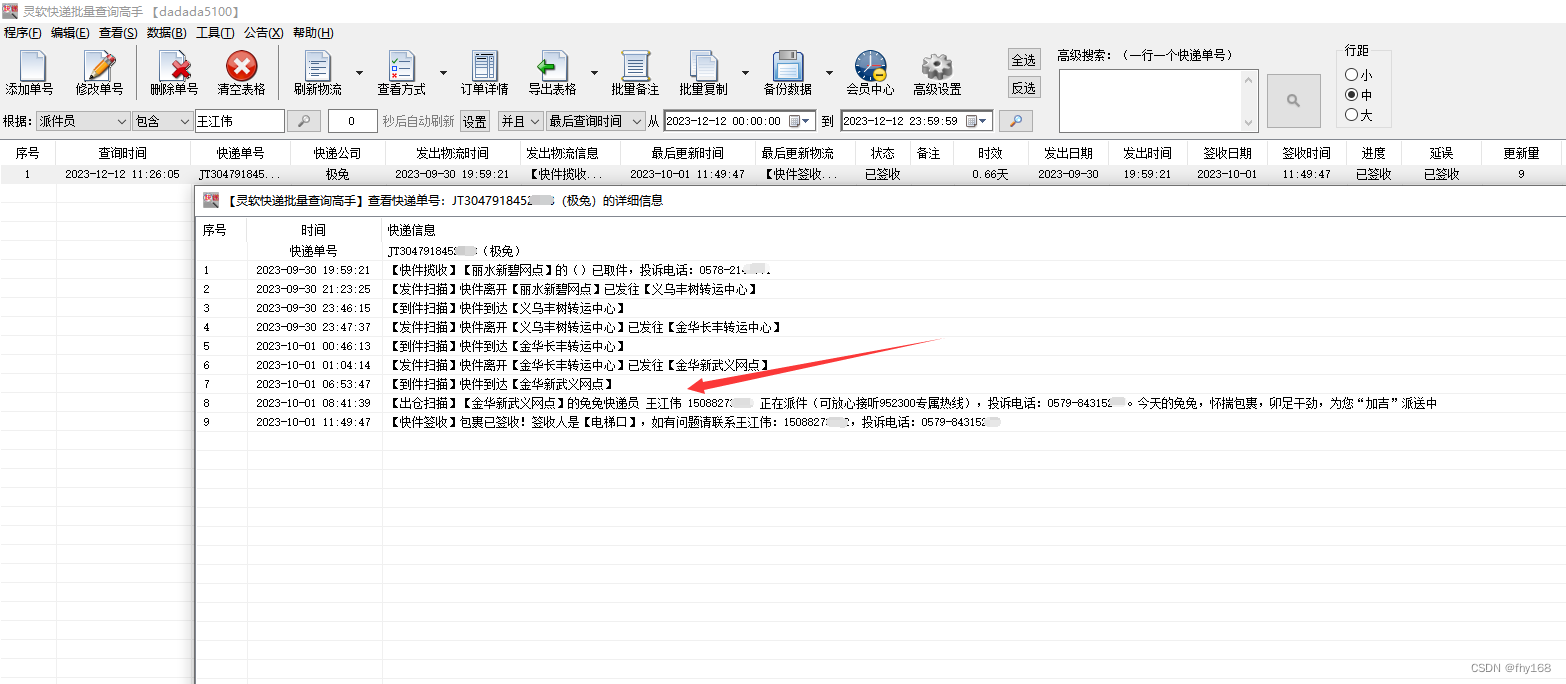
步骤6:这样,派件员为“王江伟”的极兔速递单号就筛选出来了,如图所示
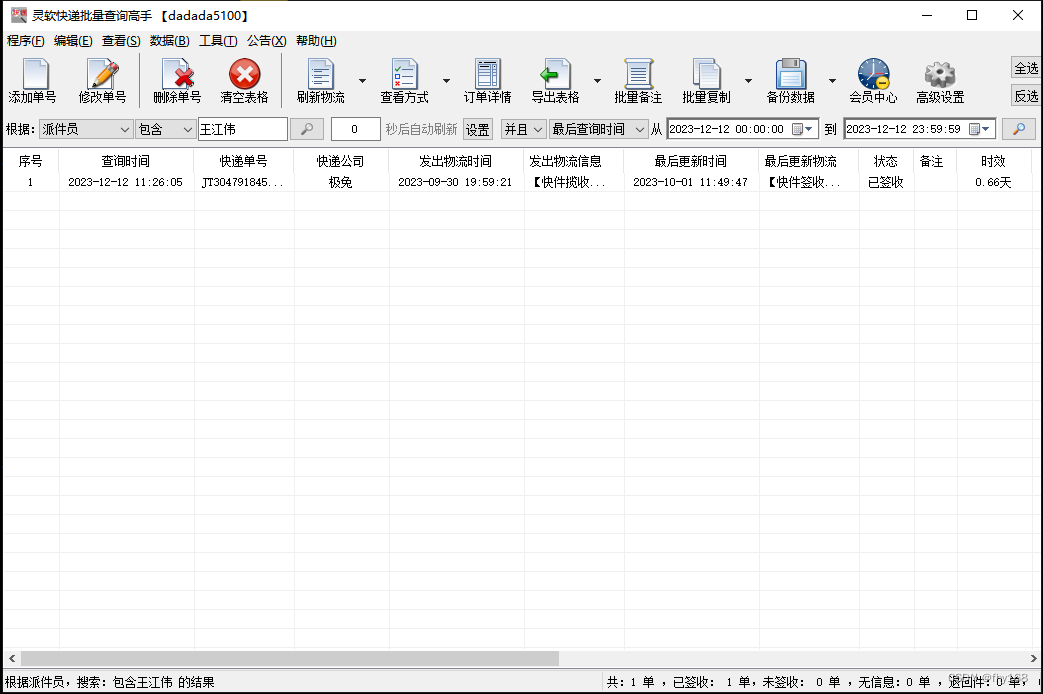
步骤7:双击这一行,查看该极兔速递单号的详细物流信息,可以看到该单的派件员确实是“王江伟”