做网站大作业的心得体会在百度上怎么注册网站
目录
- Hi3798MV200 恩兔N2 NS-1 (一): 设备介绍和刷机说明
- Hi3798MV200 恩兔N2 NS-1 (二): HiNAS海纳思使用和修改
- Hi3798MV200 恩兔N2 NS-1 (三): 制作 Ubuntu rootfs
- Hi3798MV200 恩兔N2 NS-1 (四): 制作 Debian rootfs
介绍
恩兔N2是一个家庭存储的系列产品, NS-1 是其中体积最小的一个型号, 基于海思ARM64 CPU Hi3798MV200. 和其他设备相比, 特点是内置2.5寸SATA盘位, 并且带千兆网口. 这个设备比较小众, 存量很小, 不如斐讯N1, 玩客云那样有广泛的认知度, 甚至在百度和Google上搜索都没什么结果. 生产商恩兔科技这个公司已经停止经营, 其网站 n2yun.com 也已经无法访问. 因为有海思 Hi3798 系列内核的SDK和刷机工具, 使得这个盒子可以注入新的灵魂, 发挥余热, 物尽其用.
本文的内容, 大量参考自以下链接
- 带图说明 https://www.wdmomo.fun:81/doc/index.html?file=003_%E5%90%84%E7%B1%BB%E7%9F%BF%E6%B8%A3/013_%E6%81%A9%E5%85%94NS-1
- 刷机说明 https://github.com/xiayang0521/n2ns-1/
- HiNAS https://www.ecoo.top/hitool.html
实物图
包装
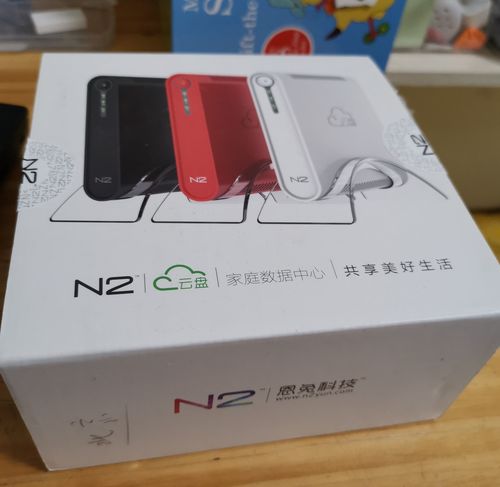

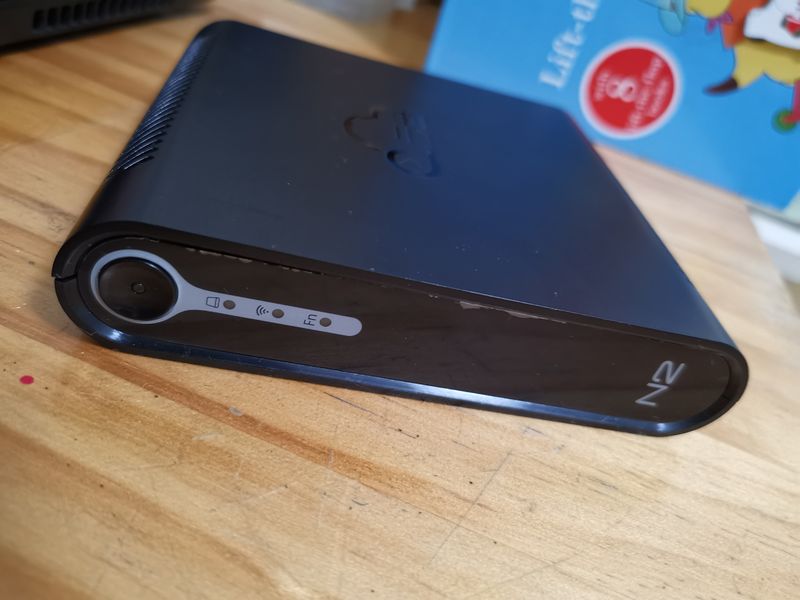
正面
正面是一个带指示灯的按钮, 和三个指示灯. 这四个指示灯都是红绿双色, 可以用红绿橙三色显示状态
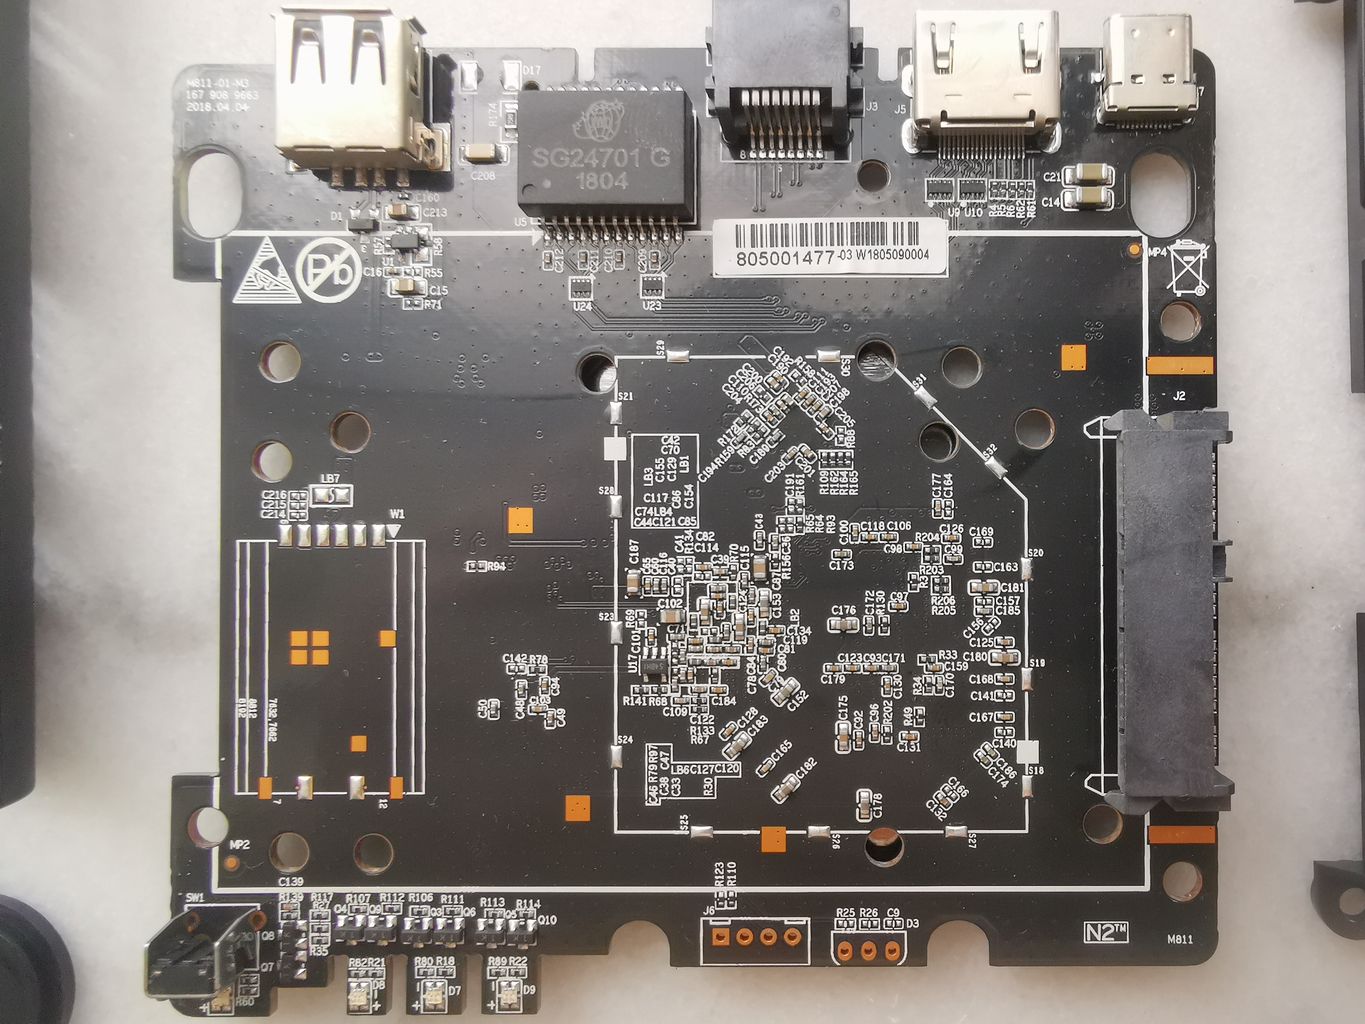
背面
背面包含一个用于供电的 USB Type-C 口, 一个 HDMI 口, 一个千兆网口, 一个USB口和一个SD Card卡槽.

内部
螺丝在包装的塑料袋里, 盒子默认没上螺丝, 用指甲沿两边可以轻松撬开. 内部可以看到一个标准的2.5寸SATA盘位. 这个高度可以放7mm和9mm厚度的硬盘, 不确定是否能放更厚的15mm厚盘.

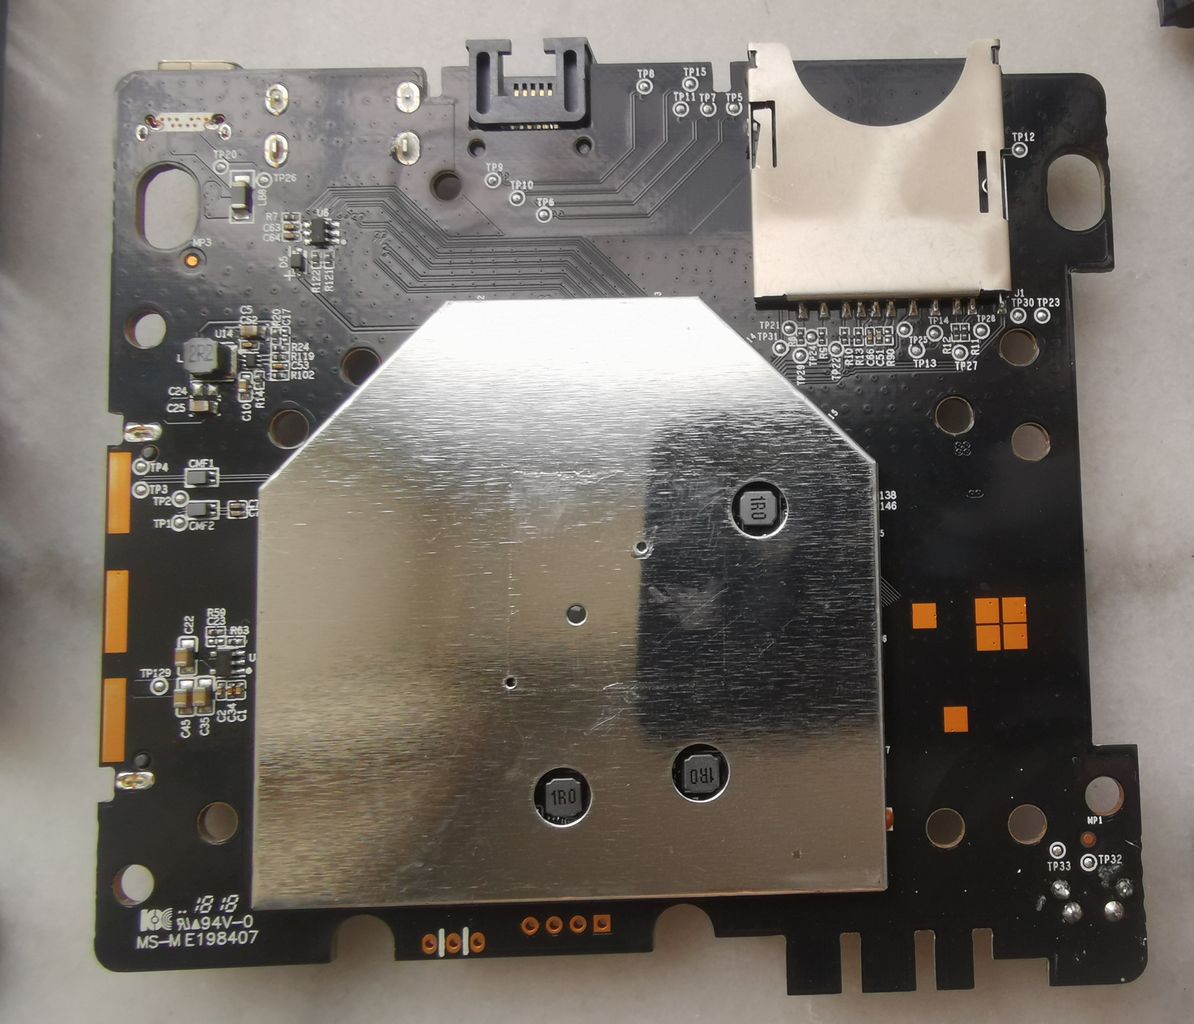
PCB特写
正面和背面
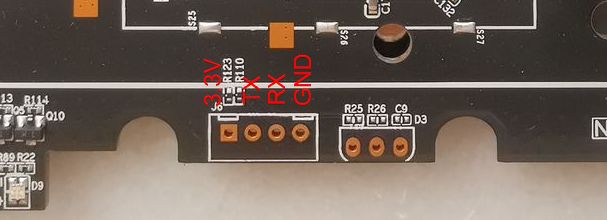
TTL 接口
硬件配置
| Part | Specs | Notes |
|---|---|---|
| CPU | Hi3798MV200 | 四核A53, T450 GPU, 详细型号为 Hi3798MRBCV2010D000 详细信息 |
| RAM | DDR4 1GB | K4A4G165WE-BCRC * 2, 单颗256M 16b, 最高支持ddr2400 |
| Flash | eMMC 4GB | 东芝THGBMDG5D1LBAIT |
| Ethernet | 10/100/1000M * 1 | Realtek RTL8211 |
| USB 2.0 | USB 2.0 * 1 | |
| HDMI | HDMI 2.0 * 1 | |
| HDD | SATA 3.0 * 1 | 2.5 Inch |
| Power Supply | DC 5V 2A | USB-TypeC |
| Other Interfaces | SD Card Reader * 1 |
刷机前的准备工作
硬件部分
- 一台正常工作的, 运行Win10的电脑
- 网线, 用于连接 N2NS1 到交换机或路由器
- 用于USB转串口, USB2TTL的串口模块, 常见的 CH340 模块即可
软件部分
软件部分主要是刷机工具和固件
刷机工具
刷机工具是基于 Eclipse 框架开发的, Windows版下载地址列表
- https://oss.histb.com/HiTool-windows.7z
- http://xz.w10a.com/small/HiTool.7z
- https://dl.ecoo.top/HiTool-soft/HiTool-windows.7z
- https://www.xitongzhijia.net/soft/211748.html
- http://www.hihope.org/en/download/download.aspx?mtt=36 需要注册
Linux的版本比较旧, 未尝试使用
- https://oss.histb.com/hitool_linux.tar.gz
- https://dl.ecoo.top/HiTool-soft/hitool_linux.tar.gz
固件
常见固件的下载
- HiNAS https://dl.ecoo.top/
这是一个功能比较完整的集成系统, 内核4.4.35, 选择恩兔N2 NS1定制的 TTL-hi3798mv200-202307-64-n2ns1.zip - Debian https://pan.baidu.com/s/1Dx58Zc43P3b3cx3tnhLlmw?pwd=9qte
这是我基于4.4.35内核做的Debian10系统, 比较干净的版本, 未安装各种服务软件 - 合集 https://github.com/xiayang0521/n2ns-1/releases
这里包含了稍息版的 Debian 10, 以及 Centos7 等系统的固件
备份和刷机
海思烧录的基本原理(摘抄自帮助手册)
HiBurn工具在开始烧写后,
- 首先与bootrom进行交互, 工具将 DDR 参数传送到传到bootrom, 即为uboot下载阶段5%处, 然后初始化DDR
- 把uboot传输到DDR中, uboot下载阶段100%处表示传输完毕
- 从DDR启动uboot
- uboot启动完成后, 工具开始与uboot进行交互, 发送烧写命令, 将DDR中的uboot烧写到Flash对应地址中
uboot部分是通过TTL传输, 其他镜像分区烧写, 如kernel, rootfs等分区, 工具默认采用网口传输的方式, 客户可选择裸烧和非裸烧两种方式进行烧写
- 裸烧即为在按分区烧写或按Emmc烧写中勾选uboot进行烧写,此时uboot会被烧写到Flash中
- 非裸烧即为不勾选uboot, 仅勾选其他分区进行烧写, 此时需要保证当前单板上已经存在uboot, 烧写时工具会启动uboot, 与其交互, 通过向uboot发送TFTP命令与Write命令, 完成烧写.
准备工作
准备 TTL2USB, 排针和网线, 主板上的四孔接口为 TTL, 接口定义参考前面的图.
方孔为VCC不连接, 工作时测得电压为3.3V, 因此切勿用5V的电压连接, 平时最好不连接. USB转串口模块连接电脑和盒子, USB转串口模块的 RX 接盒子的 TX, TX 接盒子的 RX.
本机(上位机)打开 HiTool, 芯片选择 Hi3798MV200, 点击运行 HiBurn, 点击刷新, 本机会自动识别IP和存在的串口, 将串口修改为USB2TTL所在的串口, 盒子(下位机)的IP和本机IP要在同一网段, 例如本机为 192.168.9.123, 板子的IP就可以设为 192.168.9.100, 不要和网段中其它机器冲突即可. 传输方式选择网口.
MAC 地址可以自行设置, 软件将根据设置在刷机过程中使用该 MAC 地址作为板端 MAC
备份
准备分区表
盒子先上电启动一次, 通过串口 TTL 软件看启动日志, 或者在命令行中查看dmesg, 可以得到当前的分区信息, 其格式为
blkdevparts=mmcblk0:2M(fastboot),1M(bootargs),4M(deviceinfo),6M(stbinfo),8M(baseparam),20M(logo),8M(pqparam),40M(private),10M(privatebak),80M(factory),40M(trustedcore_linux),80M(kernel0),80M(kernel1),150M(root0),150M(root1),300M(roothome),-(userdata)
根据上述信息在分区部分逐个添加分区, 最后选择保存分区表.
除了大小, 分区类型在首次备份可以全部选择 none, 也就是以 raw 方式备份, 备份完成后用 binwalk 等工具测试分区到底是 raw 还是 ext4, squash. 除了 roothome 和 userdata, 其它全是raw, 也就是none. 都使用raw类型对备份无影响.
执行备份
分区表选择刚才设置保存的路径, 然后逐个选择文件路径(备份的目标文件名, 主机上目前没有)
programmer 文件为刷机模式使用的临时 fastboot, 可以从别的固件提取, 也可以通过 TFTP 手动备份, 如果留空则使用 eMMC 内置的, 这种情况要求 eMMC 中有 UBOOT, 否则备份失败.
选择上载, 按照提示给盒子上电, 备份需要大约20分钟.
刷机
准备分区表和刷机文件
- 解压需要刷机的固件
- 运行 HiTool, 在启动对话框选择正确的芯片型号, 选择默认的按分区烧录
- 在 partition file 那一行点击浏览, 选择对应的分区表文件. 此时 HiTool 会显示定义好的分区列表, 对应的大小和文件
- 在列表中, 勾选的部分是会被执行操作的, 要备份/擦写/写入哪个部分, 就勾上哪个部分
这里以 Debian 固件下载链接 为例进行说明, 其分区表文件为 partition_debian.xml, 对应的六个分区分别是
- fastboot(UBOOT)
- bootargs(启动参数)
- stock_kernel(recovery内核, 小内核)
- stock_squash(recovery系统, 小系统)
- kernel(64位目标内核)
- rootfs(64位目标系统)
通过 HiTool 写入
点击烧写/Burn按钮后, 根据日志窗口提示断电然后上电, 工具会检测到盒子状态, 自动开始烧录
日志窗口会显示进度, 等待烧写完毕后会自动reset, 时间大概需要五六分钟
Debian系统的使用
- 通过TTL终端软件在串口可以直接登录, 也可以在路由器中查到盒子的IP后, 通过SSH登录.
- 默认用户为 root / root
- 刚刷完的根目录所在分区, 可用空间为0, 登录后执行 local-resize.sh 对分区进行扩容.
通过 Recovery 模式恢复或刷机
在固件的6个分区中, stock_kernel 和 stock_squash 组成了一套可以独立运行的 recovery 系统, 如果要让盒子启动进入 recovery 系统, 只需要修改 bootargs 分区.
在 HiTool 中仅勾选 bootargs, 将对应的文件改为 bootargs_stock 进行烧录, 重启后就会通过 stock_kernel / stock_squash 启动, 进入 recovery 命令行
进入 recovery 命令行, 登录用户 root, 密码为空
- 选项一: 机器连接串口, 通过串口操作
- 选项二: 机器连接网线, 在路由器找到设备IP, telnet连接
以稍息版的 Debian 刷机包为例说明如何写入系统.
-
将 stretch.tar.bz2 和 bootargs2 文件放入U盘根目录, 插上盒子的USB口.
-
执行以下命令 开启U盘供电
echo 33 > /sys/class/gpio/export
echo out > /sys/class/gpio/gpio33/direction
echo 1 > /sys/class/gpio/gpio33/value
命令行会输出识别到的 usb storage 设备
# usb-storage 1-1:1.0: USB Mass Storage device detected
scsi host1: usb-storage 1-1:1.0
scsi 1:0:0:0: Direct-Access     Generic  Flash Disk       8.07 PQ: 0 ANSI: 4
sd 1:0:0:0: [sda] 15974400 512-byte logical blocks: (8.18 GB/7.62 GiB)
sd 1:0:0:0: [sda] Write Protect is off
sd 1:0:0:0: [sda] Write cache: disabled, read cache: enabled, doesn't support DPO or FUA sda:
sd 1:0:0:0: [sda] Attached SCSI removable disk
udisk1110 -> /dev/sda
-
用 blkid 能看到U盘对应的分区, 根据U盘分区方式的不同可能是 /dev/sda 也可能是 /dev/sda1
-
挂载U盘到 /mnt/usb1
mount /dev/sda /mnt/usb1
# 或者
mount /dev/sda1 /mnt/usb1
这时候ls /mnt/usb1要能看到 stretch.tar.bz2 和 bootargs2 这两个文件
- /dev/mmcblk0p6 是用于放置新系统的目标分区, 先格式化
mkfs.ext4 /dev/mmcblk0p6
然后挂载到 /tmp/mmc, 如果提示couldn't mount as ext3 due to feature incompatibilities, 可以忽略
mkdir /tmp/mmc
mount /dev/mmcblk0p6 /tmp/mmc
- 解压 Debian 到 /tmp/mmc, 如果要看详细输出, 加上 v 参数
tar xjpf /mnt/usb1/stretch.tar.bz2 -C /tmp/mmc
注意结束时的输出, 如果最后提示一个 magic 写入错误, 可以忽略, 如果是显示其它类型的错误, 要检查一下, 是否U盘文件损坏
- 用 bootargs2 覆盖当前的 bootargs
dd if=/mnt/usb1/bootargs2 of=/dev/mmcblk0p2
这一步用于改变启动参数, 重启后将从 /dev/mmcblk0p5 (64bit kernel) 启动.
附录
GPIO 操作
通过GPIO操作LED
# 打开
echo 255 > /sys/class/leds/green:fn/brightness
# 关闭
echo 0 > /sys/class/leds/green:fn/brightness
触发, 如闪烁、管理mmc读写等. 通过cat命令可以看到 LED 支持的触发方式, 通过echo回写相应的字符串可以实现 LED 的自动触发, 如heartbeat代表闪烁, mmc0 代表 mmc0 的读写触发 LED 等等
env 记录
正常启动的 bootargs 参数
root@n2ns1:~# fw_printenv
bootdelay=1
baudrate=115200
bootfile="uImage"
ethaddr=C6:04:53:66:0E:36
filesize=3702000
fileaddr=1000000
netmask=255.255.255.0
ipaddr=192.168.1.10
serverip=192.168.1.254
bootargs_stock=mem=1G mmz=ddr,0,0,60M vmalloc=500M console=ttyAMA0,115200 initrd=0x11000000,0x4600000 root=/dev/ram blkdevparts=mmcblk0:1M(fastboot),1M(bootargs),10M(stock_kernel),60M(stock_squash),32M(kernel),-(rootfs)
bootargs_debian=mem=1G mmz=ddr,0,0,120M console=ttyAMA0,115200 root=/dev/mmcblk0p6 rw blkdevparts=mmcblk0:1M(fastboot),1M(bootargs),10M(stock_kernel),60M(stock_squash),32M(kernel),-(rootfs)
bootargs_512M=mem=512M mmz=ddr,0,0,256M
bootargs_1G=mem=1G mmz=ddr,0,0,380M
bootargs_2G=mem=2G mmz=ddr,0,0,600M
ethact=up
bootcmd_debian=mmc read 0 0x10000000 0x24000 0x10000;setenv bootargs ${bootargs_debian};bootm 0x10000000
bootcmd_stock=mmc read 0 0x10000000 0x1000 0x5000;mmc read 0 0x11000000 0x6000 0x1e000;setenv bootargs ${bootargs_stock};bootm 10000000
stdin=serial
stdout=serial
stderr=serial
ver=Fastboot 3.3.0 (htpc@htpc4105) (Dec 17 2021 - 11:19:34)
bootcmd=mmc read 0 0x10000000 0x24000 0x10000;setenv bootargs ${bootargs_debian};bootm 0x10000000
recovery 环境的 env 带引导的命令和内核参数
# printenv
USER=root
LD_LIBRARY_PATH=/lib:/usr/local/lib:/usr/lib:/usr/share/bluetooth/lib:/hybroad/lib
SHLVL=1
TERMINFO=/usr/share/terminfo
HOME=/root
LOGNAME=root
TERM=vt100
PATH=/hybroad/bin:/usr/local/bin:/usr/local/sbin:/usr/bin:/usr/sbin:/bin:/sbin
SHELL=/bin/sh
PWD=/root