深圳网站设计公司哪个好seo是什么缩写
一、Error running ‘Tomcat 8.5.29’ Address localhost:1099 is already in use


原因:端口1099被占用了。
二、解决
2.1 解决方法一-结束该端口1099占用
//1-查看端口占用,根据端口号1099,获取PID(进程ID)
netstat -ano | findstr "端口号"//查看PID对应的进程
tasklist | findstr "进程ID"//2-根据PID结束进程
taskkill /F /PID PID
或者
taskkill -f -pid PID 具体命令:
//1-查看端口占用,根据端口号1099,获取PID(进程ID)netstat -ano | findstr "1099"//2-根据PID结束进程(这里执行上面netstat命令获得的PID是13080)
taskkill /F /PID 13080
截图:

2.2 解决方法二-修改端口号1099为其他端口

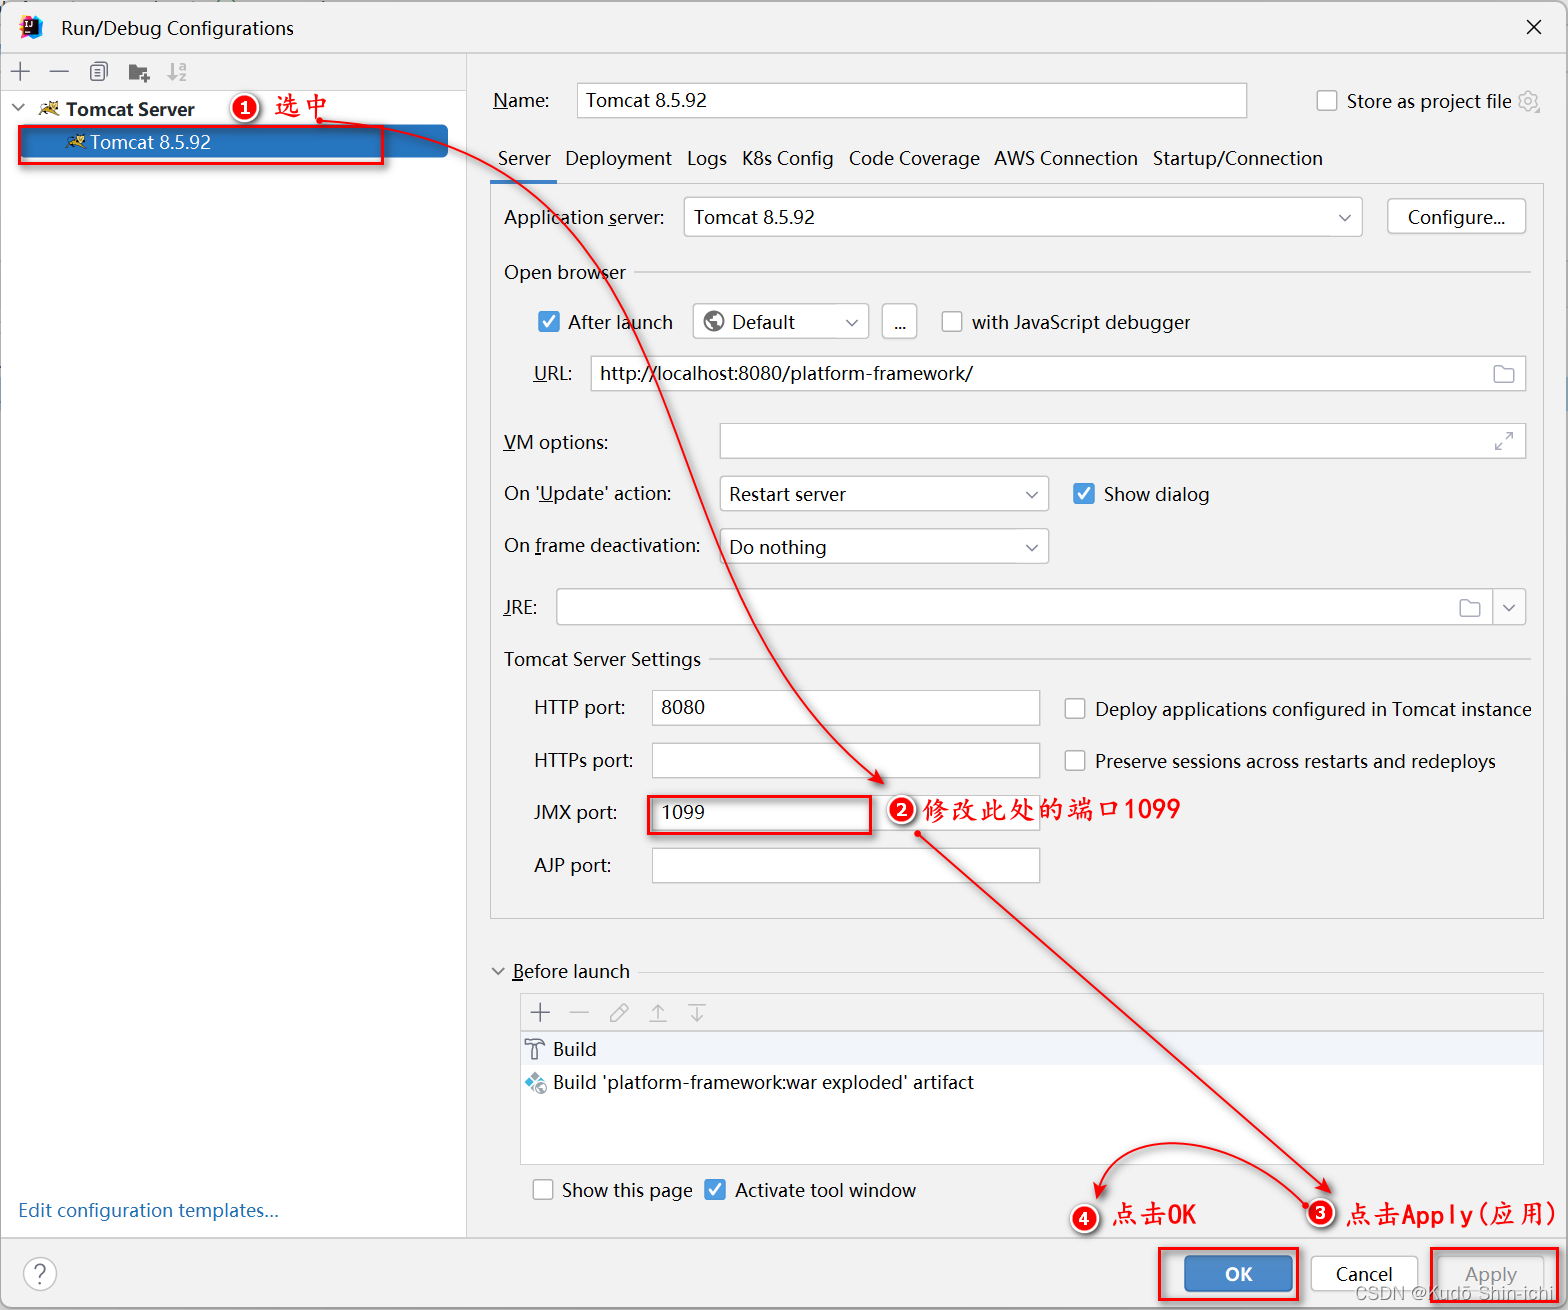
使用方法一或者方法二解决问题后,再次启动Tomcat,便不会再报此端口占用错误。
三、linux下查找和关闭进程
//1-查看端口占用获取PID(进程ID)
ps -aux | grep  进程名//2-根据PID结束进程
kill -9  PID