设计师常备设计网站大全手机网站制作
目录
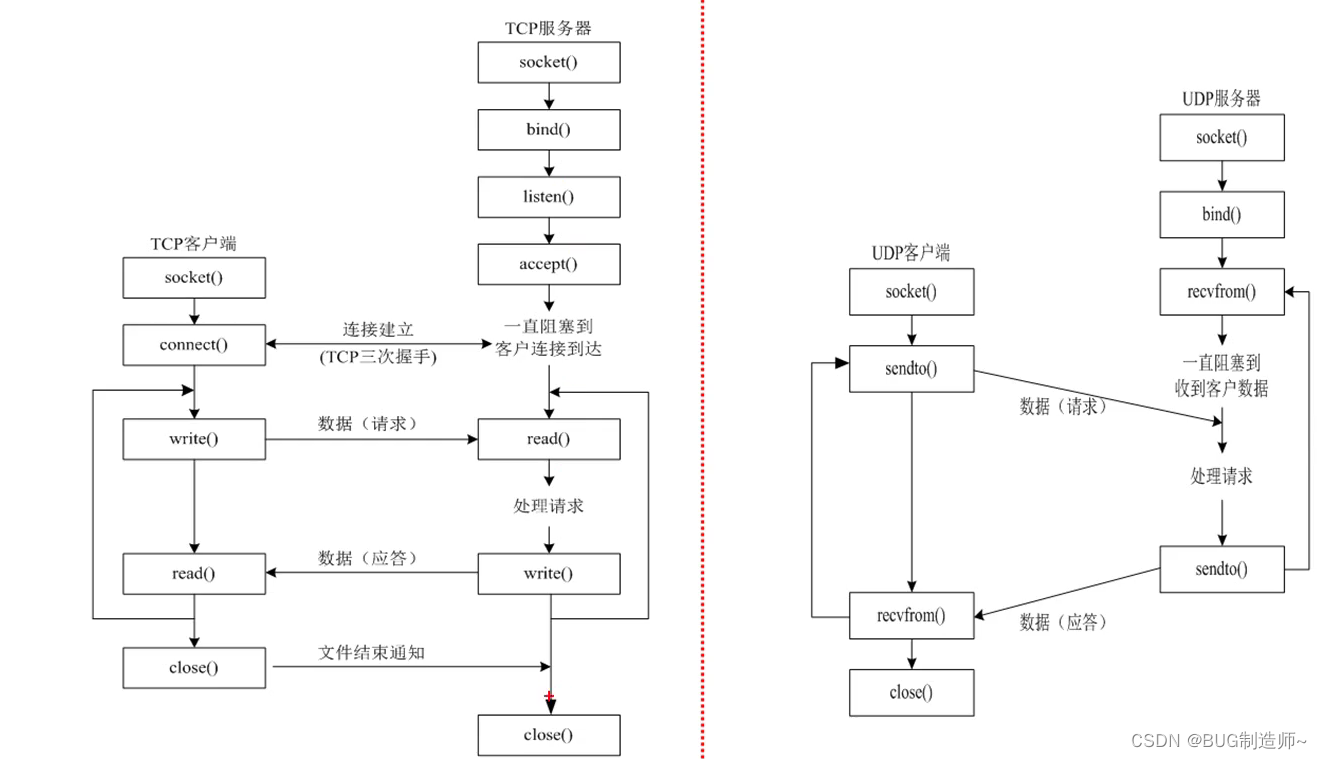
一.TCP客户端API
1.创建套接字
2.connect连接服务器编辑
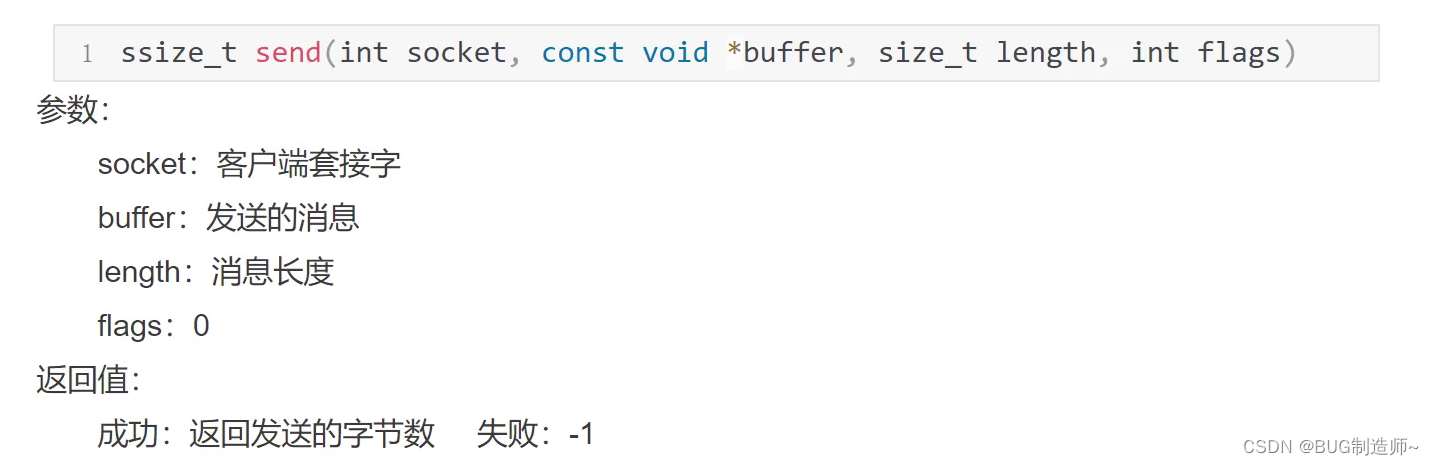
3.send发送信息
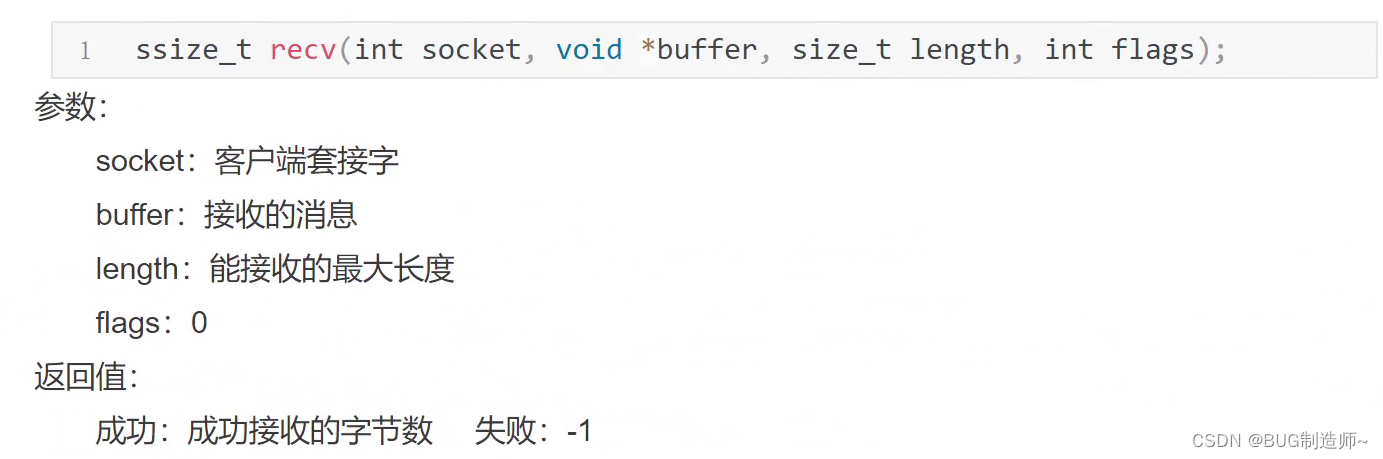
4.recv接受信息
5.close
二.TCP服务器API
1.socket创建tcp套接字(监听套接字)
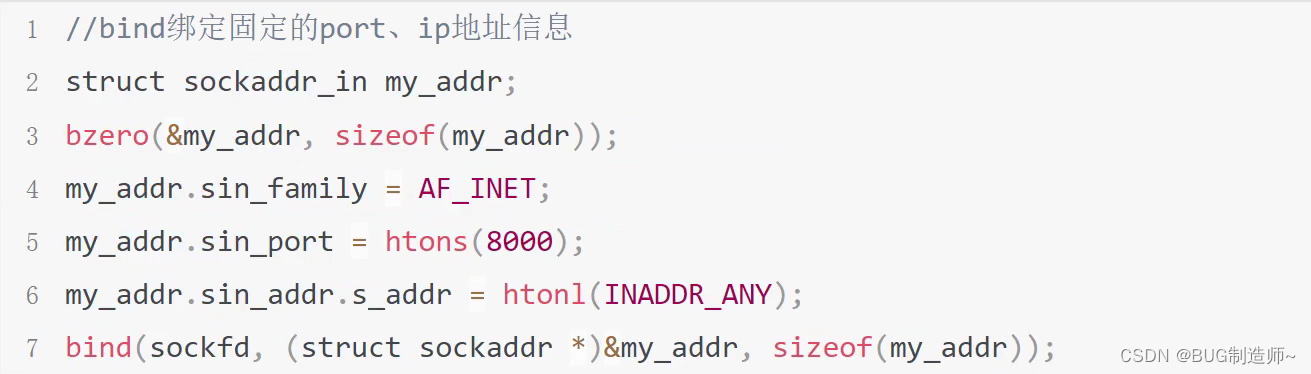
2.bind给服务器套接字绑定port,ip地址信息
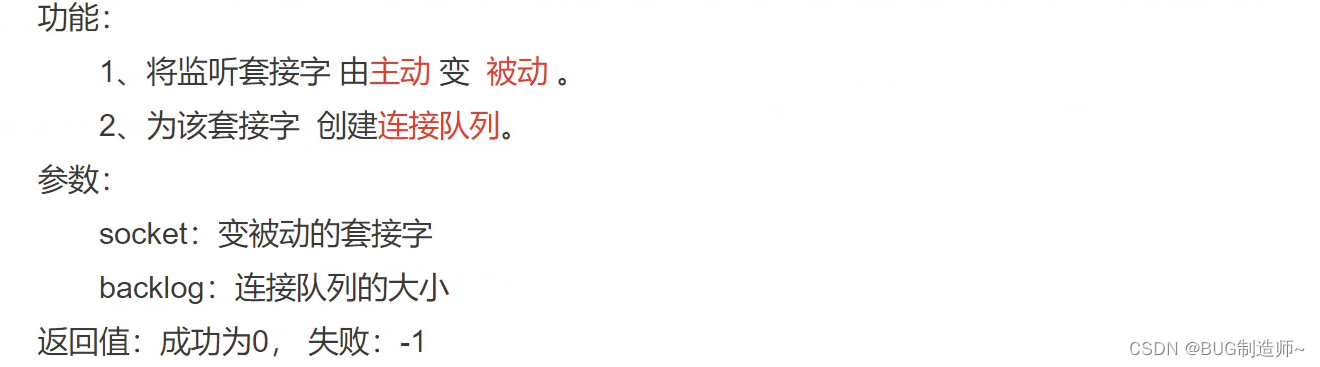
3.listen监听并创建连接队列
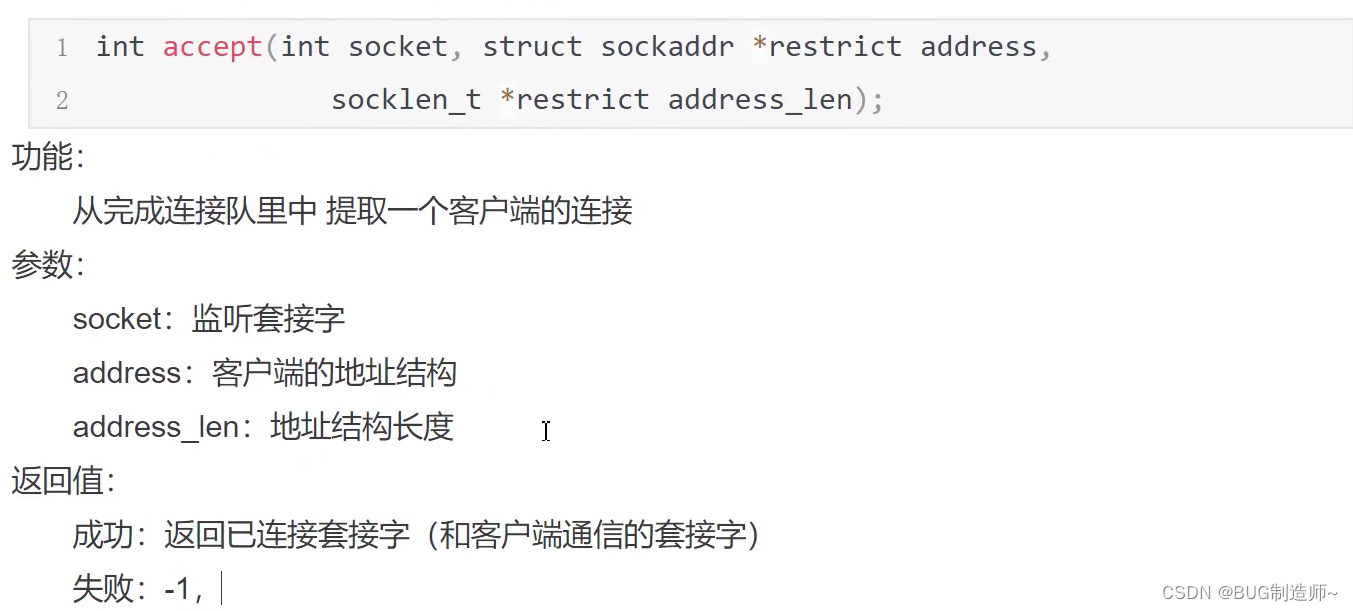
4.accept提取客户端的连接
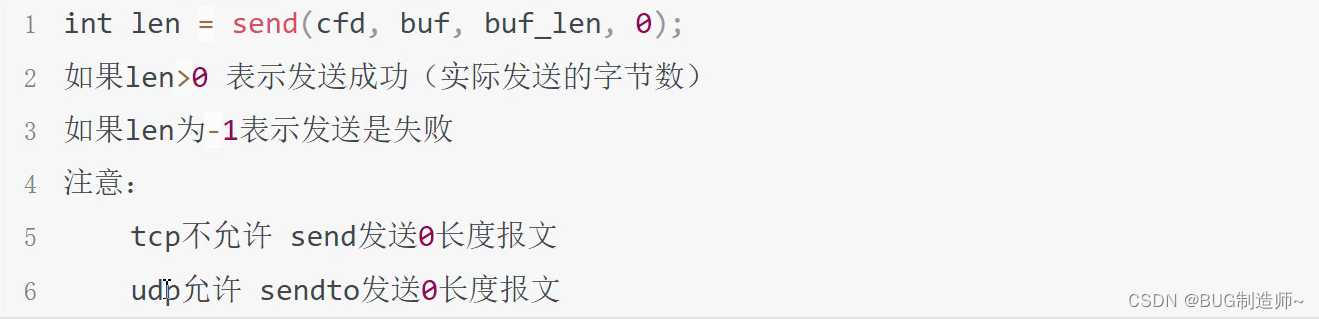
5.send,recv
编辑
6.close
实例:基于TCP客户端与服务器的实现与代码联调
一.TCP客户端API
1.创建套接字

2.connect连接服务器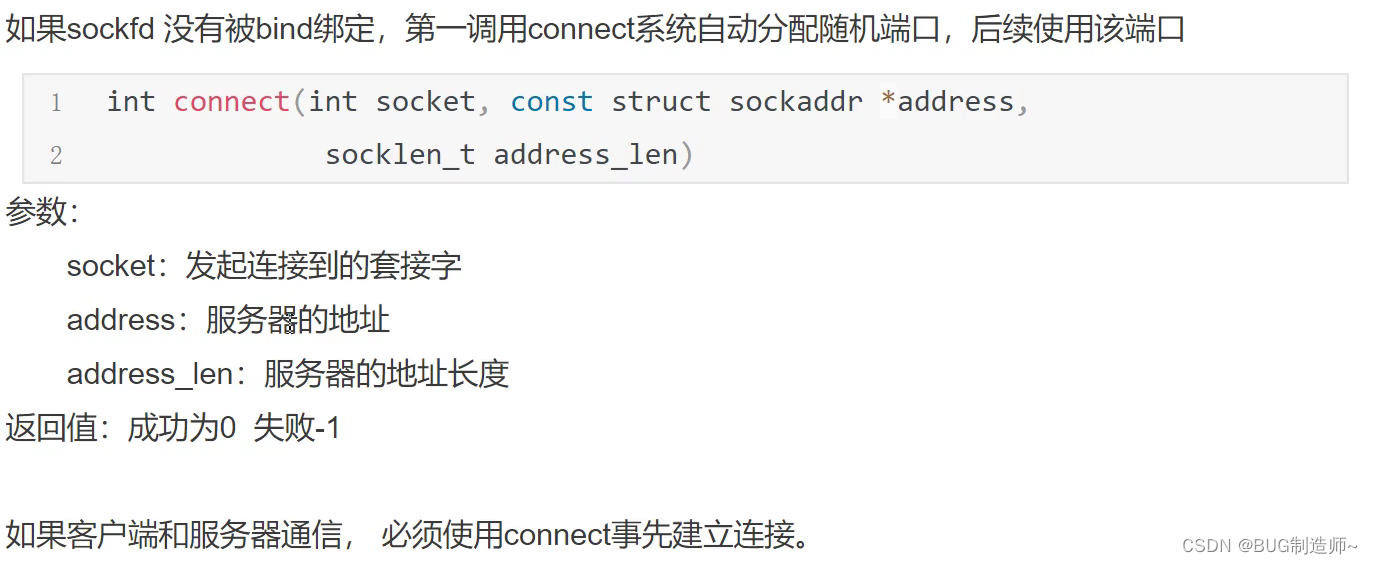
3.send发送信息
4.recv接受信息
5.close

二.TCP服务器API
1.socket创建tcp套接字(监听套接字)

2.bind给服务器套接字绑定port,ip地址信息
3.listen监听并创建连接队列

4.accept提取客户端的连接

5.send,recv

6.close
close(套接字)会导致对方recv收到0长度报文
实例:基于TCP客户端与服务器的实现与代码联调
#include <cstdio>
#include<iostream>
#include<string.h>     //memset
#include<arpa/inet.h>  //htos
#include<sys/socket.h>  //socket
#include<netinet/in.h> //struct sockaddr
#include<unistd.h>  //close
#include<sys/wait.h>void ser() //服务端
{//第一步建立套接字int ser_sk = socket(PF_INET, SOCK_STREAM, 0); //第二步建立地址信息,并用bind进行绑定struct sockaddr_in ser_add ;				   //建立服务端套接字地址结构memset(&ser_add, 0, sizeof ser_add);          ser_add.sin_family = AF_INET;				   //填写对应的port,ip,协议族ser_add.sin_port = htons(9100);ser_add.sin_addr.s_addr = htonl(INADDR_ANY);   //记得转换为网络字节序bind(ser_sk,(struct sockaddr *)&ser_add,sizeof ser_add);  //绑定IP,port//第三步监听套接字,创建连接队列listen(ser_sk, 5);  //第四步进行accpet连接通信struct sockaddr_in cli_add;socklen_t cli_len = sizeof cli_add;sleep(1);int cli_sk = accept(ser_sk,(struct sockaddr *)&cli_add , &cli_len);  //建立连接,获得通信套接字,和对方套接字信息//接受信息unsigned char buffer[1500] = "";char ip[16] = "";unsigned short port = 0;inet_ntop(AF_INET, &cli_add.sin_addr.s_addr,ip,16); //把32为ip地址转化为字符串port = ntohs(cli_add.sin_port);  //网络字节序转化为主机字节序printf("客户端:%s %d  connnected\n",ip,port);int len = recv(cli_sk, buffer, sizeof buffer , 0);   //接受信息printf("%s\n", buffer);close(ser_sk);
}void cli()    //客户端
{//第一步:建立套接字int cli_sk = socket(PF_INET, SOCK_STREAM, 0);  //建立客户端套接字//第二步建立发送到的地址结构struct sockaddr_in ser_add;		memset(&ser_add, 0, sizeof ser_add);ser_add.sin_family = AF_INET; ser_add.sin_addr.s_addr = inet_addr("127.0.0.1");ser_add.sin_port = htons(9100);//第三步骤建立连接,给客户端分配端口connect(cli_sk, (struct sockaddr*)&ser_add, sizeof ser_add);  //第四步发送信息const char* buffer = "hello world";send(cli_sk, buffer, 11, 0);  close(cli_sk);
}void pra() {pid_t pid = fork();if (pid == 0){sleep(1);//开启客户端cli();}else if(pid > 0){//开启服务端ser();int status = 0;wait(&status);}}int main() {pra();return 0;
}
运行结果:
