搜狗推广效果好吗seo关键词排名优化工具
欢迎来到我的UniApp技术专栏!🎉 在这里,我将与大家分享关于UniApp开发的实用技巧、最佳实践和项目经验。
专栏特色:
📱 跨平台开发一站式解决方案
🚀 从入门到精通的完整学习路径
💡 实战项目经验分享
🔍 常见问题深度解析
无论你是刚接触UniApp的新手,还是有一定经验的开发者,都能在这里找到有价值的内容。我将持续更新最新技术动态和开发技巧,帮助大家提升开发效率,打造高质量的跨平台应用。如果文章对你有帮助,别忘了点赞收藏🌟,也欢迎在评论区留言交流,我会及时回复大家的问题!
让我们一起探索UniApp的无限可能!
目录
一.showToast交互反馈组件的基本用法
二.showToast交互反馈组件的各种属性
1.title(标题)
2.icon(图标)
3.image(图像)
4.mask(是否显示透明蒙层/遮罩层)
5.duration(持续时间)
6.position(弹窗显示的位置)
7.success(接口调用成功的回调函数)
8.fail(接口调用失败的回调函数)
9.complete(接口调用结束的回调函数)
三.hideToast的用法
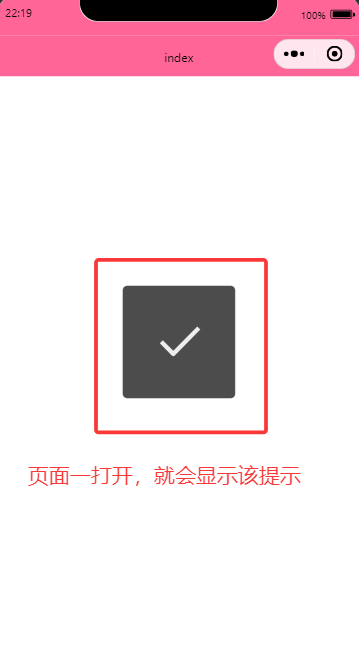
一.showToast交互反馈组件的基本用法
代码
<template><view class=""></view></template><script setup>
//直接通过uni.showToast调用反馈组件
uni.showToast({})
</script><style lang="scss" scoped></style>
运行效果
二.showToast交互反馈组件的各种属性
1.title(标题)
代码
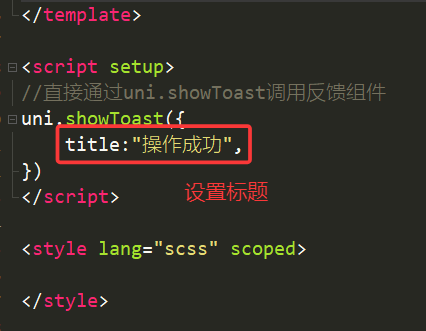
运行效果
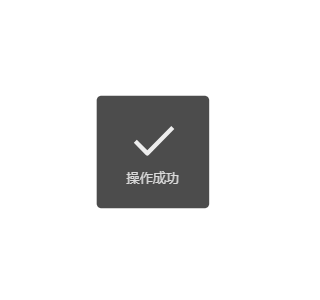
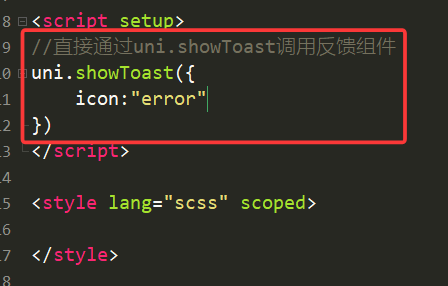
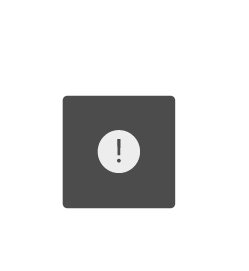
2.icon(图标)
icon图标有如下几种值

举例:icon = “error”时,说明发生错误
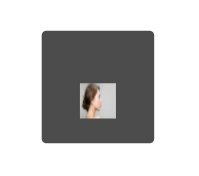
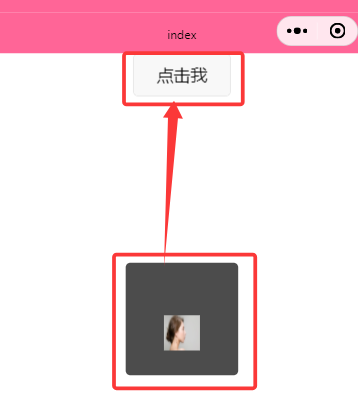
3.image(图像)
image就是用来替代icon的,实现自定义图标。
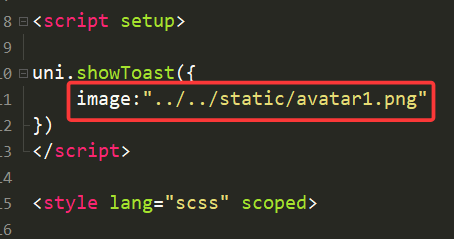
此时我们用了一张图片作为图标,效果如下
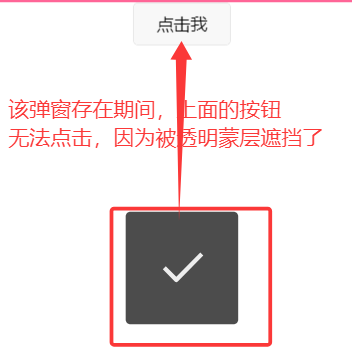
4.mask(是否显示透明蒙层/遮罩层)
①如果mask的值设为false,则弹窗存在期间,可以操作其他元素
②如果mask的值设为true,则弹窗存在期间,不可以操作其他元素(因为其他元素被透明蒙层遮挡住了)
举例

效果
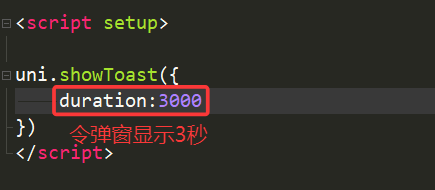
5.duration(持续时间)
默认弹窗持续1500毫秒,我们也可以自己设置持续时间
6.position(弹窗显示的位置)
只有app才能设置此属性。
7.success(接口调用成功的回调函数)
8.fail(接口调用失败的回调函数)
9.complete(接口调用结束的回调函数)
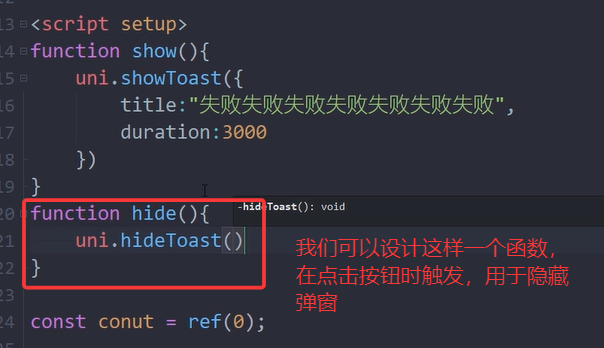
三.hideToast的用法
用来立即关闭showToast
举例
以上就是本篇文章的全部内容,喜欢的话可以留个免费的关注呦~~