app展示网站模板免费下载站长seo工具
文章目录
- 1.简介
- 2.SSH 免密登录配置
- 第一步:点击 Session
- 第二步:选择 SSH
- 第三步:输入服务器地址与用户名
- 第四步:设置会话名称
- 第五步:点击 OK 并输入密码
- 3.密码管理
- 4.小结
- 参考文献
1.简介
MobaXterm 是一个功能强大的终端模拟器和远程访问工具,特别适用于 Windows 操作系统。它集成了多种网络工具和支持多种远程协议,提供了一个统一的界面,简化了对远程服务器和网络设备的管理和访问。
MobaXterm 由总部位于法国图卢兹的软件公司 Mobatek 开发运营。
以下是 MobaXterm 的一些主要特点和功能:
- 终端模拟器: MobaXterm 提供了先进的终端模拟功能,支持多标签页,可以同时连接多个远程主机。
- 远程访问: 支持 SSH、Telnet、RDP、VNC 等常见的远程协议,使用户可以方便地连接到远程服务器和计算机。
- X11 服务器: MobaXterm 集成了 X11 服务器,允许用户在 Windows 上运行图形化的 Linux 应用程序。
- 文件传输: 内置的 SFTP 和 SCP 客户端使得文件在本地系统和远程服务器之间的传输变得简便。
- 网络工具: 集成了一系列网络工具,包括 ping、traceroute、Nmap、FTP 客户端等,方便网络故障排查和管理。
- 会话管理: MobaXterm 允许用户保存和管理远程会话,以便快速连接到常用主机。
- 插件支持: 支持插件系统,用户可以安装和使用各种插件来扩展工具的功能。
- 端口转发: 支持本地和远程端口转发,使得可以安全地访问远程服务。
- 集成的命令: 提供了许多常用的 Linux 命令,可以在 Windows 系统上直接执行。
- 多语言支持: MobaXterm 提供了多语言界面,方便全球用户使用。
2.SSH 免密登录配置
第一步:点击 Session
点击左上角的 Session 按钮,进入会话配置。

第二步:选择 SSH
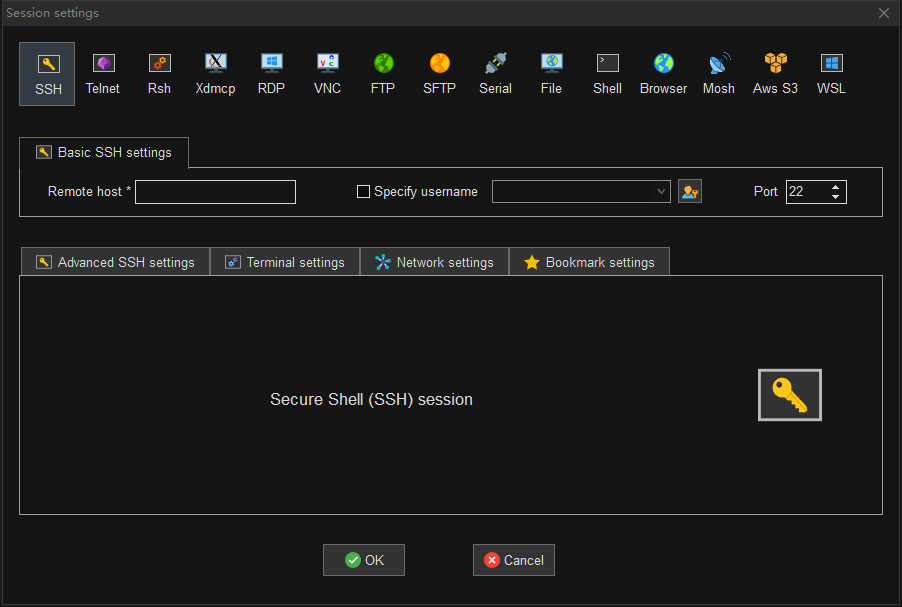
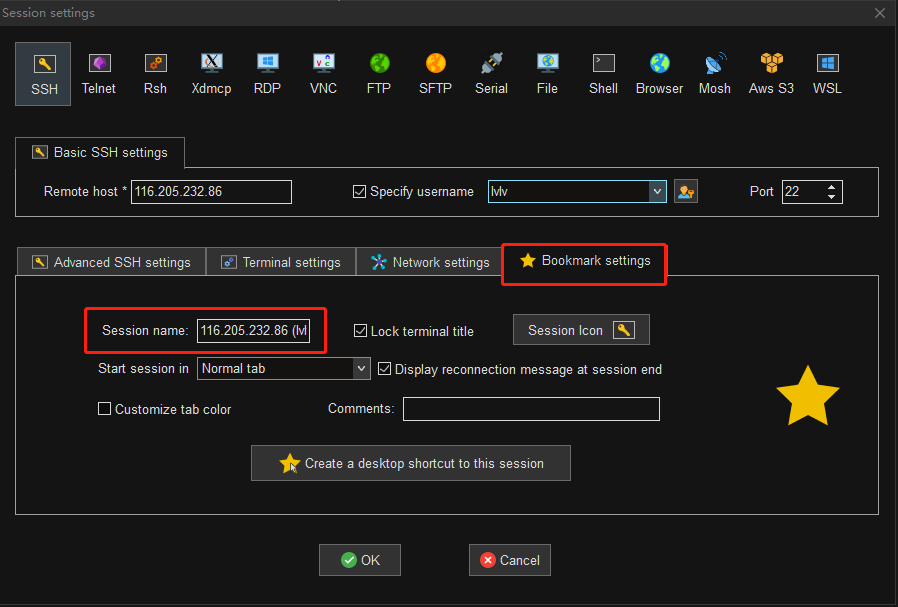
第三步:输入服务器地址与用户名

第四步:设置会话名称
会话名称缺省为 HOST(USERNAME),比如主机为 116.205.232.86,用户名为 lvlv,那么缺省会话名称为 116.205.232.86(lvlv)。
该会话名称将展示在左侧的用户会话栏列表中。
第五步:点击 OK 并输入密码
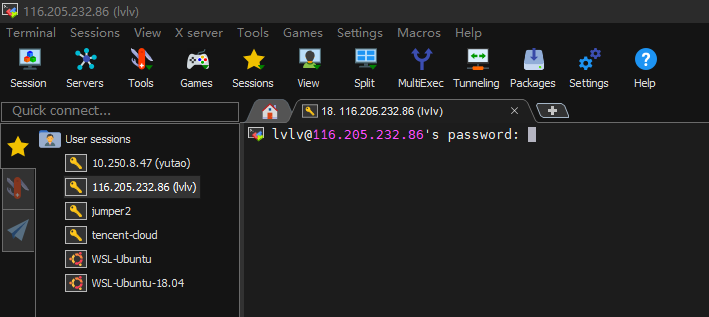
验证通过后,会有弹窗提醒是否保存会话密码。选择 Yes 后,则下次登录时无需再次输入密码。

3.密码管理
上面保存的密码,我们可以手动删除,那么下次再次登录的时候,将需要重新输入。
入口 Settings > Configuration > General > MobaXterm passwords management。
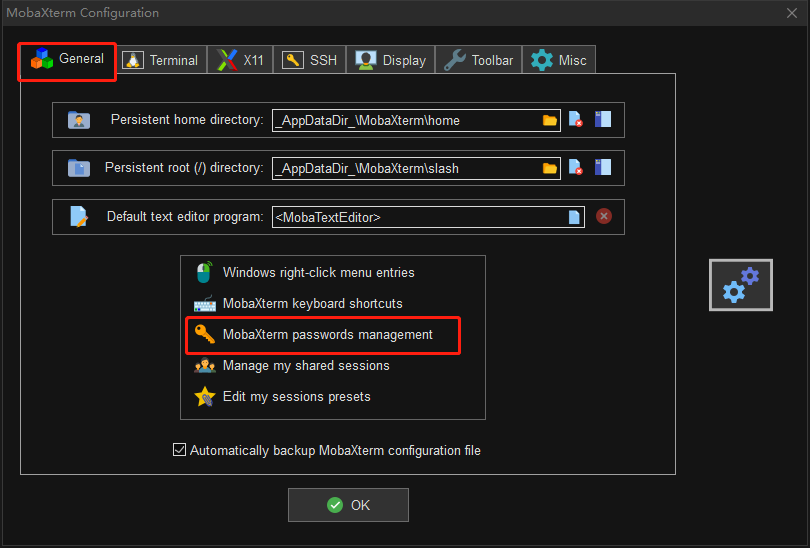
进入 MobaXterm passwords management 可以看到已保存的会话密码。单击选中后可以删除密码,删除后则下次登录需要重新输入密码。
此外可以设置是否保存会话密码,与三个选项 Always,Never 和 Ask。如果选择 Always,则会自动保存会话密码,下次登录时,不需要再次输入密码。

4.小结
MobaXterm 的会话密码不是在会话设置中预先配置,这一点与 XShell 不同。
XShell 是在会话配置时事先设置登录密码,而 MobaXterm 则是在首次登录时输入密码,根据密码管理策略(MobaXterm passwords management),决定是否保存会话密码。如果选择 Always 保存会话密码,则后续登录不再需要重新输入密码,可自动登录。
我之前一直使用 XShell,现在改用 MobaXterm,因为二者在会话密码设置交互方式上的不同,刚开始使用 MobaXterm 非常不习惯,浪费了不少时间在会话配置上。为了避免大家踩坑,特记录一下,希望对大家有帮助。
参考文献
MobaXterm free Xserver and tabbed SSH client for Windows