长春网站开发报价外贸营销网站制作公司
NFS、DHCP的搭建
- 1、nfs服务搭建及测试
- 什么是NFS?
- 环境准备
- 服务端机器安装nfs-utils和rpcbind包
- 启动NFS服务
- 创建/data/NFSdata目录,配置nfs文件
- 启动服务
- 挂载
- 测试在服务端在共享目录下创建文件
- 测试在客户端在共享目录下创建文件
- 2、dhcp服务搭建及测试
- 什么是DHCP?
- 为什么要使用DHCP?
- 总体来看,DHCP带来了如下优势:
- DHCP是怎么工作的?
- 实验.DHCP配置服务器
- 设置服务器
- 在服务端安装DHCP服务
- 新开一台主机测试
- 配置网络文件
1、nfs服务搭建及测试
什么是NFS?
NFS就是Network File System的缩写,它最大的功能就是可以通过网络,让不同的机器、不同的操作系统可以共享彼此的文件。
环境准备
| 服务器 | 服务 | ip |
|---|---|---|
| xcz7 客户端 | yum | 192.168.1.116/24 |
| xcz10 服务端 | nfs | 192.168.1.137/24 |
服务端机器安装nfs-utils和rpcbind包
yum install -y nfs-utils rpcbind
nfs-utils:提供了NFS服务器程序和对应的管理工具
rpcbind:获取nfs服务器端的端口等信息
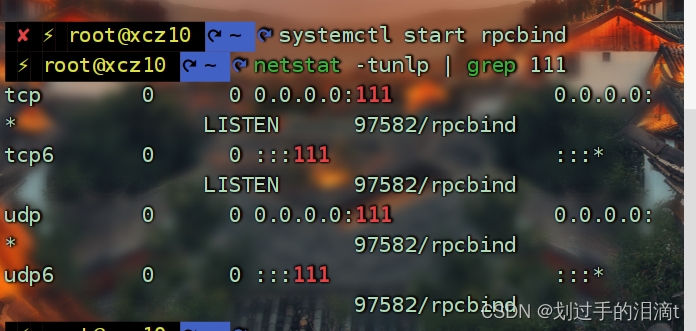
启动NFS服务
 systemctl start rpcbind
netstat -tunlp | grep 111
创建/data/NFSdata目录,配置nfs文件
mkdir -p /data/NFSdata
vim /etc/exports

/data/NFSdata 192.168.10.0/24(rw,sync,no_root_squash)
#/data/NFSdata #表示要共享文件的目录
#192.168.10.0/24 #表示所有允许访问的客户端IP网段,也可以写成指定的ip,只允许当前客户机访问
#(rw,sync) #rw:表示读写权限,
#sync:表示数据同步写入内存硬盘
#async:表示异步
#no_root_squash 本地root权限
启动服务
systemctl start nfs
客户端机器安装nfs-utils包
yum -y install nfs-utils
挂载
systemctl stop firewalld
mount -t nfs 192.168.1.137:/data/NFSdata /NFS
showmount -e 192.168.1.137
#显示以下信息代表成功
Export list for 192.168.1.137:
/data/NFSdata 192.168.1.0/24
测试在服务端在共享目录下创建文件
cd /data/NFSdata
touch c1
测试在客户端在共享目录下创建文件
cd /data/NFSdata
touch c2
ls

2、dhcp服务搭建及测试
什么是DHCP?
动态主机配置协议DHCP(Dynamic Host Configuration Protocol)是一种网络管理协议,用于集中对用户IP地址进行动态管理和配置。
为什么要使用DHCP?
在IP网络中,每个连接Internet的设备都需要分配唯一的IP地址。DHCP使网络管理员能从中心结点监控和分配IP地址。当某台计算机移到网络中的其它位置时,能自动收到新的IP地址。DHCP实现的自动化分配IP地址不仅降低了配置和部署设备的时间,同时也降低了发生配置错误的可能性。另外DHCP服务器可以管理多个网段的配置信息,当某个网段的配置发生变化时,管理员只需要更新DHCP服务器上的相关配置即可,实现了集中化管理。
总体来看,DHCP带来了如下优势:
准确的IP配置:IP地址配置参数必须准确,并且在处理“ 192.168.XXX.XXX”之类的输入时,很容易出错。另外印刷错误通常很难解决,使用DHCP服务器可以最大程度地降低这种风险。
减少IP地址冲突:每个连接的设备都必须有一个IP地址。但是,每个地址只能使用一次,重复的地址将导致无法连接一个或两个设备的冲突。当手动分配地址时,尤其是在存在大量仅定期连接的端点(例如移动设备)时,可能会发生这种情况。DHCP的使用可确保每个地址仅使用一次。
IP地址管理的自动化:如果没有DHCP,网络管理员将需要手动分配和撤消地址。跟踪哪个设备具有什么地址可能是徒劳的,因为几乎无法理解设备何时需要访问网络以及何时需要离开网络。DHCP允许将其自动化和集中化,因此网络专业人员可以从一个位置管理所有位置。
高效的变更管理:DHCP的使用使更改地址,范围或端点变得非常简单。例如,组织可能希望将其IP寻址方案从一个范围更改为另一个范围。DHCP服务器配置有新信息,该信息将传播到新端点。同样,如果升级并更换了网络设备,则不需要网络配置。
DHCP是怎么工作的?
DHCP协议采用UDP作为传输协议,DHCP客户端发送请求消息到DHCP服务器的68号端口,DHCP服务器回应应答消息给DHCP客户端的67号端口。
只有跟DHCP客户端在同一个网段的DHCP服务器才能收到DHCP客户端广播的DHCP DISCOVER报文。当DHCP客户端与DHCP服务器不在同一个网段时,必须部署DHCP中继来转发DHCP客户端和DHCP服务器之间的DHCP报文。在DHCP客户端看来,DHCP中继就像DHCP服务器;在DHCP服务器看来,DHCP中继就像DHCP客户端。
无中继场景时DHCP客户端首次接入网络的工作原理
如下图所示,在没有部署DHCP中继的场景下,首次接入网络DHCP客户端与DHCP服务器的报文交互过程,该过程称为DHCP报文四步交互。
无中继场景时DHCP客户端首次接入网络的报文交互示意图

实验.DHCP配置服务器
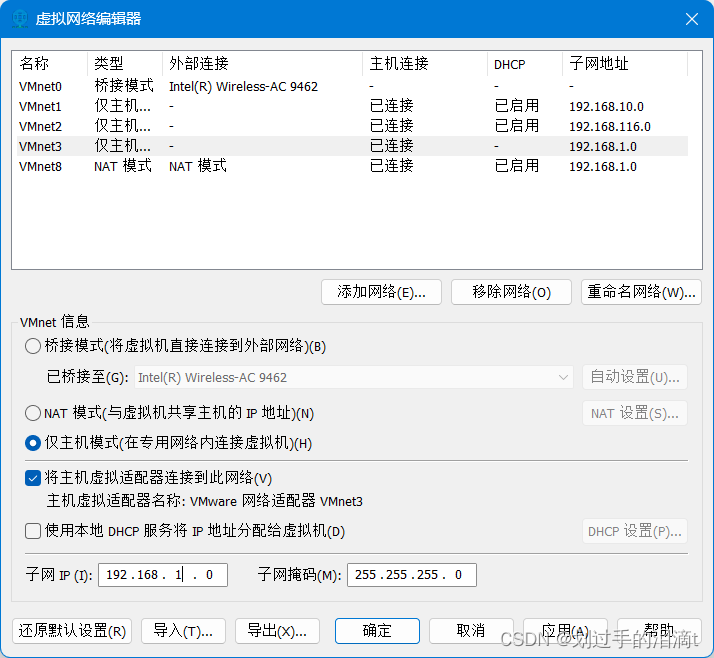
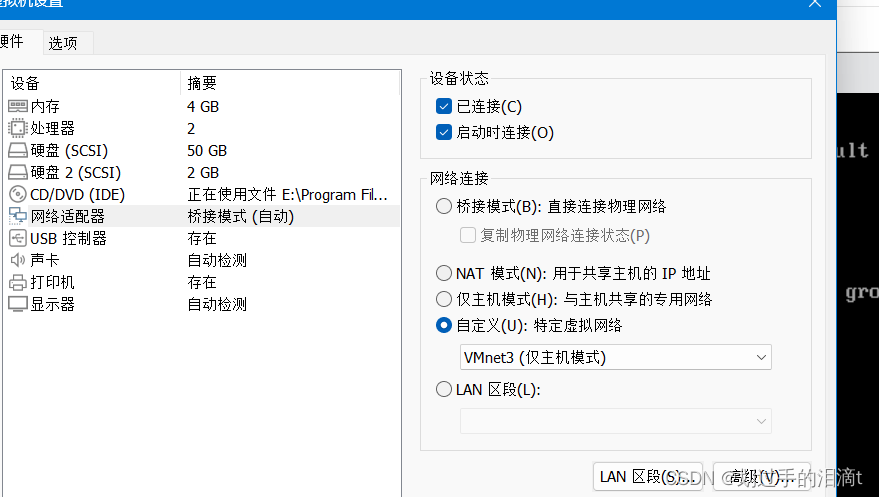
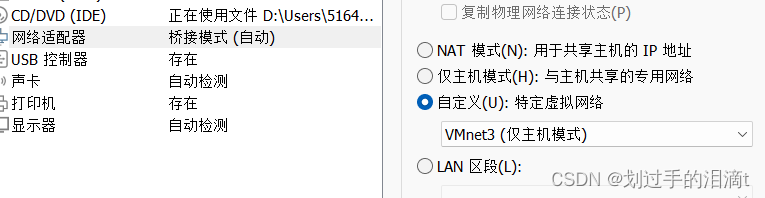
设置服务器
添加本地网络适配器vmnet3
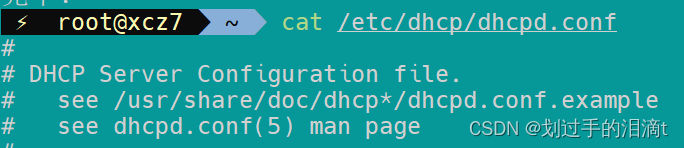
在服务端安装DHCP服务
yum -y install dhcp
cat /etc/dhcp/dhcpd.conf #发现DHCP配置文件模板
配置文件编写
cp /usr/share/doc/dhcp-4.2.5/dhcpd.conf.example /etc/dhcp/dhcpd.conf
echo subnet 192.168.1.0 netmask 255.255.255.0{ \range 192.168.1.10 192.168.1.200;\option routers 192.168.1.2;\}>>/etc/dhcp/dhcpd.confsystemctl restart networksystemctl start dhcpd
新开一台主机测试
配置网络文件

systemctl restart network
ip a

