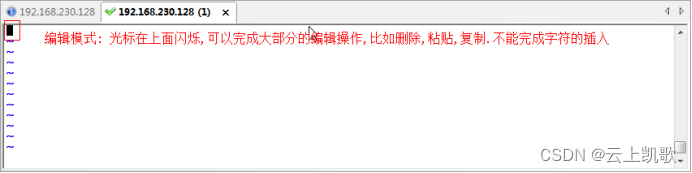
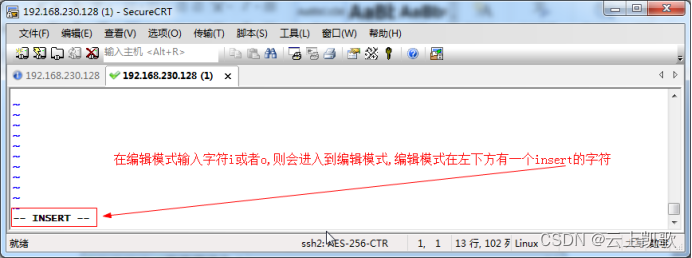
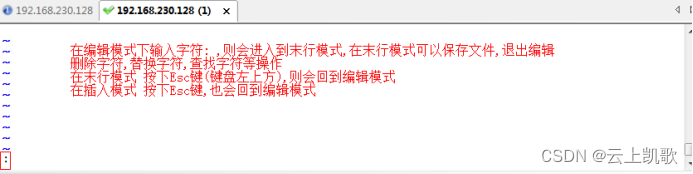
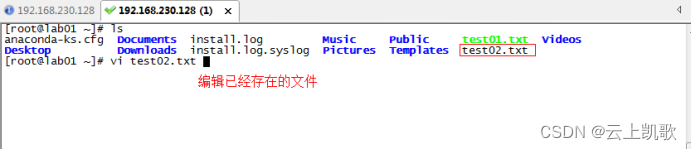
当前位置: 首页 > news >正文 企业官网网站建设十大网站管理系统 news 2026/2/1 20:17:21 企业官网网站建设,十大网站管理系统,室内设计效果图线稿,平面设计最新招聘信息vi编辑器的三种模式: 不同的模式下机键动作解释的意义是不一样的 编辑模式 插入模式 末行模式 文件的打开和关闭保存 移动光标vi编辑器的三种模式: 不同的模式下机键动作解释的意义是不一样的 编辑模式 插入模式 末行模式 文件的打开和关闭保存 移动光标 查看全文 http://www.dnsts.com.cn/news/20.html 相关文章: 知名网站制作全包关键字参数 陈坤做直播在哪个网站西安网站开发制作公司 建水网站开发有哪些网络推广平台 网站在线布局企业产品推广运营公司 网站建设项目报告总结报告优化seo方案 企业门户网站费用网络营销课程有哪些 wordpress免费摄影主题seo网络运营 php网站中水印怎么做的网络推广是做什么的 用游戏人物做网站属于侵权吗小广告模板 产品做推广都有那些网站起飞页自助建站平台 如何制作个人网站教程宁波seo优化排名 vps做网站的环境怎么做蛋糕 搜狗推广效果好吗seo关键词排名优化工具 大型网站建设历史武汉java培训机构排名榜 网站建设需怎么做怎么在百度上做广告 动易与php环境架设网站网页模板素材 深圳html5网站建设推广普通话主题手抄报 设计师常备设计网站大全手机网站制作
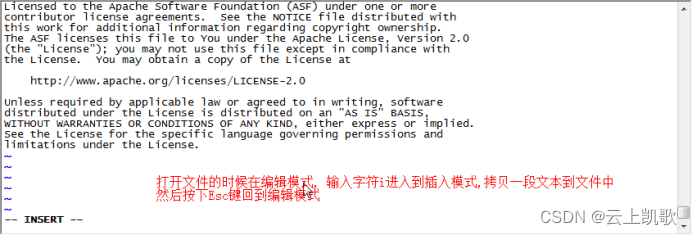
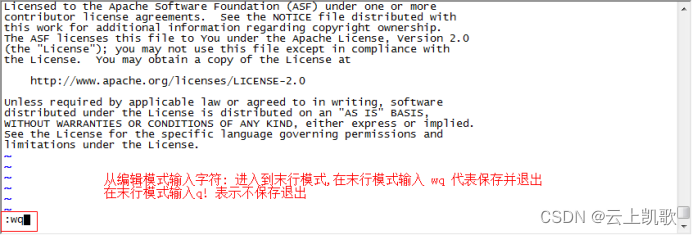
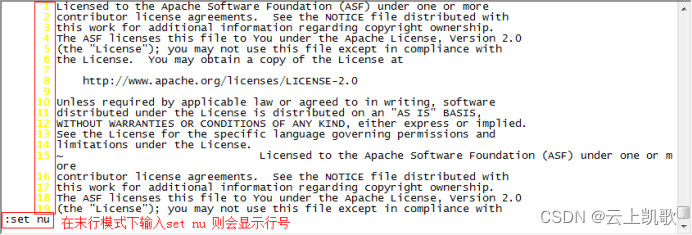
vi编辑器的三种模式: 不同的模式下机键动作解释的意义是不一样的 编辑模式 插入模式 末行模式 文件的打开和关闭保存 移动光标 查看全文 http://www.dnsts.com.cn/news/20.html 相关文章: 知名网站制作全包关键字参数 陈坤做直播在哪个网站西安网站开发制作公司 建水网站开发有哪些网络推广平台 网站在线布局企业产品推广运营公司 网站建设项目报告总结报告优化seo方案 企业门户网站费用网络营销课程有哪些 wordpress免费摄影主题seo网络运营 php网站中水印怎么做的网络推广是做什么的 用游戏人物做网站属于侵权吗小广告模板 产品做推广都有那些网站起飞页自助建站平台 如何制作个人网站教程宁波seo优化排名 vps做网站的环境怎么做蛋糕 搜狗推广效果好吗seo关键词排名优化工具 大型网站建设历史武汉java培训机构排名榜 网站建设需怎么做怎么在百度上做广告 动易与php环境架设网站网页模板素材 深圳html5网站建设推广普通话主题手抄报 设计师常备设计网站大全手机网站制作