平面设计做网站的步骤百度爱企查电话人工服务总部
上一篇:(一)app自动化测试环境搭建(mac+ios+airtest )_airtest环境搭建_要开朗的spookypop的博客-CSDN博客
注:后续都是用IOS设备来介绍自动化测试,安卓就不赘述了。
接上一篇,搭建好自动化测试环境后,就可以开始做自动化测试了。
- AirtestIDE简单介绍
官网介绍AirtestIDE是一个跨平台的UI自动化测试编辑器,适用于游戏和App。

该工具支持基于图像识别的airtest框架和基于ui控件搜索的poco框架,使用airtest+poco可以更好地编写自动化测试全流程。
- 开始你的第一个自动化测试脚本
- 新建脚本,依次点击:文件——新建脚本——.air Aiertest项目(或者点击左上角“+”图标,再点击“.air Aiertest项目”),输入脚本名称,点击保存

2.连接IOS设备
1)手机数据线连接电脑
2)在Xcode点击Product——Test,等待手机屏幕出现Automation Running
3)在AirtestIDE右边“连接ios设备”窗口点击“连接”按钮,直到设备窗口显示你的手机屏幕即为成功
3.录制脚本
示例:演示高铁管家APP搜索火车票功能
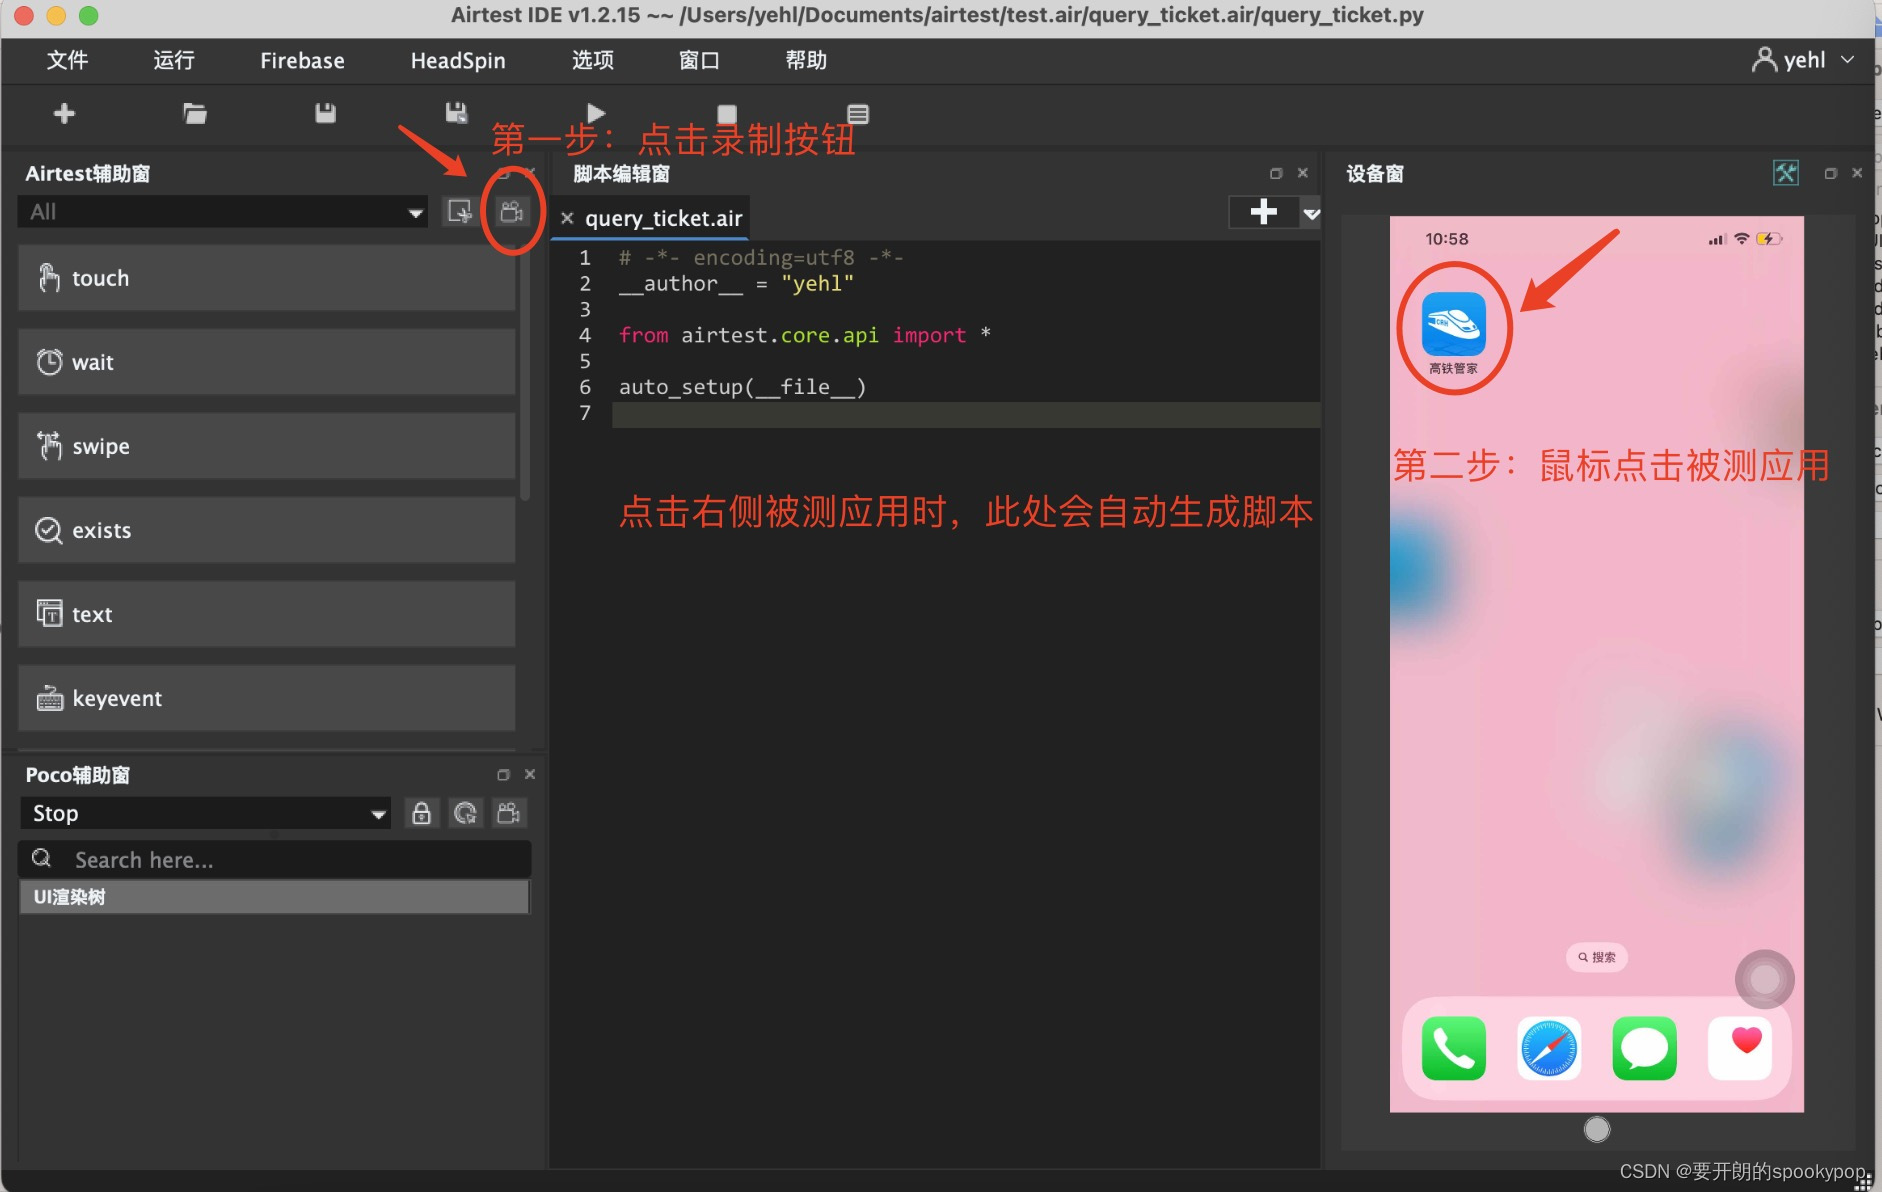
1)在设备窗口点击高铁管家APP,在高铁管家首页点击搜索火车票,脚本录制完成
2)再次点击录制按钮,取消录制
3)杀掉高铁管家APP,手机屏幕恢复在录制前的状态
4)运行刚刚生成的脚本
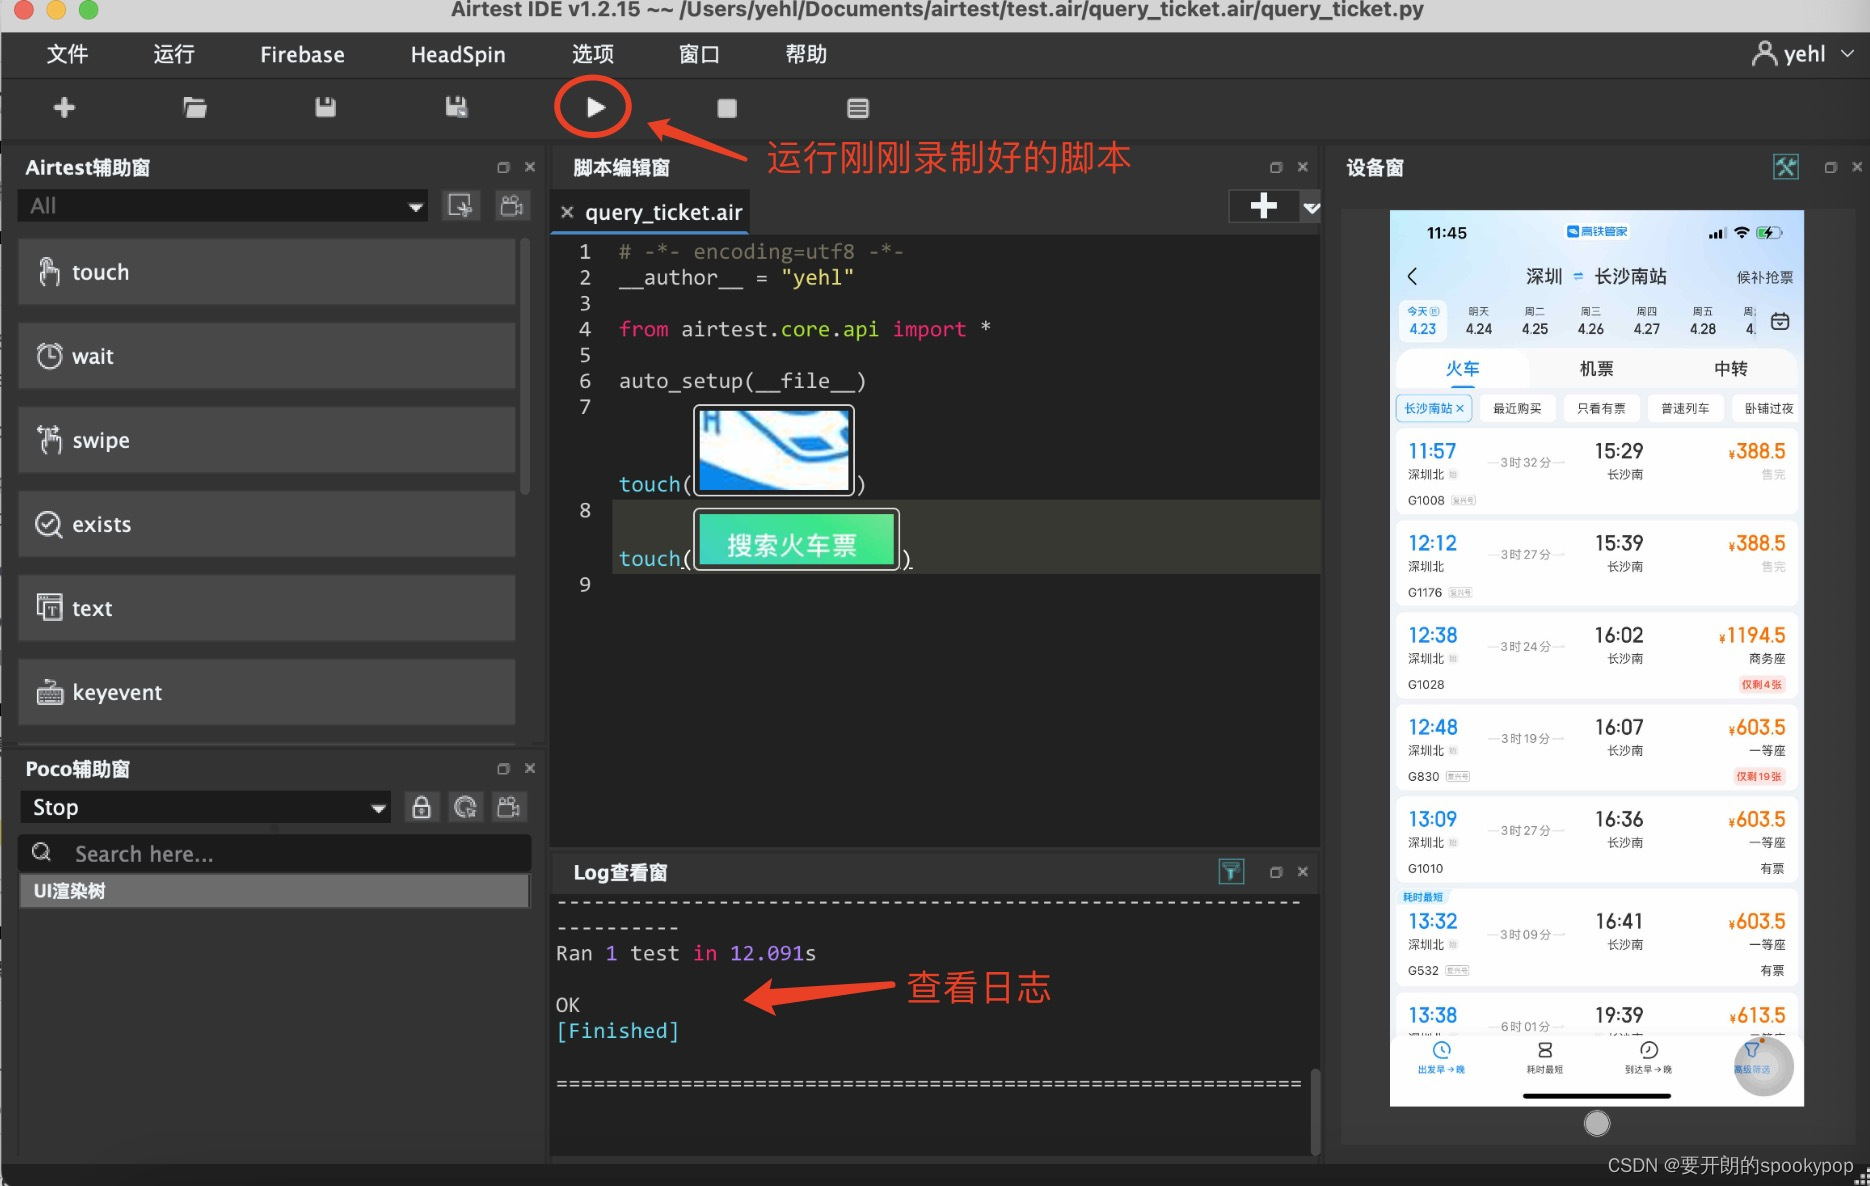
一个非常简单的自动化脚本就完成了!