想要一个免费的网站灰色广告投放平台

- 首先进行使用jmeter进行并发测试之前就需要搞清楚线程和进程的区别
- 还需要理解什么是并发、高并发、并行。
- 还需要理解高并发中的
- 以及老生常谈的,TCP三次握手协议和TCP四次握手协议
- **TCP三次握手协议指:**
- **TCP四次挥手协议:**
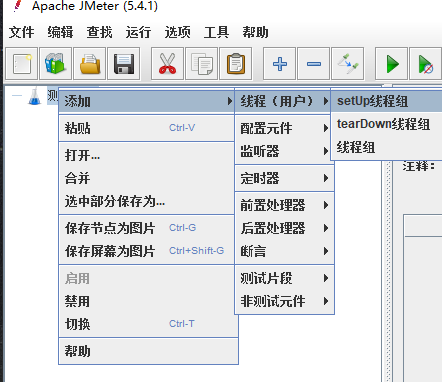
- 进入Jmeter,新建一个线程组
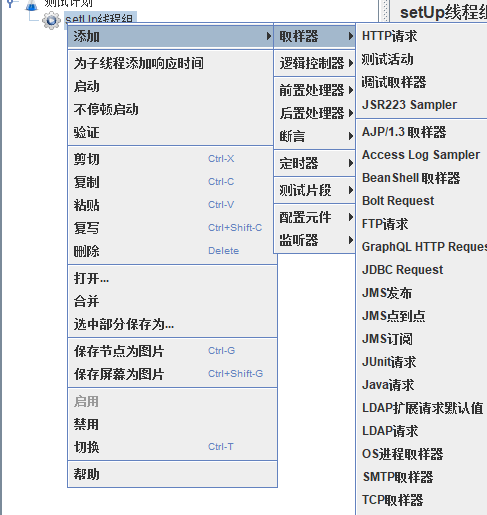
- 新建一个HTTP请求
- 模拟用户同时登录,这里使用cms搭建的后台有需求可以自行搜索
- 添加这三个监控器
- 模拟线程数:100
- 模拟线程数:200
- 模拟线程数:400
- 模拟线程数:800
- 模拟线程数:1000
- 总结
首先进行使用jmeter进行并发测试之前就需要搞清楚线程和进程的区别
进程是资源分配最小单位,线程是程序执行的最小单位;
每个进程内部会有N个线程,但至少要有1个线 程。
比如公司就是一个进程,公司的员工就是线程。
线程占用的资源要⽐进程少很多。
线程之间通信比进程更方便
还需要理解什么是并发、高并发、并行。
并发是指在一个时间段内有多个进程在执行
并行指的是在同一时刻有多个进程在同时执行
高并发是使用技术手段使系统可以并行处理很多请求
还需要理解高并发中的
响应时间(Response Time)
吞吐量(Throughput)
每秒查询率QPS(Query Per Second)
每秒事务处理量TPS(Transaction Per Second)
同时在线用户数量
以及老生常谈的,TCP三次握手协议和TCP四次握手协议
TCP三次握手协议指:
第一次握手:建立连接时,客户端发送syn包到服务器,并等待服务器确认
第二次握手:服务器收到syn包,同时自己也给客户端发送一个确认包syn+ack包
第三次握手:客户端收到服务器syn+ack包,向服务器发送一个确认包
包发送完毕后,客户端和服务器进入连接成功,完成三次握手,双方通信完毕,关闭连接时,进行第四次挥手
TCP四次挥手协议:
第一次挥手:客户端发送一个fin包,申请断开连接,并等待服务器确认。
第二次挥手:服务端回复一个ACK包,表示接收到客户端的关闭连接请求,但是现在服务端还是不能马上关闭,需要检查下是否还有未处理完成的数据
第三次挥手:服务端处理完所有数据,给客户端发送fin包,表示可以断开连接
第四次挥手:客户端回复ACK包,表示断开连接
进入Jmeter,新建一个线程组
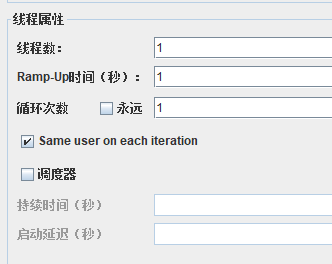
线程数:表示模拟的用户数量我们本次从100到1000,每次压测+100
Ramp-up就是每个线程的执行时间间隔,0表示并发
循环次数表示循环多少次,如果点击永远就是一直循环下次
调度器表示开始时间和持续时间以及启动延迟的时间
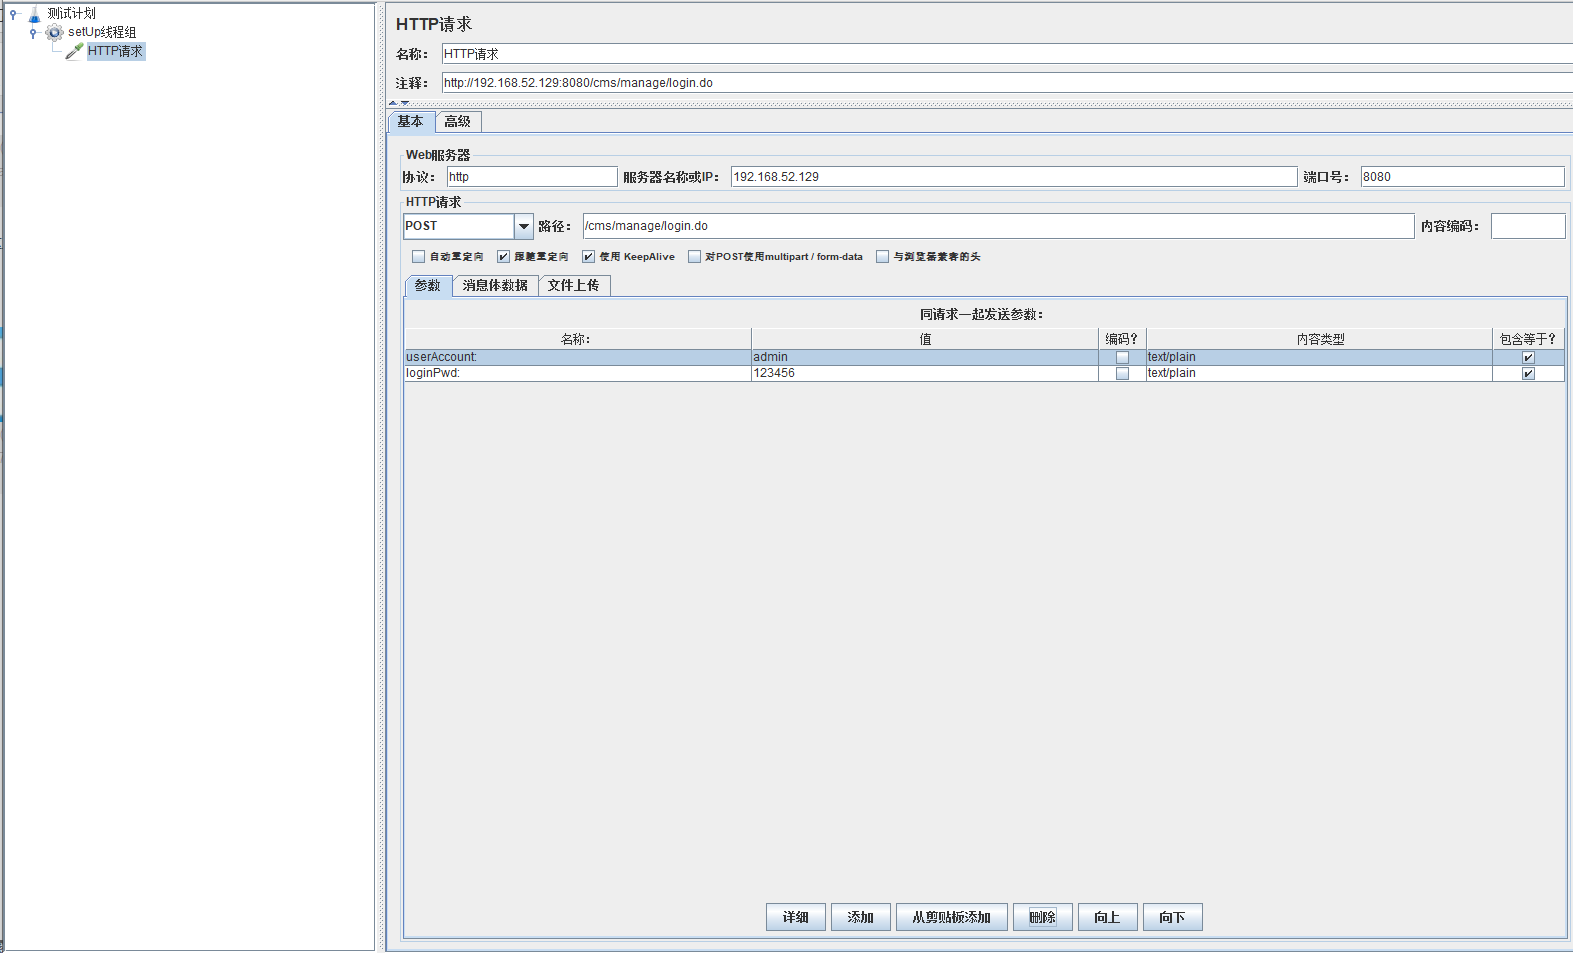
新建一个HTTP请求
模拟用户同时登录,这里使用cms搭建的后台有需求可以自行搜索

因为需要模拟同时登录,所以就要在请求体里面加入相应的信息进去
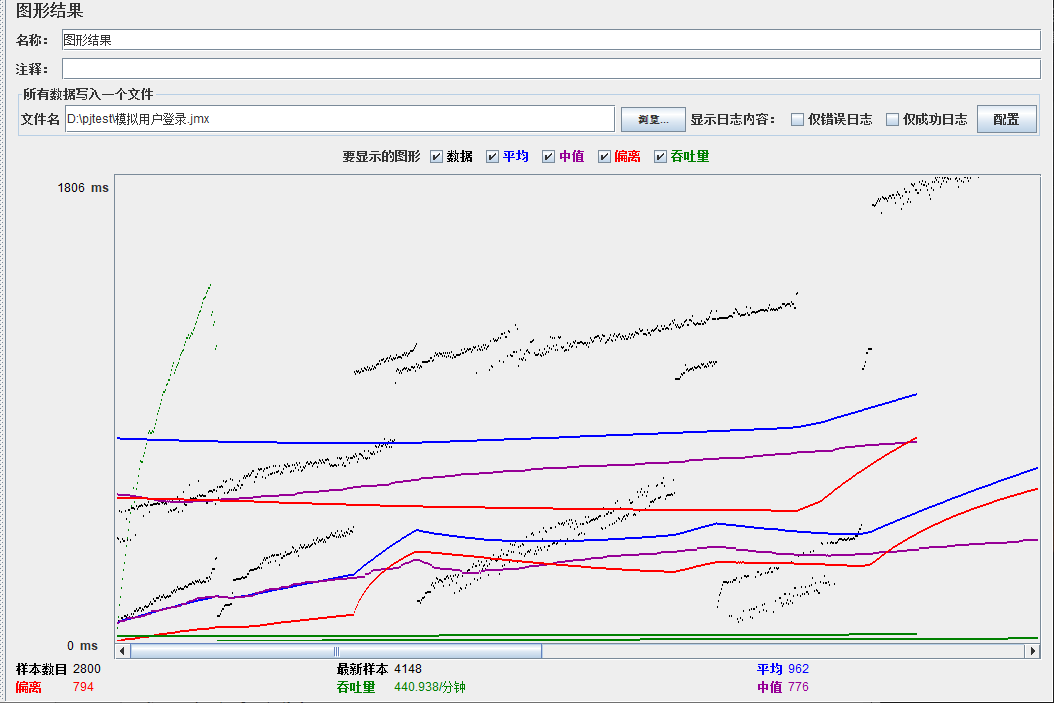
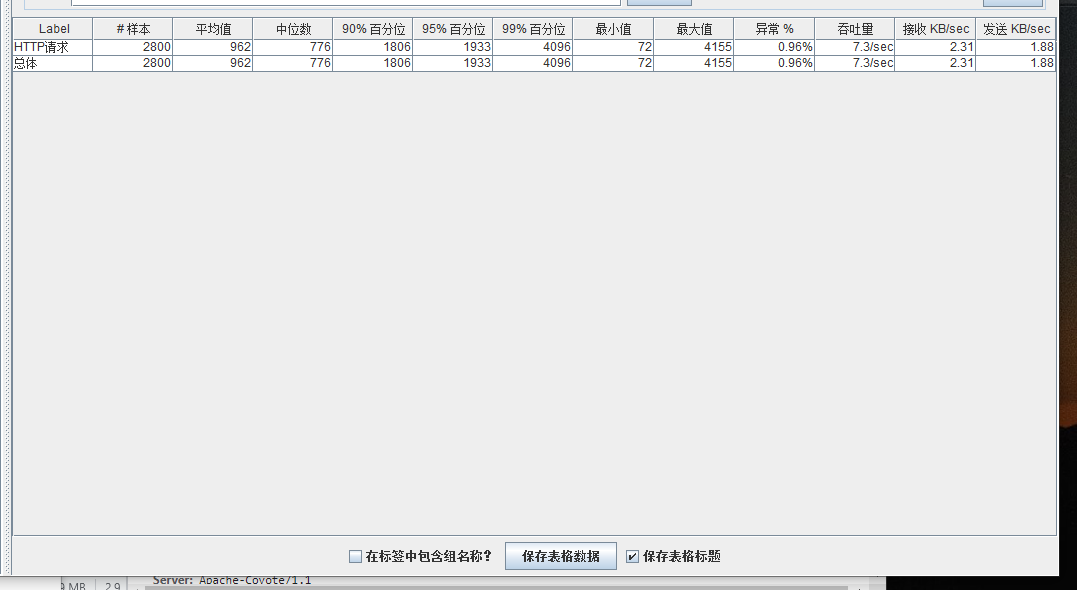
添加这三个监控器
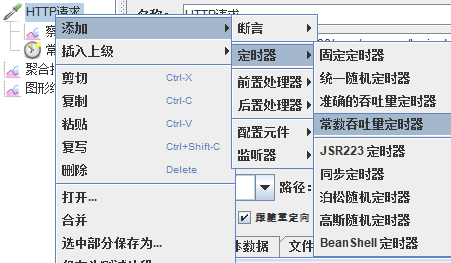
再添加一个常数吞吐量定时器
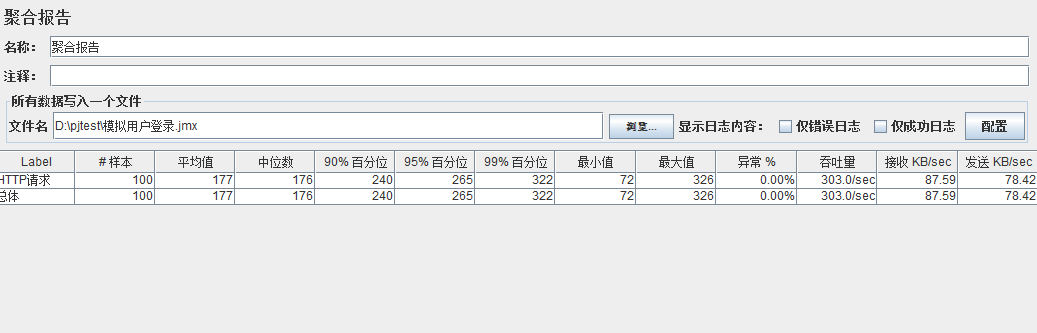
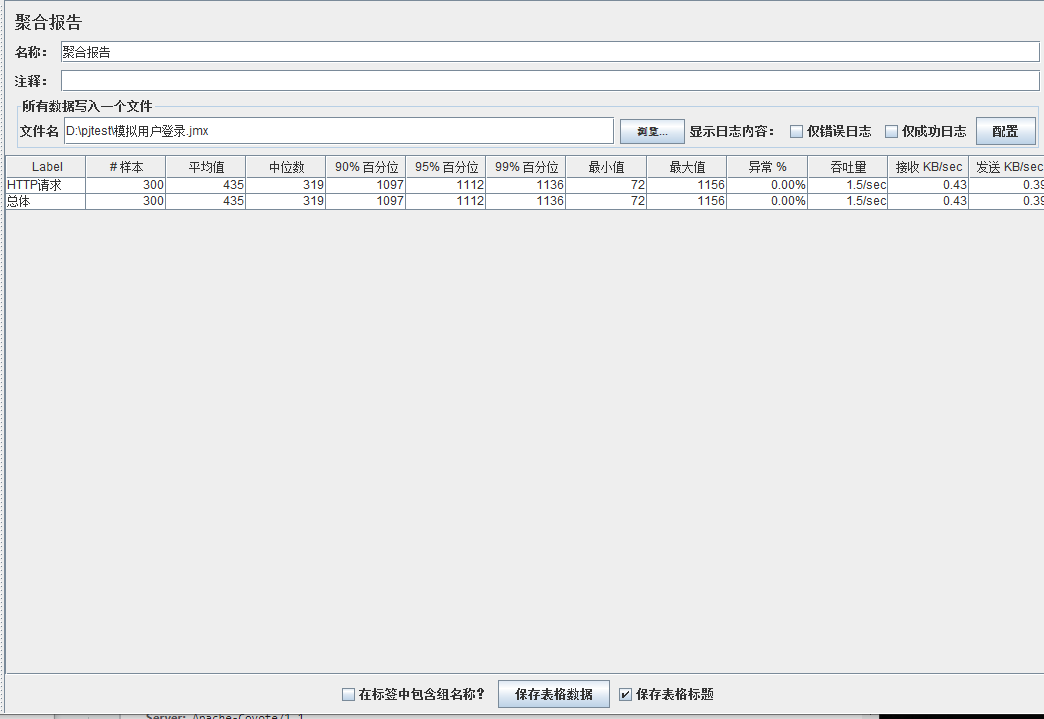
模拟线程数:100

模拟线程数:200
模拟线程数:400
模拟线程数:800
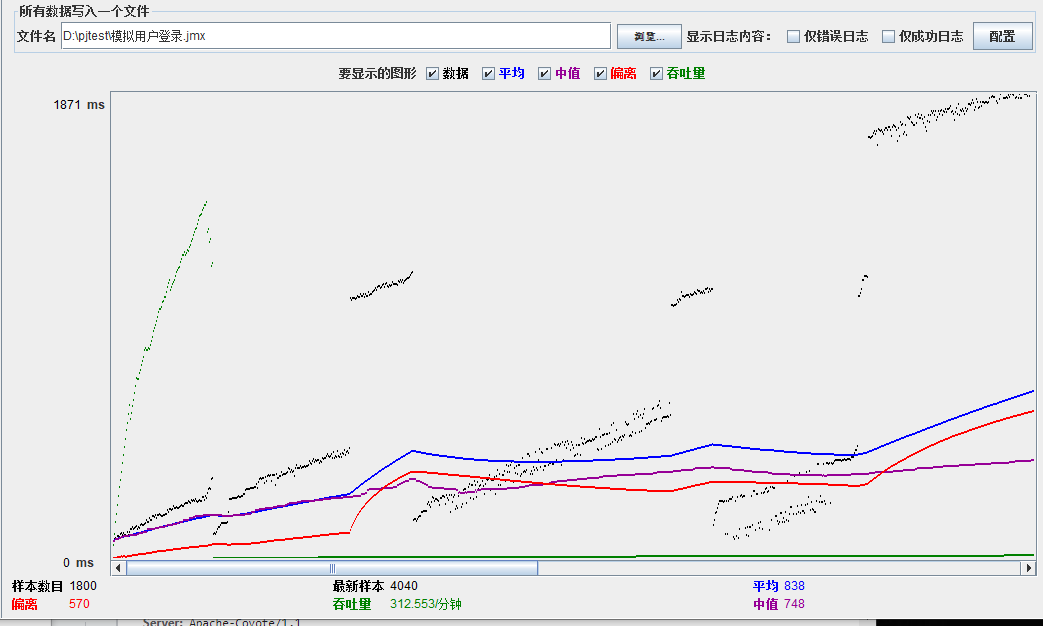

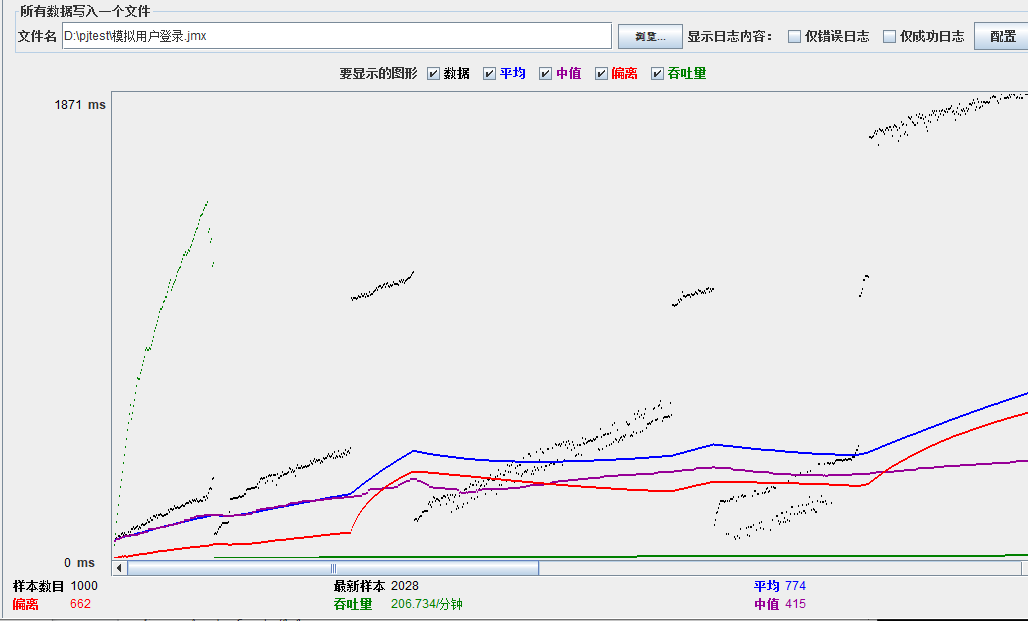
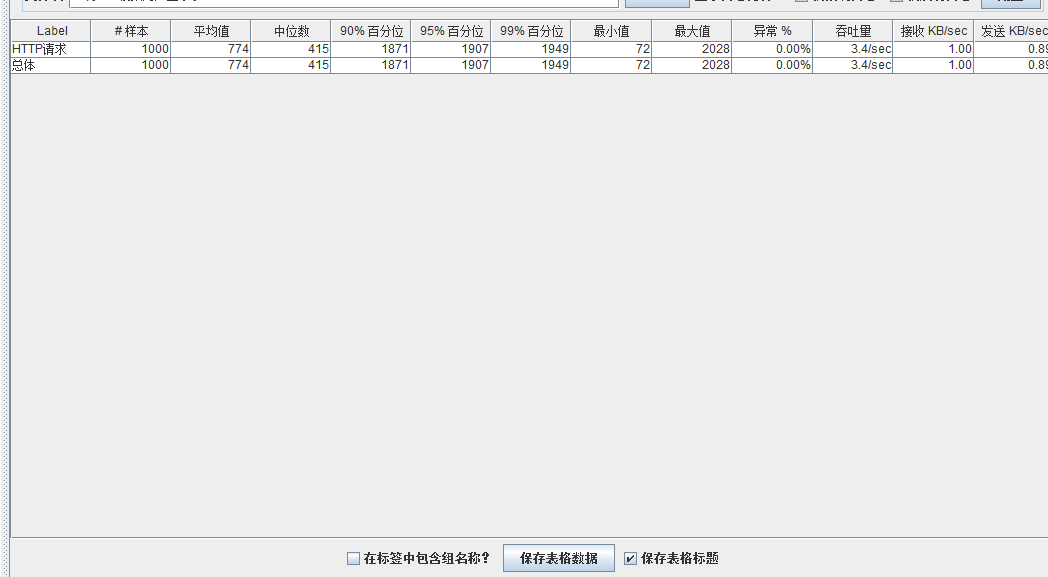
模拟线程数:1000
总结
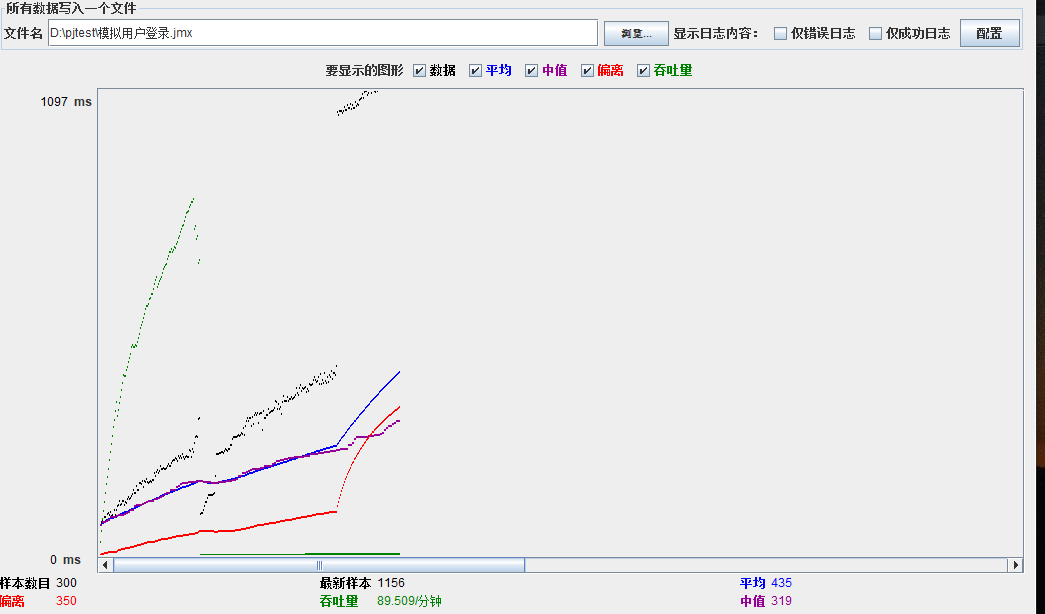
可以看到在100的时候服务器还算是比较稳定,200时也是较为平稳,到400时就开始有些走势不稳,到800时已经开始出现走势乱的情况,到1000时就出现不少的数据异常以及偏离值严重。可以根据项目情况去不断增加压力进行测试