自己电脑做网站iis湖南seo优化服务
问题产生的地方

原因
对于
double类型的属性,不能直接使用减法运算符进行比较。减法运算符只能用于数值类型,而double是浮点数类型。要在
double属性上进行排序,可以使用CompareTo方法或者使用自定义的比较器。
更改
要在
double属性上进行排序,可以使用CompareTo方法或者使用自定义的比较器。下面是两种可行的方式:1.使用
CompareTo方法:list1.Sort((m, n) => m.Id.CompareTo(n.Id));使用了
CompareTo方法来比较两个double值的大小2.使用自定义的比较器:
public class DoubleComparer : IComparer<double>
{public int Compare(double x, double y){return x.CompareTo(y);}
}// 在排序时使用自定义的比较器
list1.Sort((m, n) => new DoubleComparer().Compare(m.Id, n.Id));
这种写法定义了一个名为
DoubleComparer的自定义比较器类,实现了IComparer<double>接口的Compare方法。然后,在排序时使用新建的DoubleComparer实例来进行比较。
产生原因
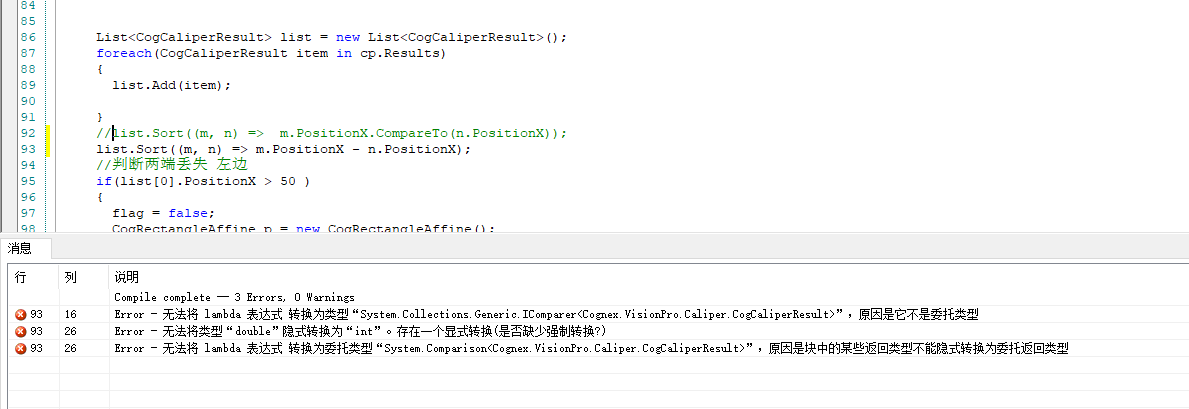
如:list1.Sort((m, n) => m.Id - n.Id);id为double类型,为什么会报错无法将都变了隐式转换为int,为什么会报错无妨将lambda表达式转换成预期委托类型
List<T>的Sort方法的参数是一个委托,用于比较两个元素的大小关系,以实现排序功能。这个委托类型的声明如下:public delegate int Comparison<in T>(T x, T y);可以将 lambda 表达式中的
m.Id - n.Id修改为一个返回整数类型的表达式,比如(int)(m.Id - n.Id)。这样就可以将lambda表达式转换成预期的委托类型,从而成功地实现按照Id属性进行排序的功能。
list.Sort((m, n) => m.PositionX - n.PositionX);
m.PositionX - n.PositionX的结果是一个double 需要强转成int ,但是强转的时候会造成精度丢失 如本来是0.3 会变成0导致认为mn是相等的所以保险起见还是用
list.Sort((m, n) => m.PositionX.CompareTo(n.PositionX));
CompareTo方法
CompareTo()方法是用于比较两个值的大小,并返回一个整数作为比较结果的表示。
CompareTo()方法的返回值为整数,其含义如下:
- 如果
x小于y,则返回一个负数(通常为 -1)。- 如果
x等于y,则返回零。- 如果
x大于y,则返回一个正数(通常为 1)。返回一个整数的好处是可以更灵活地处理比较结果。通过比较结果的正负号,可以判断出两个值的相对大小关系,并进行相应的逻辑处理。
CompareTo方法是IComparable接口的一部分,它定义了一个用于比较对象的方法。因此,只要类实现了IComparable接口,就会拥有CompareTo方法。以下是一些常见的具有
CompareTo方法的类:
Int32,Int64,Double,Decimal等数值类型:这些数值类型都实现了IComparable接口,并且提供了CompareTo方法来比较它们之间的大小关系。String类型:String类型实现了IComparable接口,因此它也具有CompareTo方法,用于按照字典顺序比较字符串的大小。DateTime类型:DateTime类型也实现了IComparable接口,并提供了CompareTo方法,用于比较日期和时间。- 用户自定义类:如果你在自己的类中实现了
IComparable接口,并提供了CompareTo方法的实现,那么你的类也会具有CompareTo方法。