网站建设中网站需求分析报告作用友情连接
使用 vimdiff 作为 Git 的合并工具确实可能会让新手感到困惑,但它是一个功能强大的工具,一旦掌握了它,就可以非常高效地进行代码合并和比较。以下是一个简短的教程,旨在帮助理解 vimdiff 的基本用法以及如何利用它来进行 Git 合并。
Git配置
在开始之前,需要知道如何将vimdiff设置为Git的合并工具。具体步骤如下:
git config merge.tool vimdiff
git config merge.conflictstyle diff3
git config mergetool.prompt false
这将把Git设置为默认的合并工具,在合并时显示共同祖先,并禁用打开vimdiff的提示。
git config merge.tool vimdiff: 这会将vimdiff设置为默认的合并工具。git config merge.conflictstyle diff3: 这会告诉 Git 在合并冲突时显示共同祖先的版本,这样就可以看到两个分支以及它们的共同起点的内容。git config mergetool.prompt false: 这会禁用打开合并工具时的提示,Git 将自动打开vimdiff而不询问是否想要继续。
完成这些设置后,当运行 git mergetool 命令来解决合并冲突时,Git 将自动使用 vimdiff 来打开有冲突的文件。
创建合并冲突
下面用一个例子举例:
创建一个名为"zoo"的目录,并进入"zoo"目录,然后初始化Git仓库,最后新建一个animals.txt。
mkdir zoo  #
cd zoo
git init
vi animals.txt
在文件中添加一些动物信息后并保存:
cat
dog
octopus
octocat
之后提交该文件
git add animals.txt
git commit -m "Initial commit"
添加文件animals.txt到Git,提交文件,并附上消息"Initial commit"。
创建一个名为"octodog"的分支,并切换到"octodog"分支,并打开文件animals.txt,并将"octopus"改为"octodog"。
git branch octodog
git checkout octodog
vi animals.txt  # let's change octopus to octodog
添加文件animals.txt到Git,提交文件,并附上消息"Replace octopus with an octodog"。
git add animals.txt
git commit -m "Replace octopus with an octodog"
切换到"master"分支,打开文件animals.txt,并将"octopus"改为"octoman"。
git checkout master
vi animals.txt  # let's change octopus to octoman
添加文件animals.txt到Git,提交文件,并附上消息"Replace octopus with an octoman"。
git add animals.txt
git commit -m "Replace octopus with an octoman"
合并"octodog"分支到"master"分支。
git merge octodog # merge octodog into master
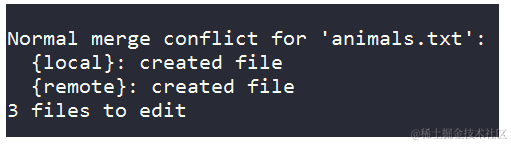
此时,会得到一个合并错误:
Auto-merging animals.txt
CONFLICT (content): Merge conflict in animals.txt
Automatic merge failed; fix conflicts and then commit the result.
这表明在animals.txt文件中存在合并冲突。
使用vimdiff解决merge冲突
解决这个冲突可以输入以下命令:
git mergetool
执行上述命令后,Git会尝试使用vimdiff作为合并工具来解决冲突。vimdiff会打开一个窗口,显示两个版本的文件,中间会有冲突标记。需要手动比较这两个版本,并选择一个解决方案来替换冲突的部分。使用 hjkl 键在窗口之间导航,使用 :diffget LOCAL、:diffget REMOTE 或 :diffget BASE 来将对应窗口的内容复制到 MERGED 窗口中。解决冲突后,保存并关闭文件,Git会提示你提交冲突的解决结果。

上述窗口看起来很迷糊,其实很好理解,下面解释一下都有什么。从左到右,从上到下:
LOCAL:- 这是当前分支(通常是执行
git merge命令时所在的分支)的文件内容。 - 在合并过程中,这代表了您的最新更改。
- 这是当前分支(通常是执行
BASE:- 这是两个分支的共同祖先的文件内容。
- 它显示了自从两个分支从共同点分开以来,发生了哪些变化。
REMOTE:- 这是试图合并进来的分支的文件内容。
- 在
git merge命令中,`` 就是这里的REMOTE。
MERGED:- 这是合并后的文件内容将显示的地方。
- 目标是将
LOCAL和REMOTE的更改合并到这个窗口中,以解决所有冲突。
假设想要保留“octodog”的更改(来自REMOTE)。为此,将光标移动到MERGED文件(Ctrl + w, j),然后移动到合并冲突区域。接着,可以选择保留LOCAL版本、BASE版本或REMOTE版本中的哪一部分,或者合并这些内容。完成后,保存并关闭文件,Git会提示你提交冲突的解决结果。
:diffget RE
这会将REMOTE中相应的更改添加到MERGED文件中,也可以:
`:diffg RE` - 从REMOTE获取内容
`:diffg BA` - 从BASE获取内容
`:diffg LO` - 从LOCAL获取内容
这些命令允许快速地从一个特定的版本中获取内容,并将其应用于MERGED区域。一旦解决了所有的冲突,保存并关闭文件,Git会提示提交冲突的解决结果。
保存文件并退出(快速写入并退出多个文件的方法是::wqa)。一旦解决了所有冲突并保存了文件后运行git commit,完成这些步骤后,就成功地解决了合并冲突,并将更改提交到了 Git 仓库。
以下是一些其他的命令:
- 使用
:diffthis命令来打开两个版本之间的差异,这样可以更清楚地看到差异。 - 使用
:nextdiffto命令来切换到下一个差异,这样可以逐步解决多个冲突。 - 使用
:diffoff命令来关闭差异显示,这样可以更专注于编辑。 - 使用
:diffmerge命令来合并两个版本,这将覆盖当前的MERGED区域。 - 使用
:diffmergeoff命令来关闭合并显示,这样可以回到正常的编辑模式。
参考
- https://www.rosipov.com/blog/use-vimdiff-as-git-mergetool/