怎么看网站是哪个系统做的中国工商业联合会
在软件开发过程中,性能是决定用户体验、系统可靠性及企业竞争力的关键因素。为确保软件在真实环境中稳定运行,性能测试成为不可或缺的环节。
一、测试目标
性能指标验证:确认系统在设计负载下(如1000并发用户)的响应时间、吞吐量(TPS)等指标是否符合预期。
极限负载测试:检测系统在峰值负载(如3000并发用户)下的稳定性,识别宕机、资源竞争等风险。
高并发容量分析:确定系统在高并发场景下的容量极限,为扩容提供数据支持。
资源消耗评估:分析CPU、内存、网络带宽等资源的消耗情况,优化资源分配。
响应时间优化:评估系统对用户请求的响应速度,确保用户体验流畅。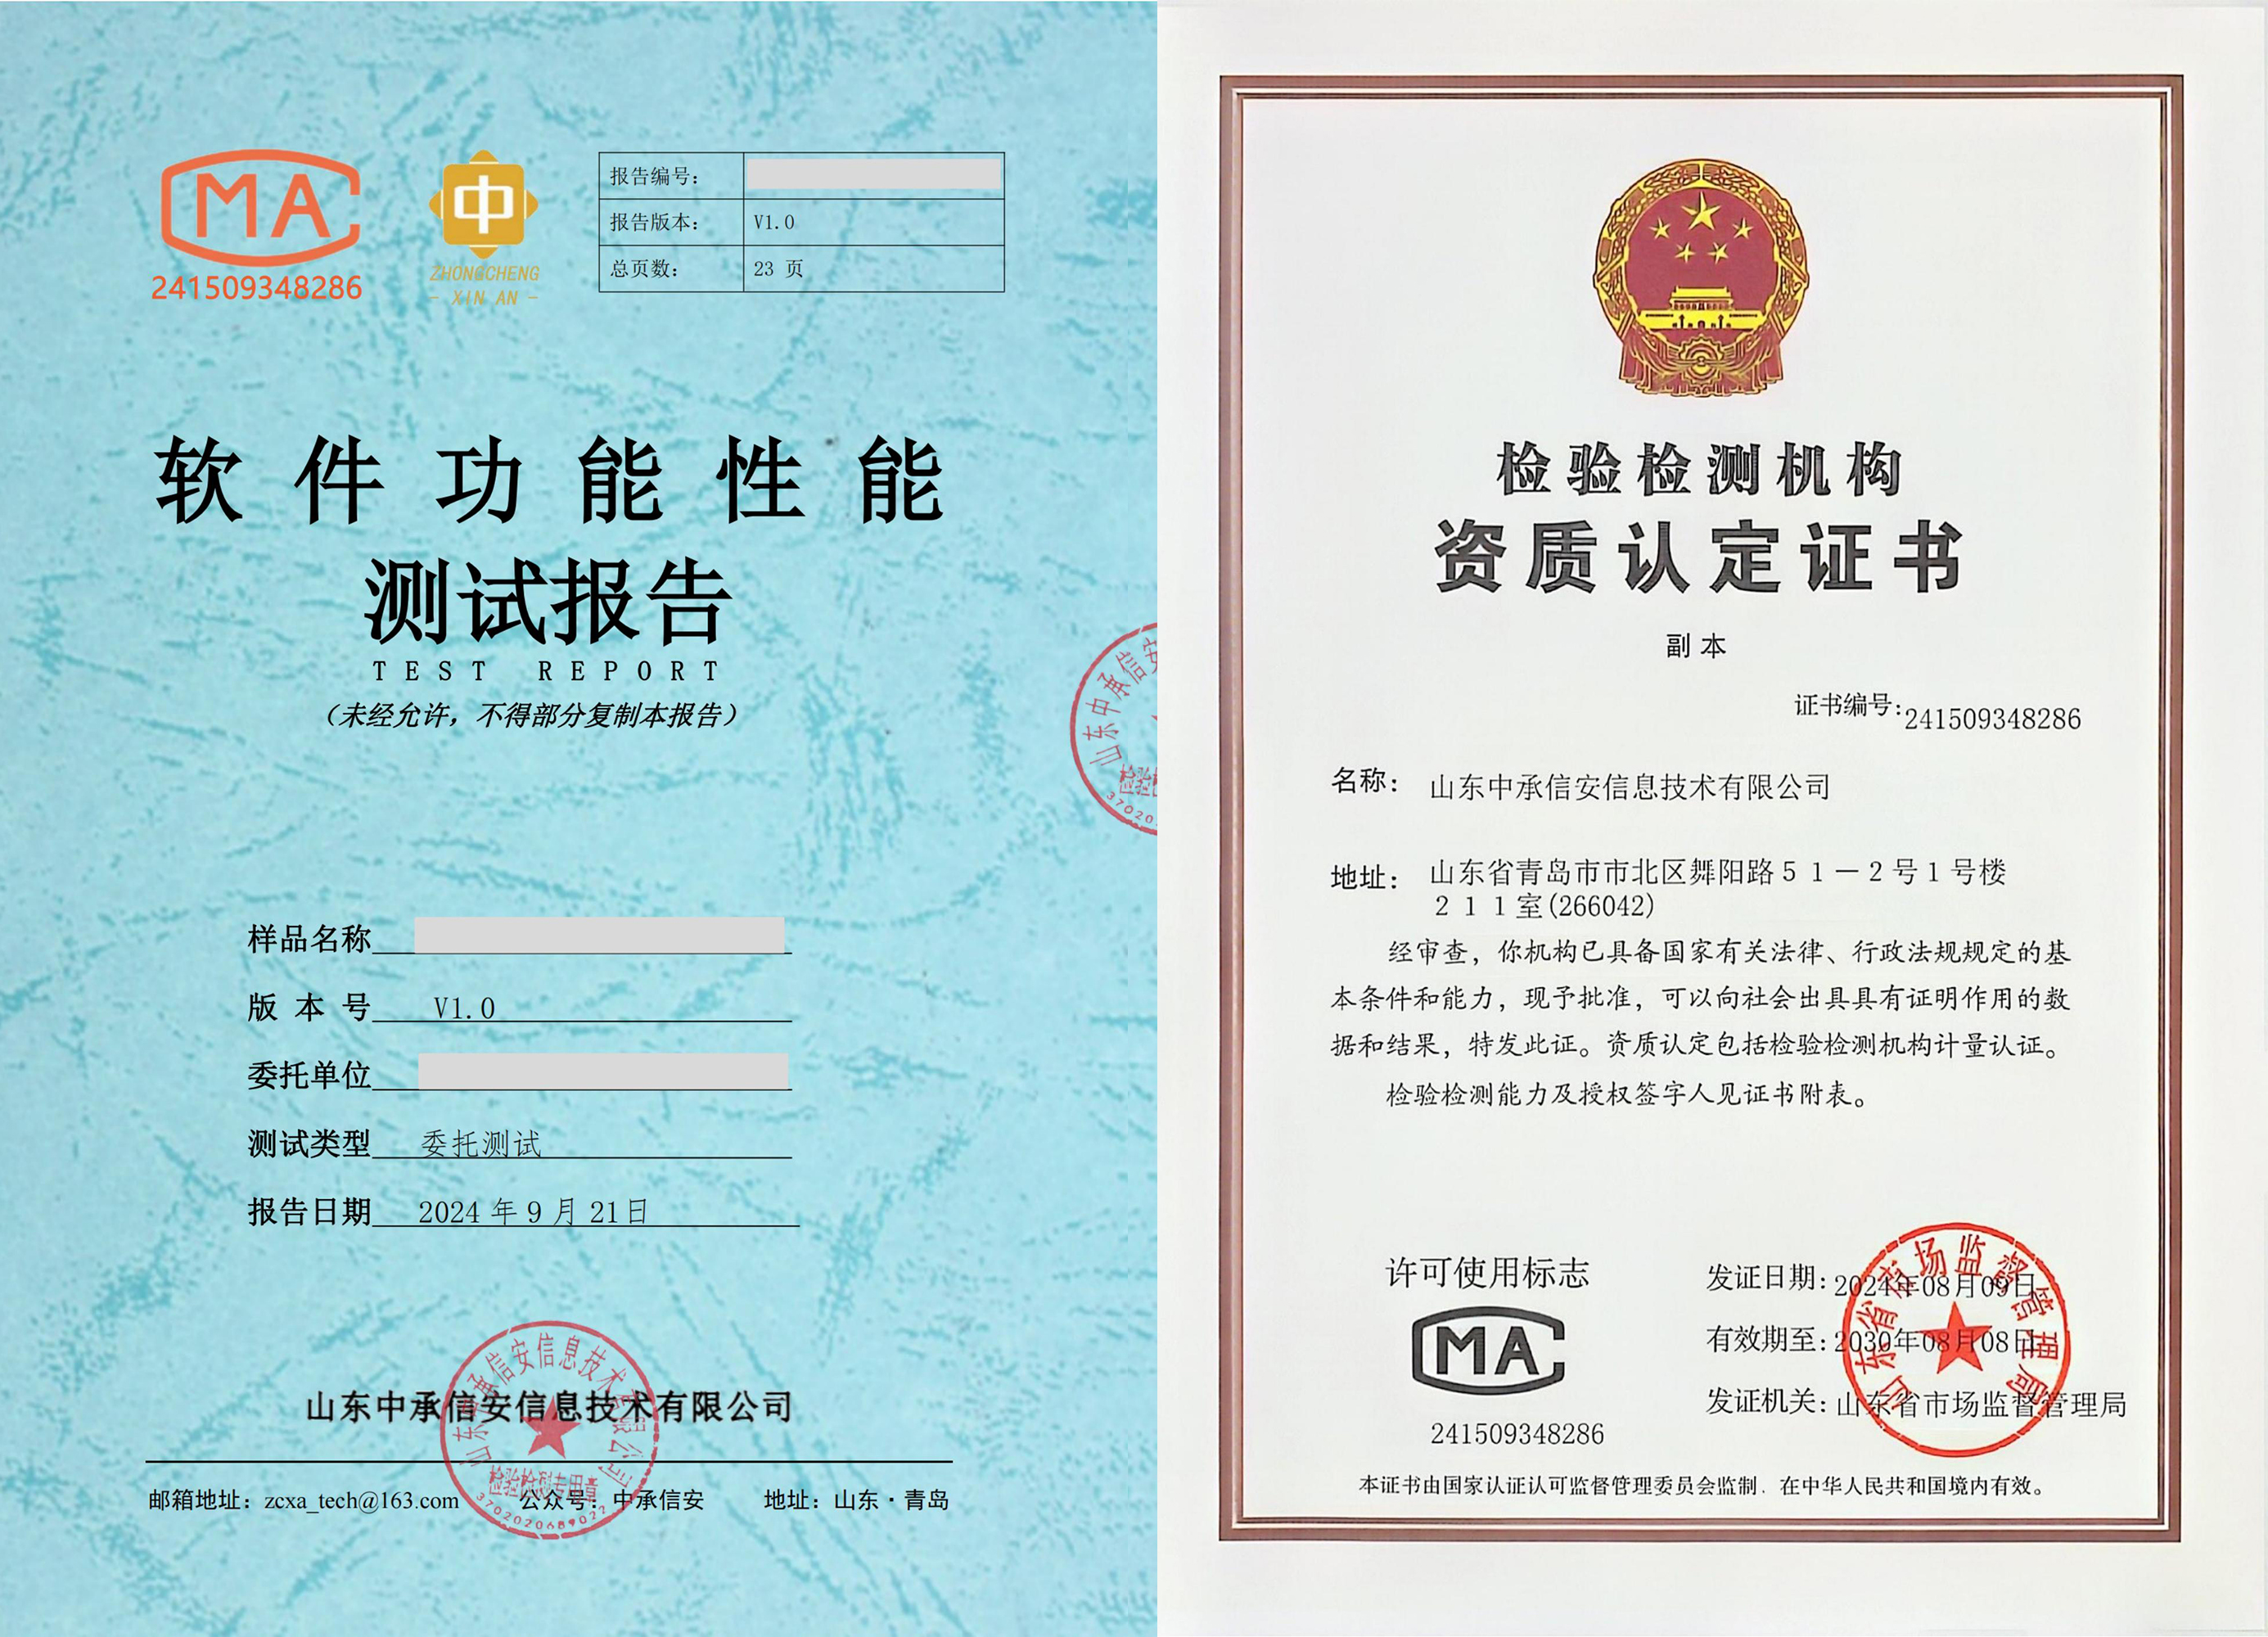
二、测试环境
硬件环境
服务器:Intel Core i7-8700处理器,32GB内存,1TB SSD硬盘,RAID 5配置。
客户端:负载生成终端采用Intel Core i5处理器,8GB内存,模拟真实用户行为。
网络:千兆以太网,模拟不同带宽条件下的性能表现。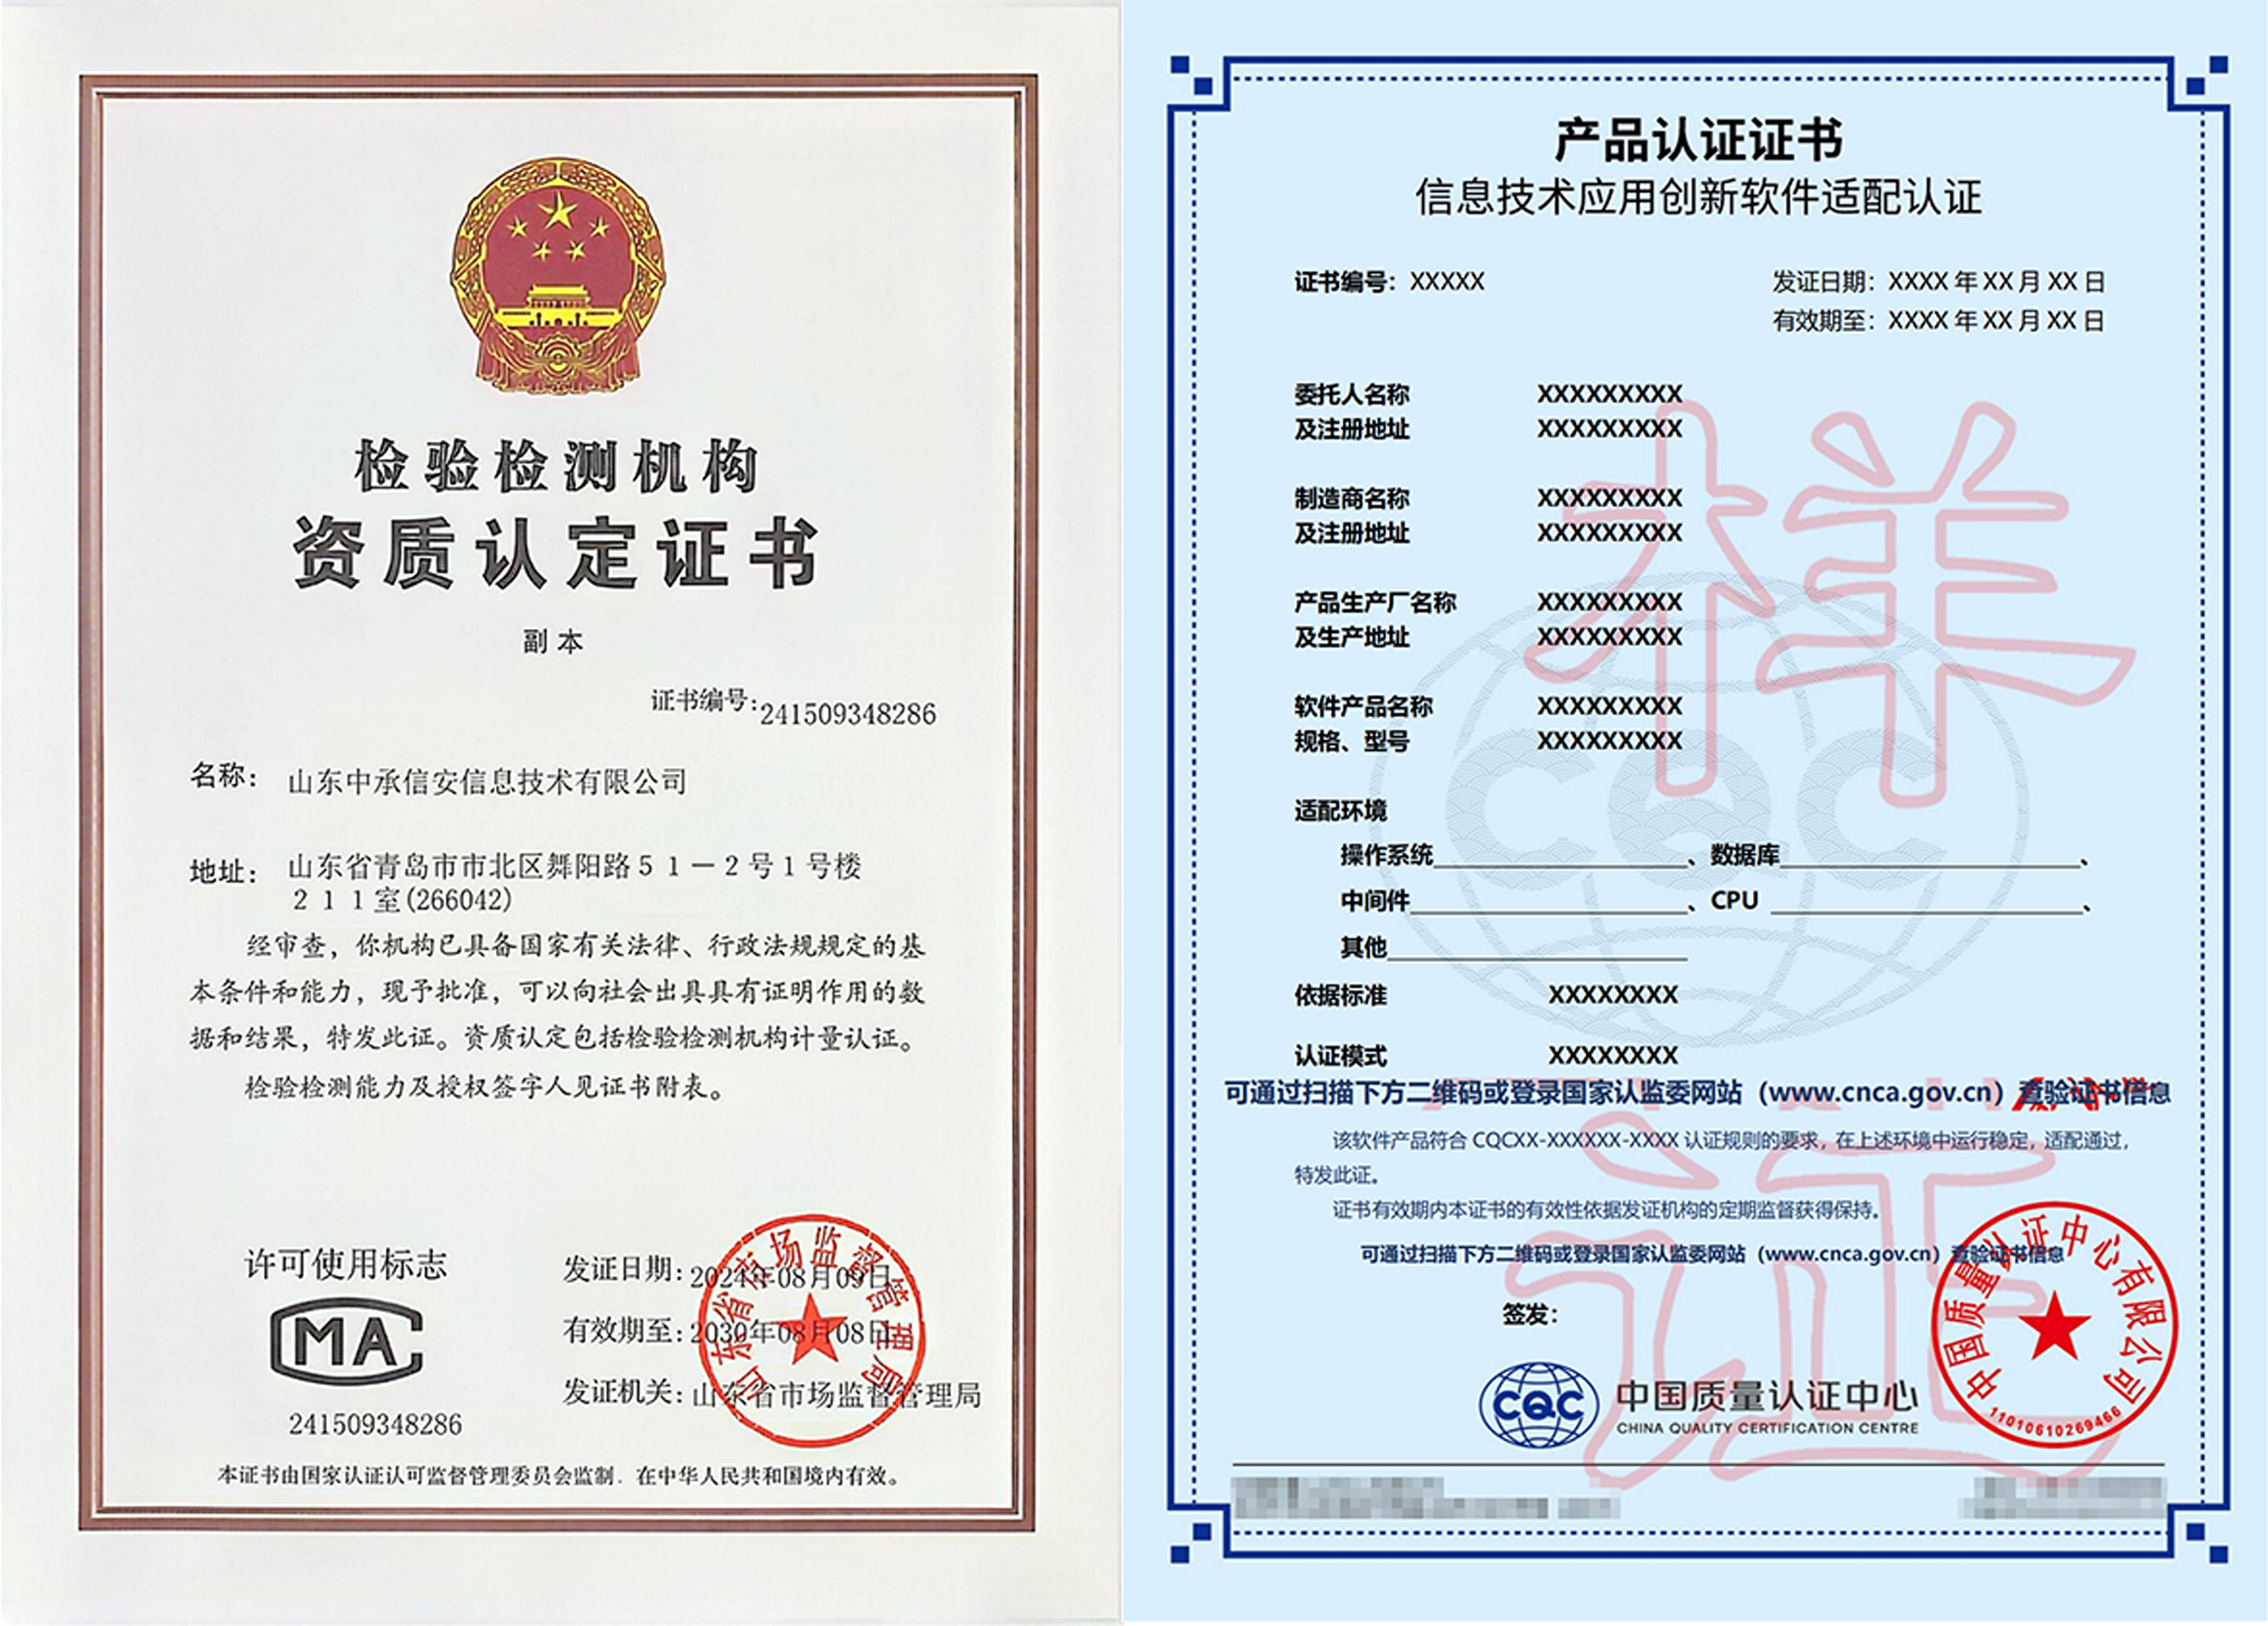
软件环境
操作系统:服务器端为Linux CentOS 7.6,客户端为Windows 10。
数据库:MySQL 8.0,配置InnoDB存储引擎,优化查询缓存。
中间件:Tomcat 9.0,调整线程池参数以支持高并发。
测试工具:LoadRunner 12.55,用于脚本录制、压力测试及结果分析。