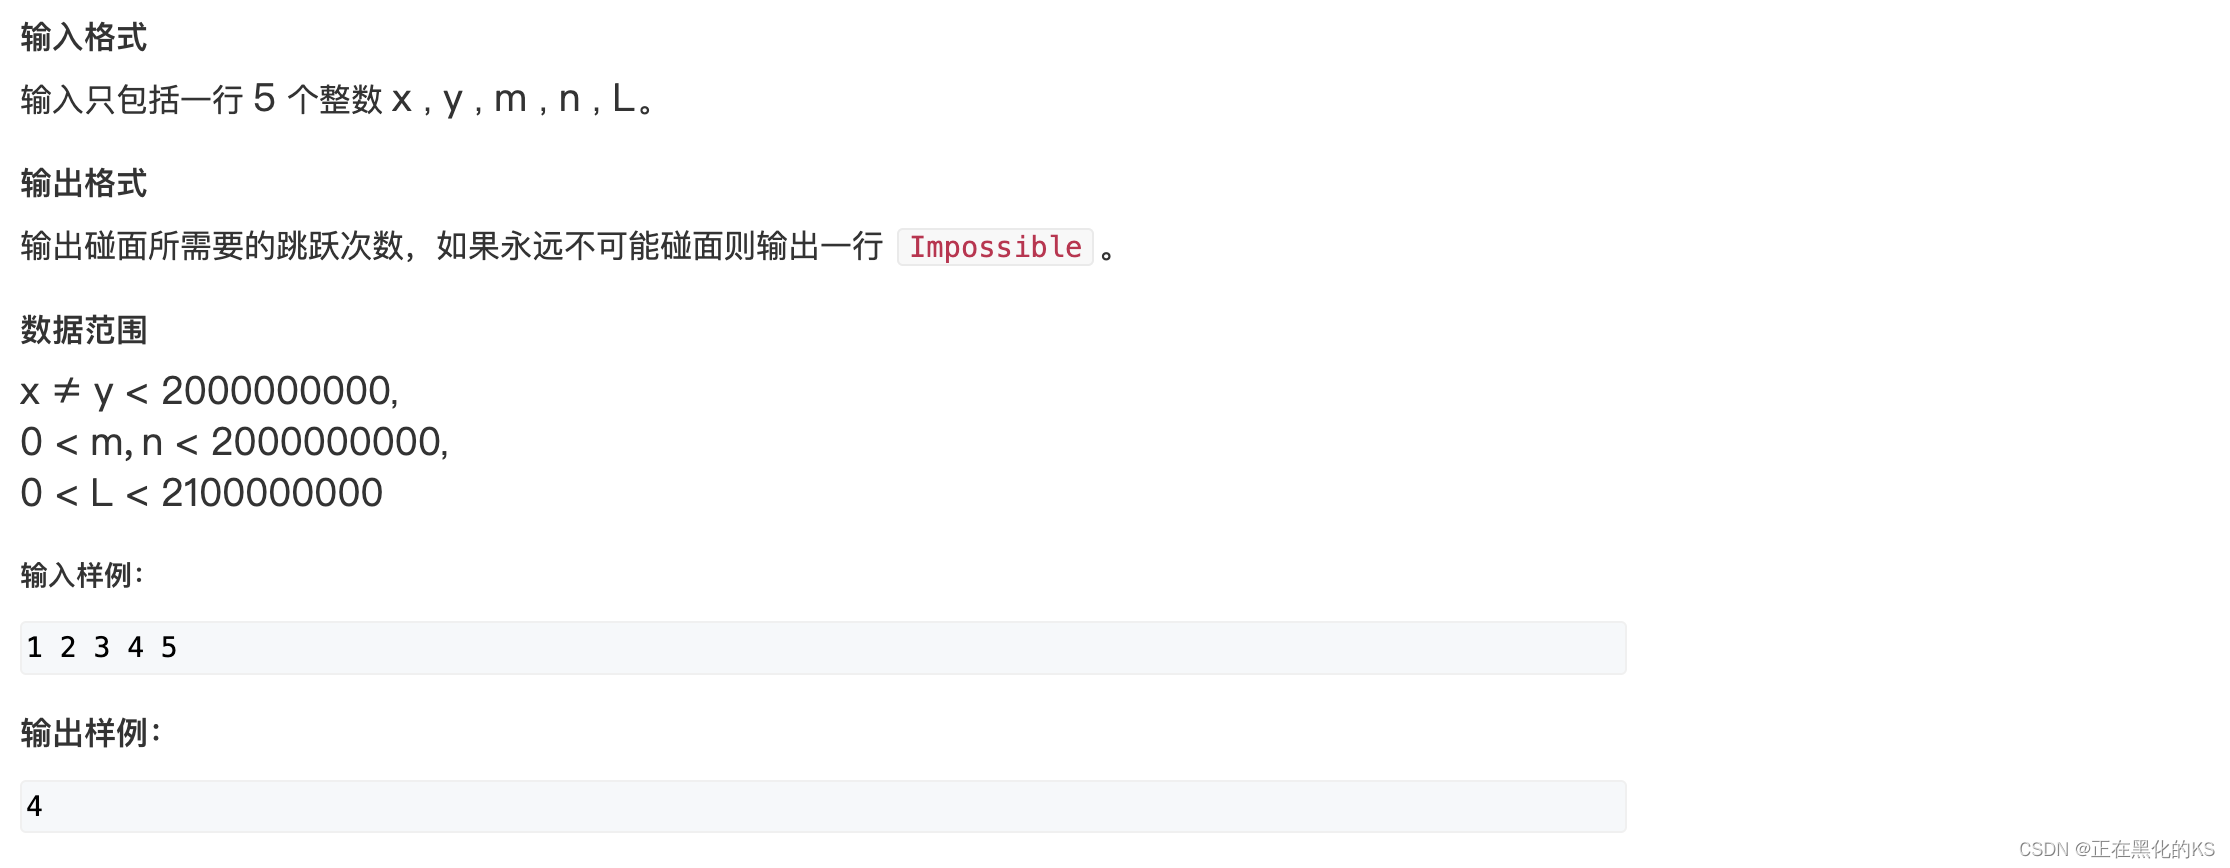
银川网站建设多少钱重庆广告公司
前言
由于数论的板子真的很抽象,也很难背,所以特此记录扩展欧几里得算法的板子和它的用途
本篇文章只涉及应用,不涉及证明,如需理解证明还请各位移步其他优秀的讲解!
扩展欧几里得算法
先粘一下板子的代码
typedef long long LL ; LL exgcd(LL a, LL b, LL &x, LL &y)
{if (!b) {x = 1, y = 0 ; return a ; }LL d = exgcd(b, a % b, y, x) ; y -= a / b * x ; return d ;
}
变量解释
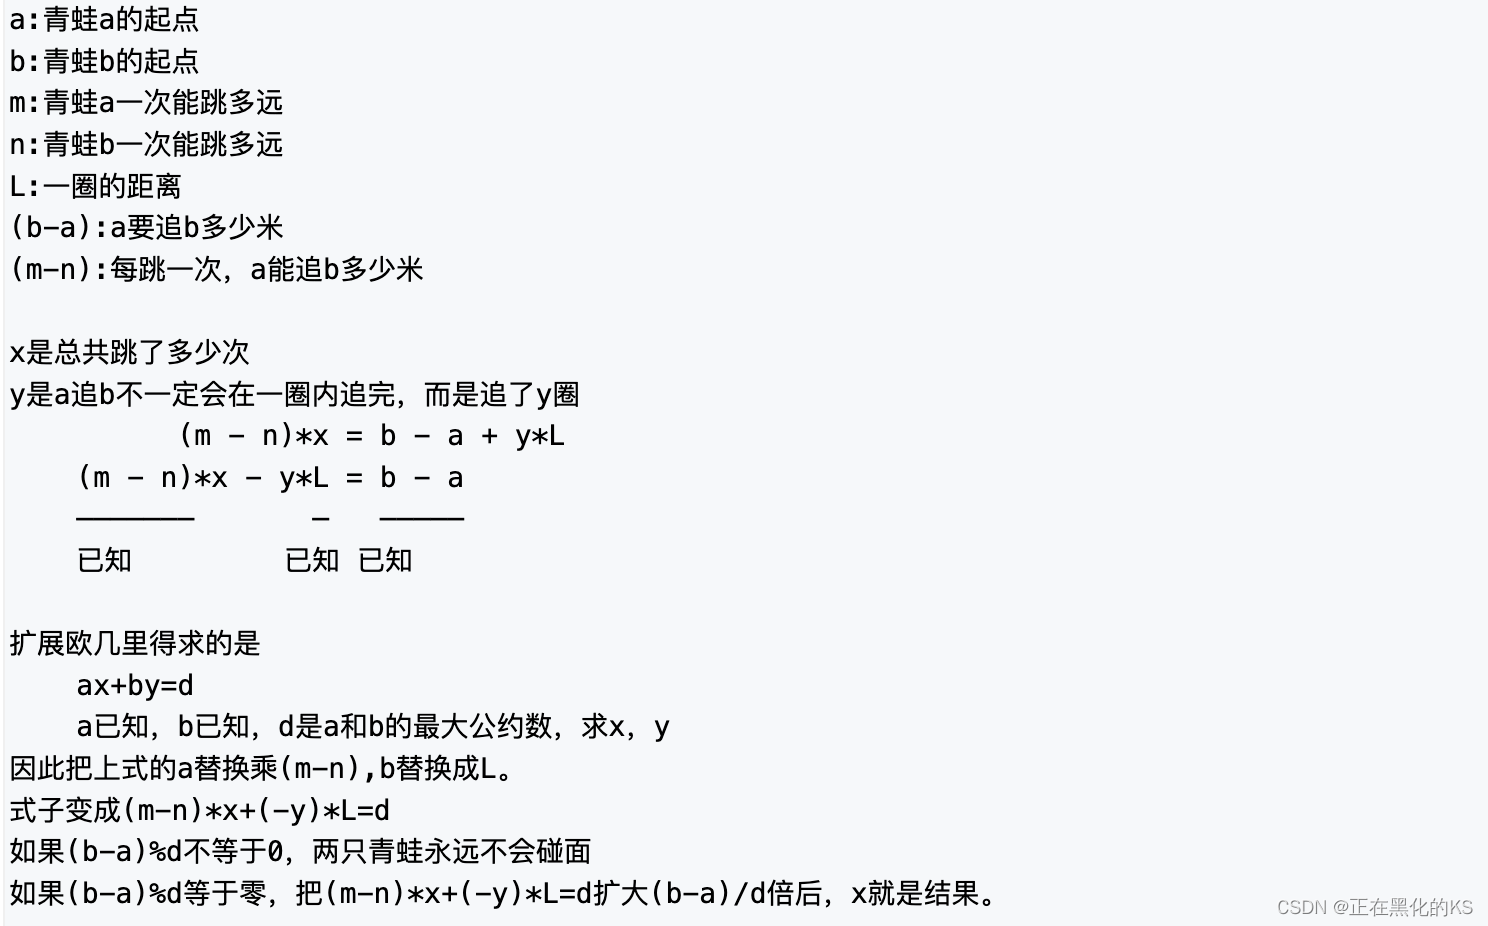
对于方程:ax + by = d
其中 a 和 b 都是常数 (已知量),d 是 a 和 b 的最大公约数
x 和 y 是我们希望求得的一组满足方程的解
应用例题

题目链接🔗:222. 青蛙的约会 - AcWing题库
题目分析
AC代码
#include <iostream>
#include <algorithm>
#include <cstring>using namespace std ;typedef long long LL ; LL exgcd(LL a, LL b, LL &x, LL &y)
{if (!b) {x = 1, y = 0 ; return a ; }LL d = exgcd(b, a % b, y, x) ; y -= a / b * x ; return d ;
}int main()
{ios::sync_with_stdio(false) ; LL a, b, m, n, L ; cin >> a >> b >> m >> n >> L ;LL x, y ; LL d = exgcd(m - n, L, x, y) ; if ((b - a) % d) cout << "Impossible" << endl ;else {x *= (b - a) / d ; LL t = abs(L / d) ; cout << (x % t + t) % t << endl ; // 求最小正整数解}return 0 ;
}
难点解释
为什么要计算 t ?
解释:

题解来源🔗: AcWing 222. 青蛙的约会 - AcWing
再来一道题目巩固一下
同余方程模版题 🔗203. 同余方程 - AcWing题库
题目描述
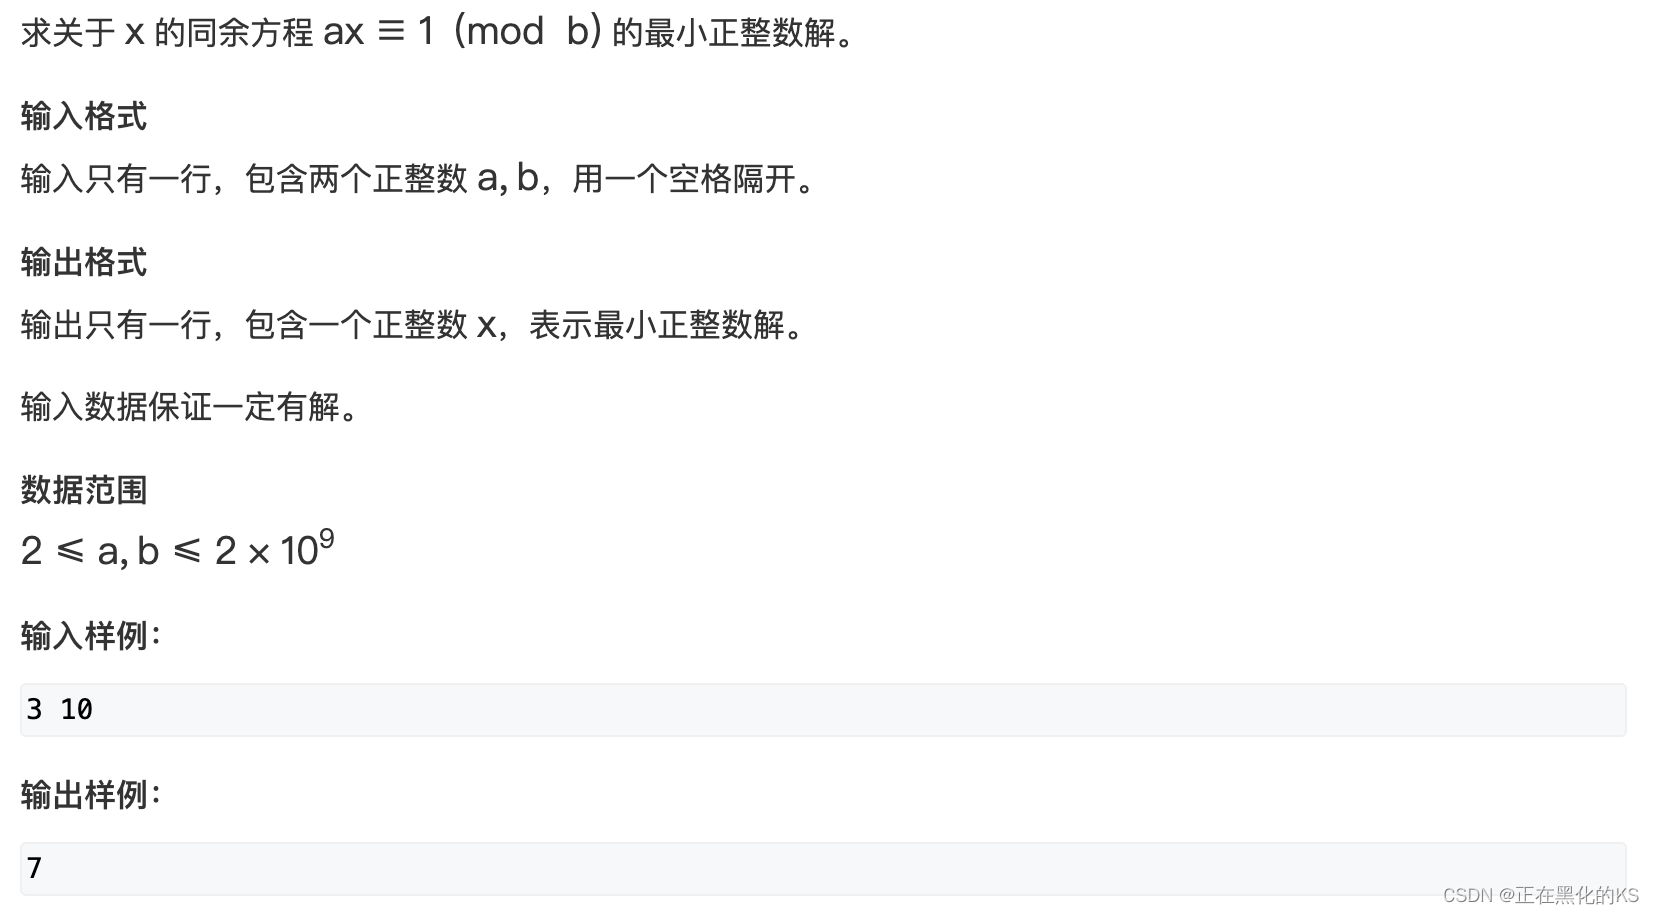
题目分析
a * x % b = 1 等价于找到两个数 x 和 y 使得 a * x + b * y = 1
这恰好是我们扩展欧几里得算法的基本解决对象,直接套板子就行了,由于题目保证输入一定有解,所以我们可以认为 a 和 b 是互质的,因此可以使用扩展欧几里得算法。
最后记得对b取模保证答案为最小正数。
AC代码
#include <iostream>
#include <algorithm>
#include <cstring>using namespace std ;typedef long long LL ; int exgcd(int a, int b, int &x, int &y)
{if (!b) {x = 1, y = 0 ; return a ; }int d = exgcd(b, a % b, y, x) ; y -= a / b * x ; return d ;
}int main()
{ios::sync_with_stdio(false) ; int a, b ; cin >> a >> b ; int x, y ; exgcd(a, b, x, y) ; cout << (x % b + (LL)b) % b << endl ; return 0 ;
}
END